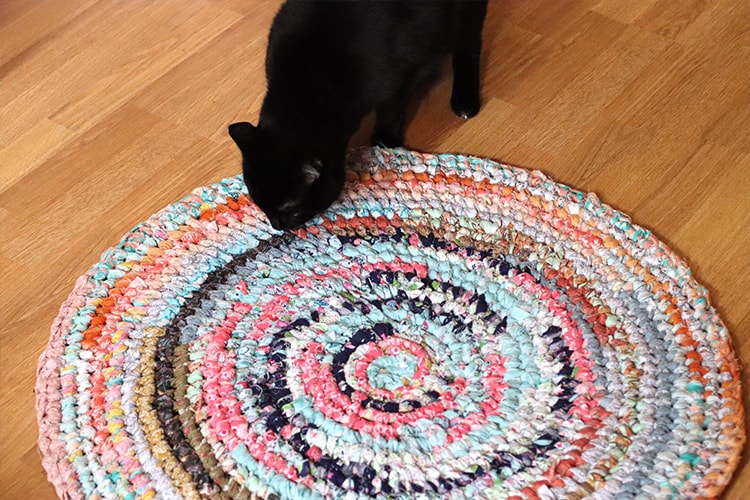
If you want to try out rag rug making as a hobby, Amish rag rugs, also known as toothbrush rugs, are an easy option that don’t require a lot of equipment. Because they’re not made on a loom, you can create one without having to worry about building or buying weaving equipment.
I made a small one to try it out, and I LOVE this craft! There are definitely some tips that I have to share to let you know what to expect, though.
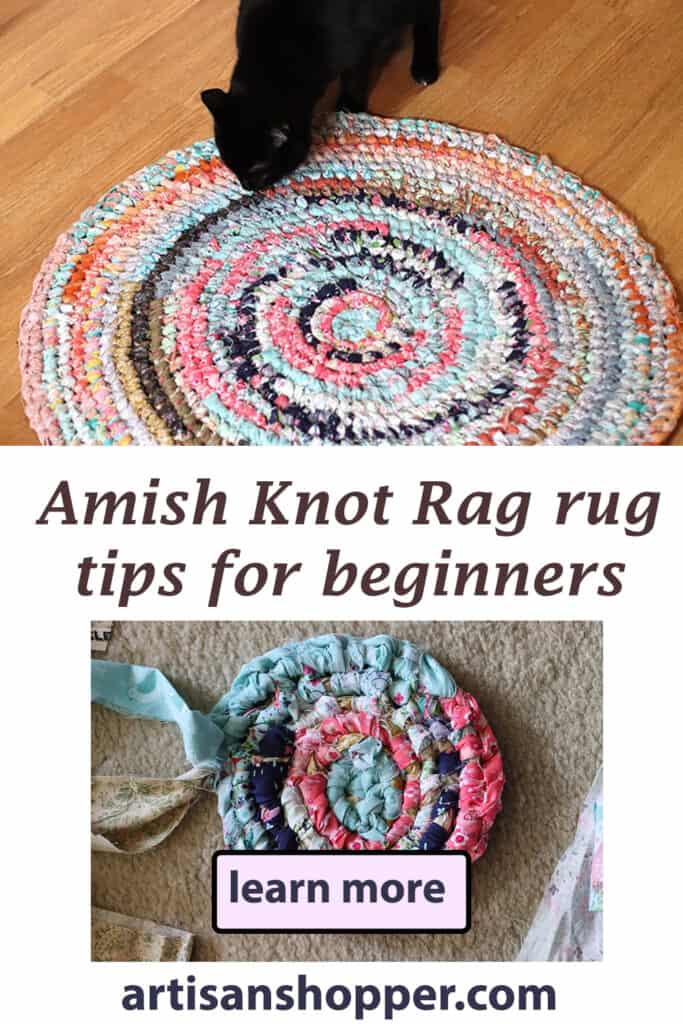
Table of Contents
- What is an Amish rag rug?
- What is a rag rug needle?
- How much fabric does it take to make an Amish knot rag rug?
- How to make the rag rug and what to watch out for.
- Can you make an Amish knot rag rug with old t-shirts?
- How to make a color pattern in the rag rug.
- How to clean a rag rug
Some of the links in this article are affiliate links that will pay a small commission if they’re used to purchase something. To see the entire affiliate policy click here.
What is an Amish rag rug?
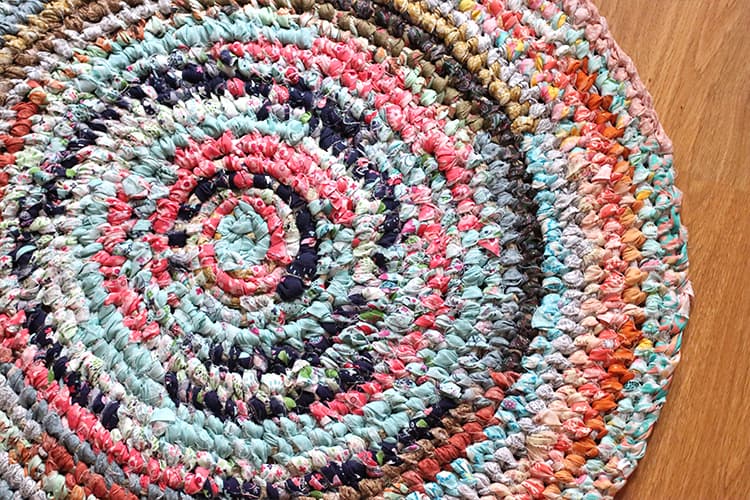
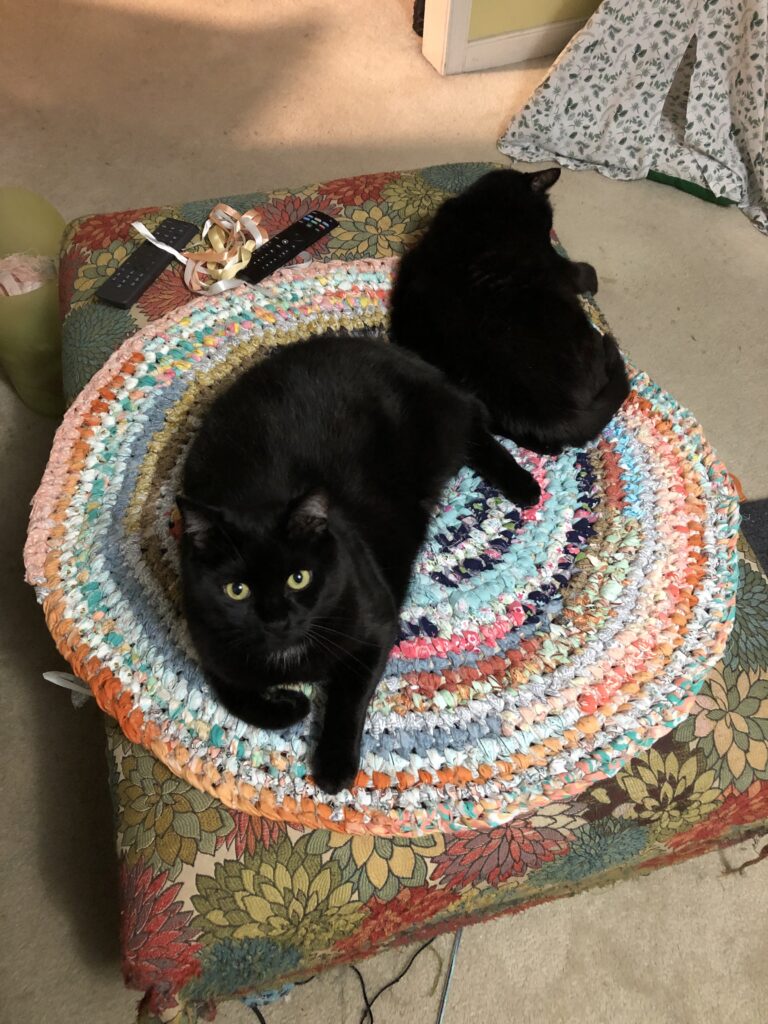
Amish rag rugs are knotted rugs made from strips of fabric that are connected together with a series of knotted stitches similar to a blanket stitch in sewing. Because you build the rug from the center out, a knotted rag rug can be any size that you choose, and they’re built without using a loom since they’re not woven.
They’re also known as toothbrush rugs because the needles that are used to make them were often made from old toothbrush handles that had an open slot on the end to insert the fabric through.
Amish rag rugs can be made using many different types of fabrics, including quilting cottons and old clothing.
There are other kinds of rag rugs, too, you can read about those here: How To Make Rag Rugs
To shop for quilting fabrics on Etsy, click here.
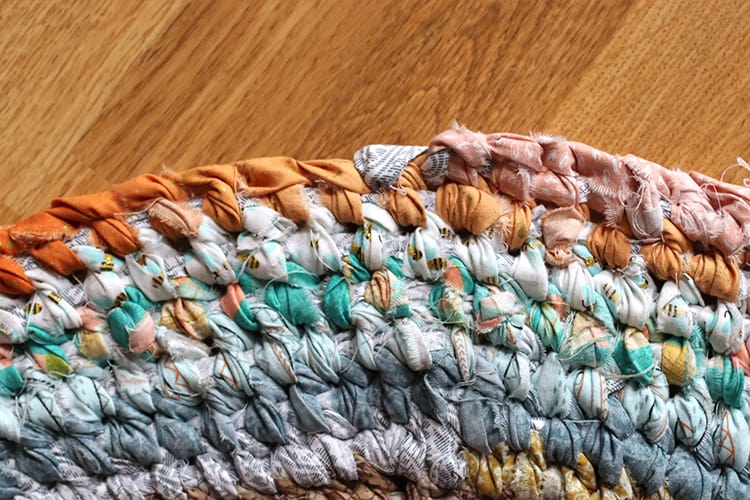
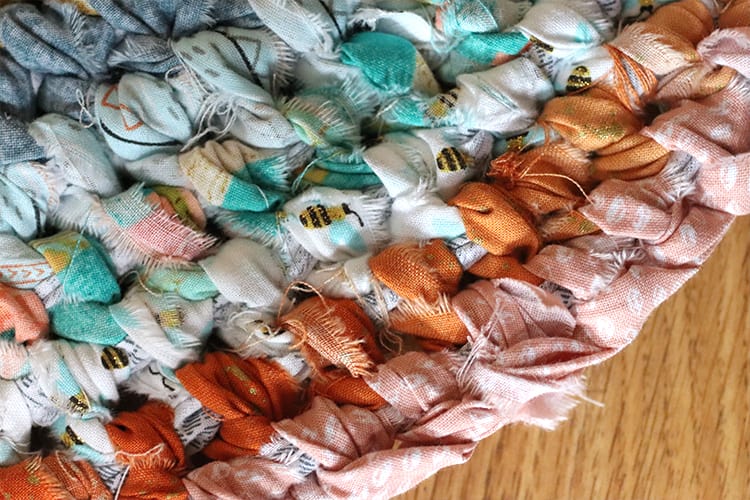
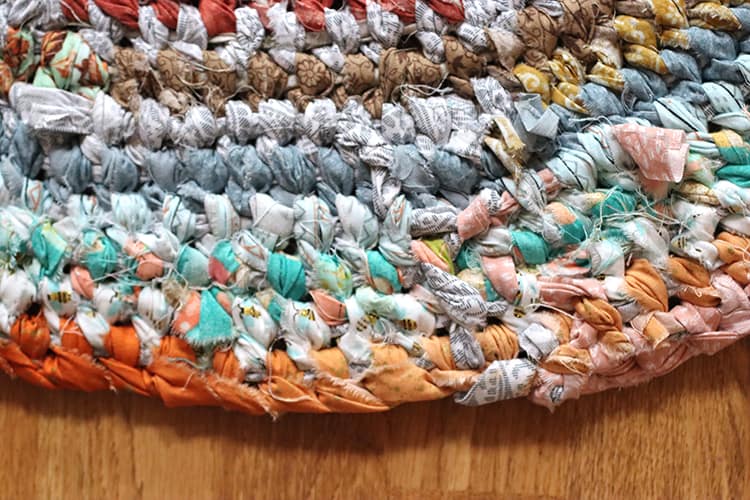
The fabric is cut into strips that can be anywhere from 1″ to 2.5″ wide, depending on the weight of the fabric, then the strips are connected to each other as you go around the edge of the rug.
Using a blanket stitch, you draw the fabric strips through the loops on the outer edge of the rug and around a carrying strip that will hold the knot in place in order to form the next row.
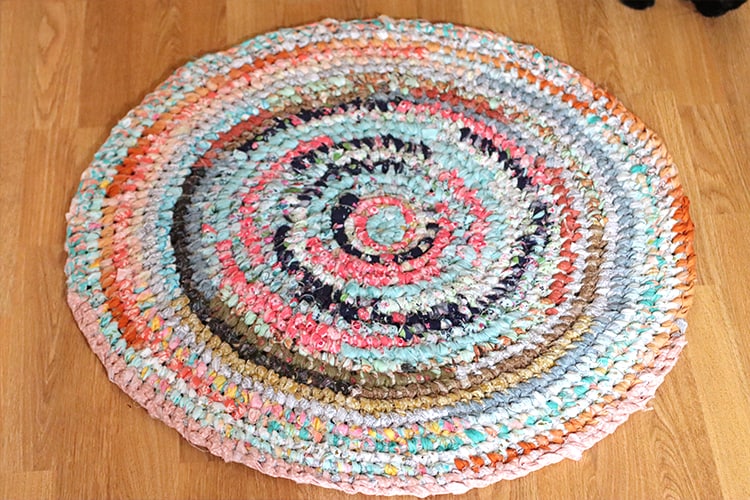
Another question I had was how long it takes to make an Amish knot rag rug. It took me about 15 hours to make a 30″ round rug on my first try. Part of that included working without a needle and part of it was with one.
It also takes a bit of time to figure out the right way to create knots that would make the rug lie flat as I went around the circle.
Once I got the hang of it, it went fairly quickly, and it definitely goes faster with a rag rug needle than it does when you just push the fabric strips through the loops with your fingers!

What is a rag rug needle?
Rag rug needles are usually large wooden or plastic needles that have a large eye that will allow the fabric strip to pass through. The needle isn’t sharp, and some are flat so that they can pass through the tight knots without opening them up. Any item that’s flat and has a wide enough opening to insert the fabric strip through can be used as a rag rug needle, so they can be made from things like dowels, popsicle sticks, and toothbrushes, which gives this type of rug the nickname of “toothbrush rug.”
I started out using no needle and I just pulled the fabric strip through the loops with my fingers as I went along. I actually did get pretty fast at it, but it was definitely slower than it would have been with a needle.
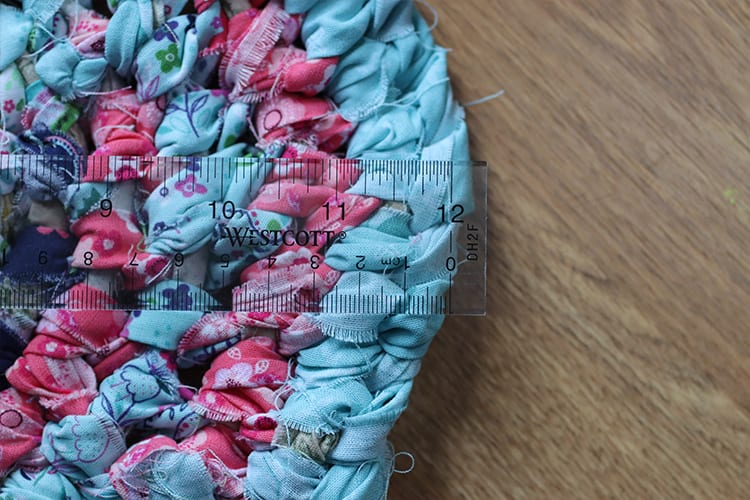
I had two jelly rolls of fabric that had been sitting around for a while so I was using those, and I did the entire first section with no needle.
That ended up being a circle that was about 17″ in diameter using both 20-strip jelly rolls.
When I got to that point I decided to make myself a needle out of cardboard, and that worked fine until it ripped.
I upgraded to a plastic needle made from an old cake board, and I used that for the rest of the rug.
I did look at the craft stores near me and was unable to find a rug needle, but there were some larger needles in the yarn section that might have worked in a pinch.
I decided to hold out, and will probably order a real one from someone on Etsy.
Click here to see rag rug tutorials on Etsy
How much fabric does it take to make an Amish knot rag rug?
This is the question that I had that I couldn’t find a good answer for, so I made a chart based on the first 2 jelly rolls that made the 17″ diameter circle. Keep in mind that these were 20-strip jelly rolls, and that the amount needed to make the rug will vary slightly depending on how tightly you pull the knots, and how thick the fabric that you use is.
For quilting cotton, this was the breakdown of how much fabric an Amish knot rag rug will take:
| Rug diameter | Area in sq inches | 20-strip jelly rolls needed | Estimated fabric yardage (rounded up) |
| 17″ | 226 | 2 | 3 |
| 36″ | 1017 | 9 | 12 |
| 48″ | 1808 | 16 | 21 |
| 60″ | 2826 | 25 | 33 |
| 72″ | 4069 | 36 | 47 |
So that’s a lot of fabric. I’m basing this entirely on the two jelly rolls that I used to make the first 17″ diameter circle, and those were 20-strip jelly rolls made from the quilt-weight cotton.
They have about 1.3 yds of fabric in them, but if you use a jelly roll that has 40 strips in it you’ll only need half as many, obviously.
If you use heavier or lighter fabric you may need to use more or less, and I did round up for the total to take the carrying strip into account.
Most people report on how many bed sheets you’ll need, or how many t-shirts you’ll need, because a lot of people will use those to make knotted rag rugs.
To see the full Artisan Shopping Directory sections, including signups for discounts, click here.
It’s a lot more difficult to estimate yardage from sources like clothing, so this chart is intended to give you a rough idea of what you’re looking at in terms of the amount of material you’ll need.
The idea for making a rag rug was originally to repurpose old clothing or bedding so that you avoid wasting them.
This is a good craft to incorporate into a zero-waste lifestyle, and if you sew or make quilts, you can use fabric from your stash to make the rugs.
A lot of people will go get cheap clothing from thrift stores to make their rugs, so it doesn’t have to be super expensive unless you want to buy all of the fabric so that you can coordinate colors.
How to make the rag rug and what to watch out for.
The stitch that’s used to create the knots for an Amish rug is the blanket stitch, and it’s done around a strip of fabric that acts as an anchor for the knot to attach it to the rug. My best advice for this is to go on over to YouTube and watch some videos on it, because there are a bunch that will show you the process and how to start the rug.
I found that the hardest part was starting it because that’s the foundation of the shape. Once I got past that it was pretty easy other than figuring out the increases.
Here are my tips from one beginner to another:
- The videos make it look really easy, but the beginning of it is the hardest. Pay extra attention to the starting point to make sure you have an even strip of knots to work with.
- You don’t NEED a rag rug needle, but it’s a lot easier and faster if you have one. Seriously, get one. Click here to see them on Etsy: Rag Rug needles
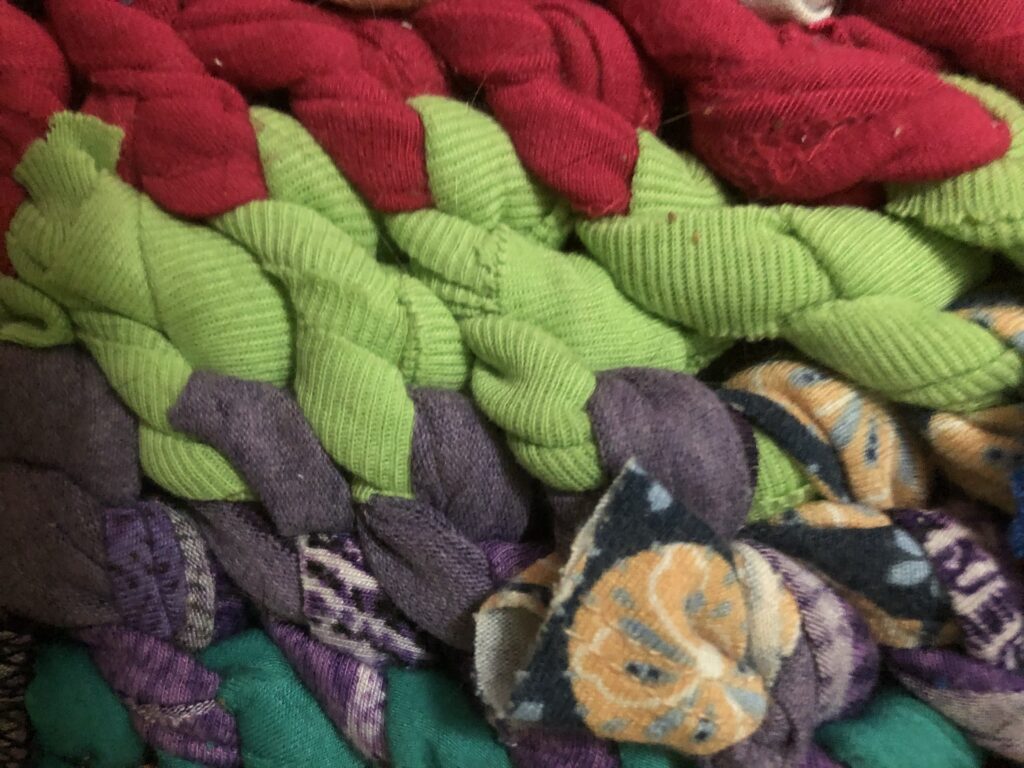
- The strips will get really stringy, which is something that I didn’t see in any demo videos that I looked at! Have a pair of scissors handy to trim off extra threads.
- It takes a lot of fabric! Have more than you think you need so that you don’t run out.
- Work on a flat surface so that it’s easier to see when you need to increase a stitch to keep the rug lying flat. If you don’t increase as you go around it will start to make a bowl shape. If you add too many it look wavy. Keeping it on a flat surface will help you decide whether you need to increase in a spot or not.
- When you increase, just do two stitches in the same loop. Do this if it looks like the rug is starting to pull in and make a bowl shape. The extra stitches will allow you to work toward the outer rows and keep the rug lying flat.
- If you’re using different colors, pay attention to where you put them so that you get a good variety in different areas of the rug.
- When you attach the strips to each other on the rug, remember to take the needle off of the strip first or you’ll have to pull the whole long strip through the eye of the needle!
- As you pull each knot tight, remember to fold the fabric as you pull it into the knot so that the right sides face out to give you the best view of the patterns on the knot itself.
- It’s okay if some knots and ends of the strips are showing, that just gives the rug more visual interest. Don’t worry about getting them all to the back side of the rug.
- If you have any fabrics that have little patterns or details on them that you like, try to position them so that you can see the detail in the rug’s knots. I had some that had bees and little foxes so I made sure to put them where you can find them if you look closely enough.
- The last knot will make a little dip in the contour of the rug, so put an extra stitch in to fill it in (not a knot, just a stitch.) I used grey but if I had done it in orange it wouldn’t be as noticeable.
- When you tie off the fabric strips at the end, weave them into the back of the rug. If you leave the strips on the longer side, you could always unweave them later and make the rug larger if you wanted to!
Once you’ve made your rug, you’ll need to take care of it, but it’s not hard to do that unless the rug is really large.
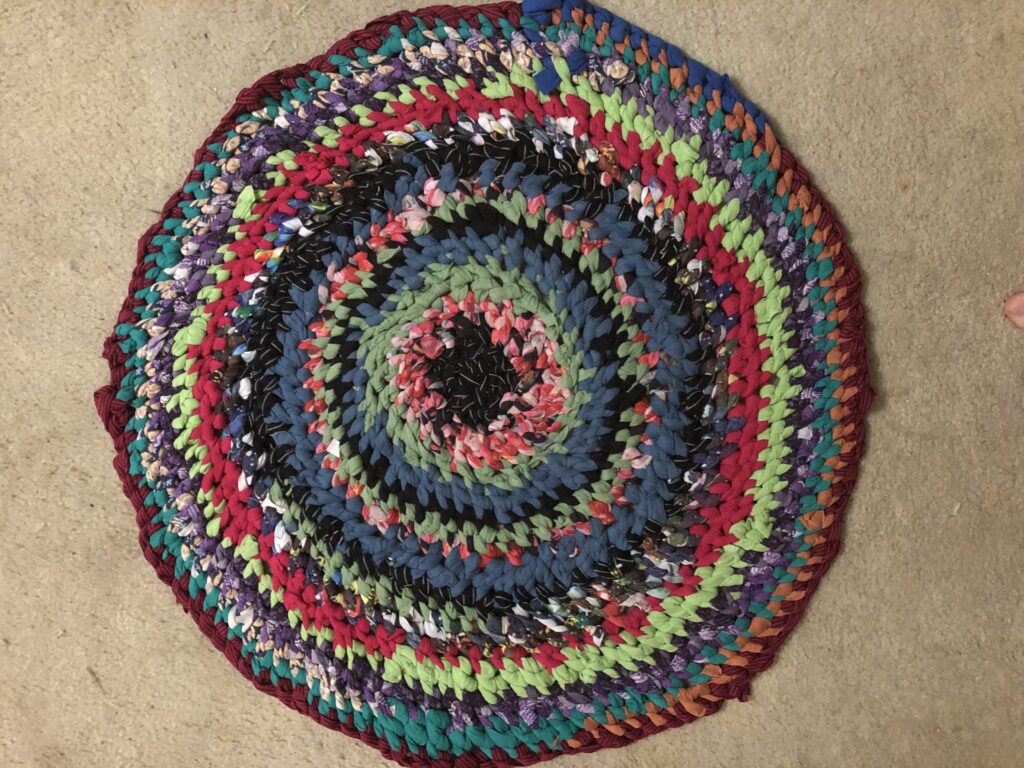
Can you make an Amish knot rag rug with old t-shirts?
The main difference with using old t-shirts and using 100% cotton fabrics is the stretch of the knit fabrics. T-shirts will stretch and create a different texture, but it also makes the rug stretchy when it’s finished.
You can either make the rug the normal way with the strip of fabric that supports the knotting as you stitch it, or leave the carrying strip out. The strip will give the rug more structure and it won’t be as stretchy when it’s done, so it’s a personal preference.
I decided to try this, and I made a couple of rag rugs that I think came out pretty well!
Instead of using the carrying strip that you would usually wrap the looped strip around, I left that out and just did the stitching part with no support strip.
It’s similar to crocheting the rug instead of doing the stitching method 100% correctly, but with the stretchier t-shirt fabric it worked fine.
To make the strips, I cut about 2″ wide strips from the shirts starting at the bottom hem and working my way up. I tried to cut as much of the shirt up as I could but some of it was hard to use because it was so short and piece-y when you got up to the neckline.
You could also use other old clothing, since I definitely did. There’s an entire pair of sweatpants in the rug in the photo above.
The other thing I’d say about using stretchy fabric is that it was a little more difficult to know when the knots were pulled tight enough, because the fabric would stretch and you could really feel when the knots were “done.”
So you’ll have to do some trial and error to figure out what tension to use, but once you get the hang of it, you might be surprised how this rug feels.
Since the fabric is stretchy, the rug feels kind of bouncy when you stand on it, so it’s great for standing on for long periods of time if you have to be on your feet.
I use the one that I made in my work area, and I really like it for standing on as I work.
This took about ten old t-shirts to make, but how many you’ll need will depend on how big the shirts are. I went to the thrift store and bought a bunch of XXL men’s shirts in solid colors to use when I ran out of my own castoffs!
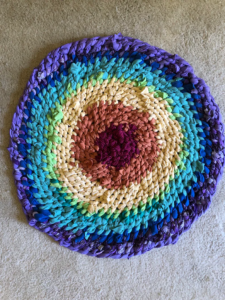
How to make a color pattern in the rag rug.
If you want to do a graduated color pattern, you’ll need to plan out the fabric that you have before you start to make sure that you add things in the right order.
For this rug, I used old t-shirts. and I cut them all up ahead of time, then arranged the strips in a rainbow pattern in the order that I wanted to add them to the rug.
Since the stripes were going to get smaller as they got bigger, I decided to end with purple since I had the most of that color.
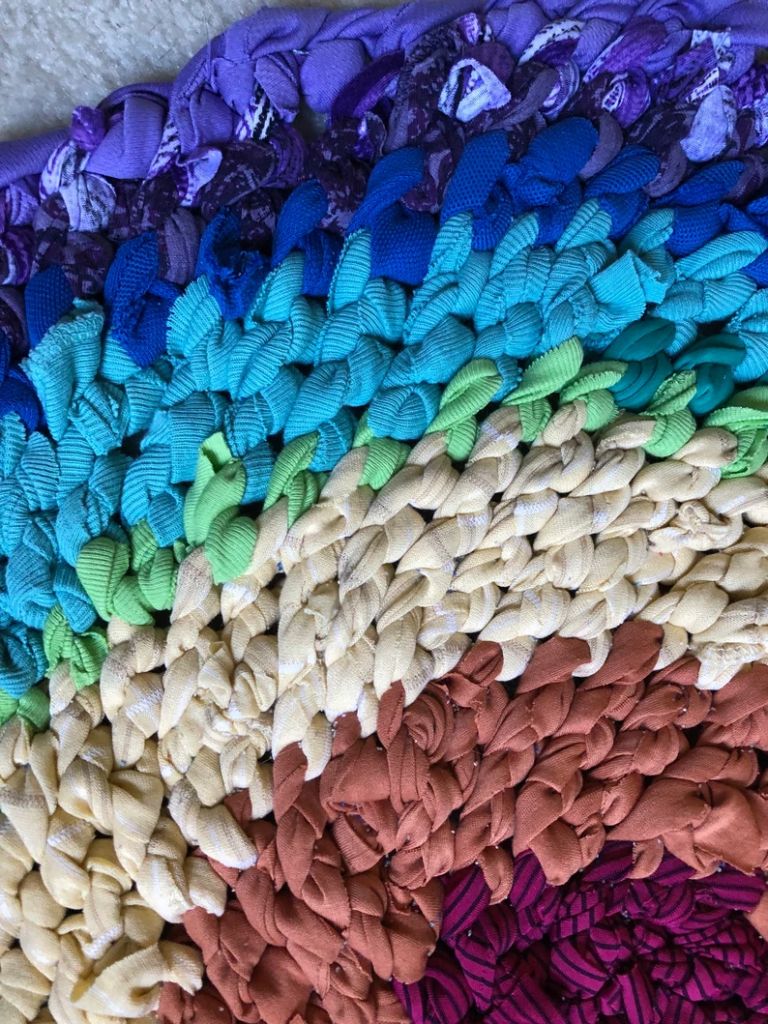
You can see that once I got to the edge, though, it wasn’t as thick a stripe as the yellow, even though I had more purple.
Plan accordingly, because if you’re making a really large rug, you’ll need a lot more of the colors that are going to be on the outside of the design.
How to clean a rag rug
To clean a knotted rag rug, vacuum it regularly and shake it out to remove more dirt when needed. If you need to put it in the washing machine you can do that using mild soap and cold water on the gentle cycle. Air dry outside if possible, or use a drying rack inside if necessary. You can also use a blow dryer to speed indoor drying a little, but try not to put them in the dryer if you can avoid it.
Rag rugs can be fairly thick and may take a long time to dry, so drying them outside is the best way to dry them quickly.
Because my rag rug was made entirely from cotton fabrics and is on the small side, I would be fine with throwing it into the washing machine. If you make one that has a variety of fabrics in it you should be a little more cautious, and try spot-cleaning it if you have a specific thing that needs to be washed out.
If your rag rug is very large, you might need to hang it up outside and give it a good old-fashioned carpet beating to get the dirt and dust out. Spot cleaning would also work at that point to remove any really noticeable areas that need to be cleaned up.
I really enjoyed making these Amish knot rag rugs, and I plan on doing more in the future. Now that I know what goes into it I might try weaving one using a loom, like I talked about here in part 1 of the how to make a rag rug articles.
I have plenty of extra fabric so it won’t be expensive to do it, and I might try out some different styles of rugs. I did lose track of time while I was doing this, so I would give this a “relaxing crafts” rating of 10 out of 10.
