Printmaking is a relaxing craft for adults, and gel plate printing makes it easy to make unique artwork at home.
I took a few printmaking classes in college and loved it, but I had never heard of gel plate printing, so I was intrigued when I started looking into it. So what is gel plate printing, and how does it work?
Gel plate printing is the process of creating monotypes by applying paint to a flexible gel plate and pressing a piece of paper onto the plate. The paint that is applied to the plate can be layered, and texture and patterns can be created by using stencils and other tools before applying the paper to the plate. When the print is pulled off of the plate, a unique print will be created.
Gel plate printing is a simple way to create prints without needing a lot of special equipment, and it can be a fun and relaxing hobby for adults or children.
Table of Contents
- Gel plate prints: Monoprint or monotype?
- What are gel printing plates made of?
- How do you make your own gel plate?
- How do you print with gel plates?
- How do you clean and store a gel plate?
- Can you use both sides of a gel plate?
Gel plate prints: Monoprint or monotype?
Monoprints are types of prints that are made using a plate that has the image on it. Each print will be different due to variations in the inks and the way that the images differ each time a print is pulled off of the plate. In contrast, a monotype can only be made once because the image is removed from the plate when the print is pulled off.
Both processes involve pressing a piece of paper or another surface onto the printing plate to pull the image off of the plate, but in a monoprint the image can be created again with different colors or details.
In a monotype the image is gone after the print is pulled off of the plate because the image isn’t contained on the plate itself.
In etching, lithography, and woodblock printing, the image is created on the plate itself, then the plate is inked and the image is pulled from the ink on the plate.
These are examples of monoprinting techniques because the image stays on the plate.
You can make multiple prints of the same plate, and even though the image will look the same, the colors of the inks and other details will be slightly different every time.
For gel plate printing, the image is created on a blank plate that’s made from a flexible synthetic material, or from actual gelatin, and when the paper is pressed onto the plate the image is transferred to the paper.
The image can’t be recreated because it’s destroyed after the print is pulled from the plate. Gel plate printing is monotype printing because of this.
You also don’t know exactly what the print will look like before you press the paper onto the plate, so it makes the printmaking process more unpredictable than usual.
Please note: Some of the links on this page are affiliate links, which will give me a small commission at no cost to you if you buy something when you use them.
What are gel printing plates made of?
Gel printing plates that are commercially available are made from flexible synthetic polymers, and mimic the textures of real gelatin. The most widely used brands are Gelli Arts and Gel Press brands. You can also make your own gelatin plate to create prints, and there are multiple recipes that you can find online to do that.
By making your own gelatin plates you’ll be able to decide how large to make them, and you won’t be limited to the sizes that you can buy commercially.
Commercial gel plates come in sizes up to 16″ x 20″, but most are smaller than that. If you make your own gel printing plate you could theoretically make a larger one to create larger prints, but realistically, it would be difficult to do that at a larger size.
Because the gel plates absorb pigments from non-water-based paints, most gel prints are made using acrylic or other water-based paint that won’t stain the plate, and they dry faster than oil-based paints.
The time that it would take to cover a very large gel plate would make it likely that you would have some areas of paint that dried out and didn’t print properly.
Most printmakers who make gel plate prints make smaller pieces that can be used as components of larger collages, assemblage art, or journals. Gel plate printing produces unique paper patterns that can add an artisan look to any project.
How do you make your own gel plate?
To make a homemade gelatin plate for printing, you can create one using gelatin, glycerin, and water. Some recipes call for alcohol or sugar, but those ingredients can cause molding issues or make the surface of the plate too sticky. The following recipe seems to be the consensus for making a permanent gel plate that doesn’t need refrigeration.
Recipe for Homemade Gel Plate
Glycerin 1 1/2 cups or 12 fluid ounces
Gelatin 6 Tbsp (about 7 packets of Knox gelatin)
Water 1 1/2 cups or 12 fluid ounces
Method: Bloom the gelatin in half of the water. Add the rest of the water and the glycerin. Stir over heat until dissolved. Set in a 12″ x 7″ tray. (or square size 8″x 8″ for a thicker mat.)
If the homemade plate is damaged or gets dirty, you can cut it up and melt it in the microwave using short bursts on high.
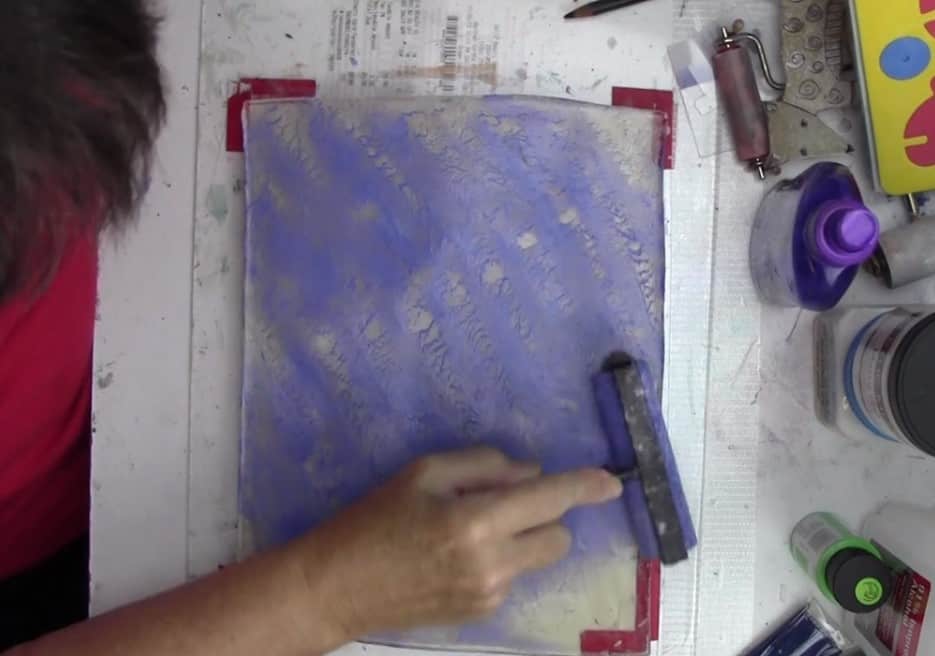
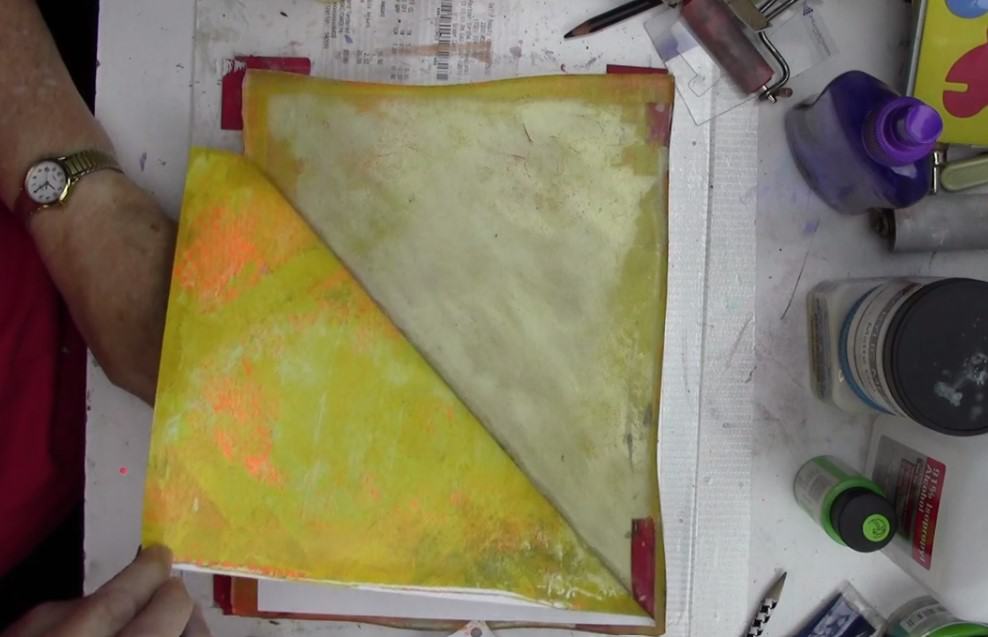
Strain the liquid and let it set up again. Artisan Shopping Directory member Caroyln of Cate Regan Designs taught a gel plate printing class and made her own plates, and the following photos show her using a homemade gel plate.
Carolyn adds that the recipes that have sugar in them tend to have a stickier surface, and that there’s really no reason for that.
However, she does hypothesize that the sticker surface might work better with certain types of paints.
.
How do you print with gel plates?
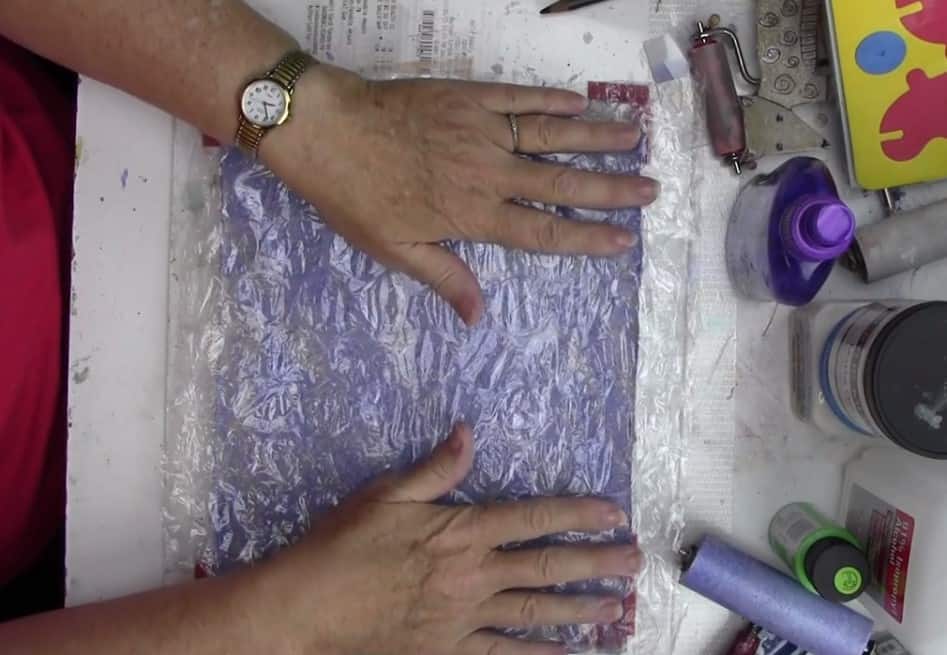
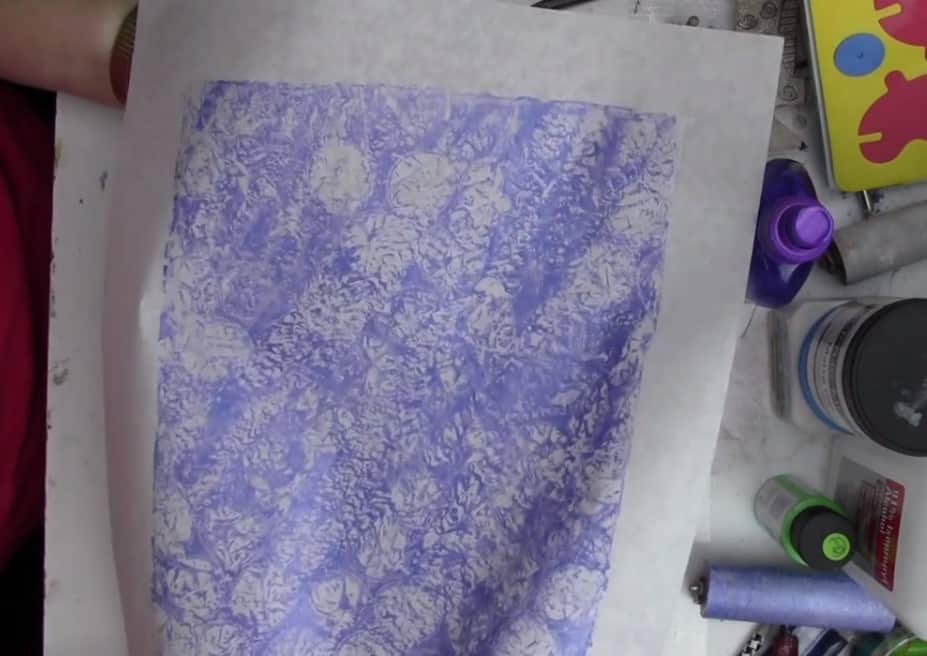
To make a gel plate print, apply acrylic paint to the plate and spread it with a brayer. You can put multiple colors on the plate or just use one. Texture and patterns can be added by pressing stencils, stamps, or silicone impression mats onto the gel plate surface to remove some of the paint. Press a piece of paper onto the surface of the prepared plate, then pull the paper off to reveal the finished print.
There are many items that can be used to create the textures on the plate before pressing the paper onto the plate, including household items like paper towels, sponges, textured fabrics, and combs.
Anything that is pressed onto the plate can remove the paint in those areas, and that will affect the color and texture of the final print.
You should however, be careful not to use sharp or pointed items on the plates because those can leave marks on the plates.
You can also paint onto the plate using a regular paintbrush, so it doesn’t have to be done with a brayer.
Hand painting patterns on might result in prints that have thicker lines than anticipated if the paint is thicker in some places than in others, but that could be an interesting part of the design.
The fun part of printmaking is not knowing 100% what the pulled print will look like once it’s finished, and imperfections just add to the uniqueness of the prints.
Teresa of Snappy Sisters on Etsy made this video showing the basics of printing with a gel plate.
She says “Start with the basics and then you can add things like stencils, stamps, alcohol inks, oil-based paints, fabric paints, etc. when you’re ready to take your creativity up a notch.
I recommend starting with the 5 x 7” plate. You can use any brand of acrylic paint – I like Liquitex Basics. Next you’ll need a brayer. My favorite brayer size is 3.8”.
“The last thing you’ll need is some paper to print on. I recommend starting with basic printer paper – I went through a lot of paper in the beginning because it’s so fun and relaxing.
If you use the 5×7 plate, you can cut your 8.5 x 11 printer paper in half so that you get 2 prints for each sheet, but I would just start with doing a few using the full size paper until you’ve done a few prints and get used to using the gel plate.
“Put a small strip of paint from 2-3 colors on the plate, use your brayer to roll them out and cover the plate (you can add more paint if you didn’t start with enough), put your paper down over the plate and gently rub the paper – make sure you run your hand over the entire plate so that you hit all the corners and the middle to make sure the paper is pressed down firmly on the paint.
“After that you’ll grab the edges of one side (long or short, it doesn’t matter) and pull your print up. Voila! You have a piece of art made by you even if you can’t even draw a stick person or your dog drawings look like dinosaurs!
“Make sure you lay or hang your print somewhere it can dry. Acrylic paint generally dries fairly quickly, but trust me, you don’t want your cat to walk across it when it’s fresh off the plate (that’s a story for another time).
“If you have some paint left on the plate, just leave it there and add your colors for your next pull (this is what you call a print because you’re “pulling” the paint from the plate). You’ll find that you make some cool and interesting prints when you have leftover paint that you add more colors to.
“You can also pull more than once without adding more paint. Try doing a second pull, even if you don’t see much paint left. You’ll probably pull something unexpected that second time. And if it’s really light, just save the print. After it dries you can do a second layer on it. As a matter of fact, you should not throw away any prints because you can always do another layer on things you didn’t like and you could end up with something really great!
“I use my prints as backgrounds in designs for paper products I sell in my Etsy shop. For example, I’ve made stickers, journal covers, and planner pages using my gel plate prints. They can also be used for junk journals, cards, collages, wall art and just about anything else that you want to put your own design on.”
How do you clean and store a gel plate?
Commercial gel plates can be cleaned with soap and water, or by wiping the paint off with baby wipes or a soft cloth. Homemade gel plates can be cleaned using water, or by rolling the brayer over a piece of clean paper on the plate in order to remove any leftover paint. Gel hand sanitizers can also be used to remove paint residue. If the plates are stained that probably won’t affect the printing process, but using the manufacturer’s instructions for cleaning oil paint off of the plates can remove stains.
It’s important to use gentle cleaning methods on a gel plate because if the surface is scratched or cut it can affect the prints that are pulled using the plate.
Any marks that are on the plate will be transferred to the final print and ruin the effect that you’re trying to achieve.
To store your gel plate, most manufacturers recommend keeping them in the packaging that they came in.
Most also recommend placing a sheet of clean paper on either side of the plate in order to keep the surface free of dirt and debris. When properly cleaned and stored, gel plates can last for years.
If the plate is homemade and is not a permanent plate, it should be refrigerated in order to prevent mold developing in or on the plate.
Permanent homemade plates, like the ones made with the recipe presented here, don’t need to be refrigerated. Recipes that include alcohol supposedly have a tendency to develop mold for some reason, so if you use alcohol in your gel plate recipe it would be best to refrigerate it to be on the safe side.
Many manufacturers recommend avoiding waxed paper or plastic wrap to cover your gel plate in storage. This makes sense because those types of wraps can wrinkle, and if they’re pressed against the plate it can affect how smooth the gel plate surface is.
Using plain paper or the acetate that comes with the plate is the best choice to avoid damaging the plate.
Can you use both sides of a gel plate?
Gel plates are identical on each side, so you can use both sides to print. You’ll obviously be printing using one side at a time, but if you damage one of the sides for some reason you may be able to get more use out of the plate by flipping it and using the other side. You should be careful to place the plate on a flat surface that won’t damage it when you’re making prints in order to prevent damage to the back of the plate.
Prints made from gel plate printing can be used for mixed media art, journaling, cardmaking, assemblage art, collages, and many other types of papercrafts.
The process of making the prints can be both relaxing and addicting, as you’re constantly trying to guess what the next print will look like. It’s a good craft for both adults and kids, so it’s something that you can do with your kids as a family craft activity, and on your own for relaxation.
