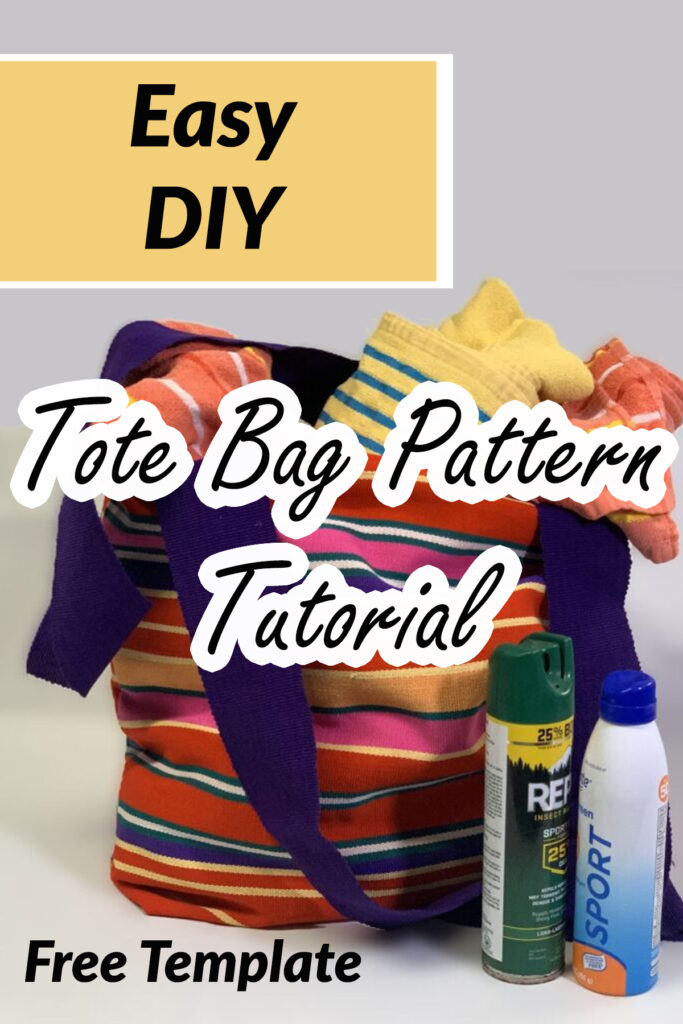
Next in our series of craft projects to DIY is this easy tote bag pattern.
It’s simple to make, using the free template and photo tutorial that Carrie, owner of More Love Mama, gave us to use. Links to her shop and the colorful Guatemalan fabric that she used are below.
Carrie wrote this tutorial, so thanks to her, and have fun making your own bag!
Some of the links in this article are affiliate links that will pay a small commission if they’re used to purchase something. To see the entire affiliate policy click here.
Tote bag tutorial
I’m Carrie, owner of More Love Mama, a fabric shop specializing in global textiles.
Right now, you might find yourself comfortably wrapped in a blanket with the fireplace keeping your toes warm. However, my thoughts are drifting towards the idea of feeling the warmth of the sand beneath my toes on a sunlit beach.
I’m thinking of Spring Break, which is just a few weeks away for many of us.
This is the time to start the preparations for that getaway, whether it will be to the beach, mountains, or any other vacation destination.

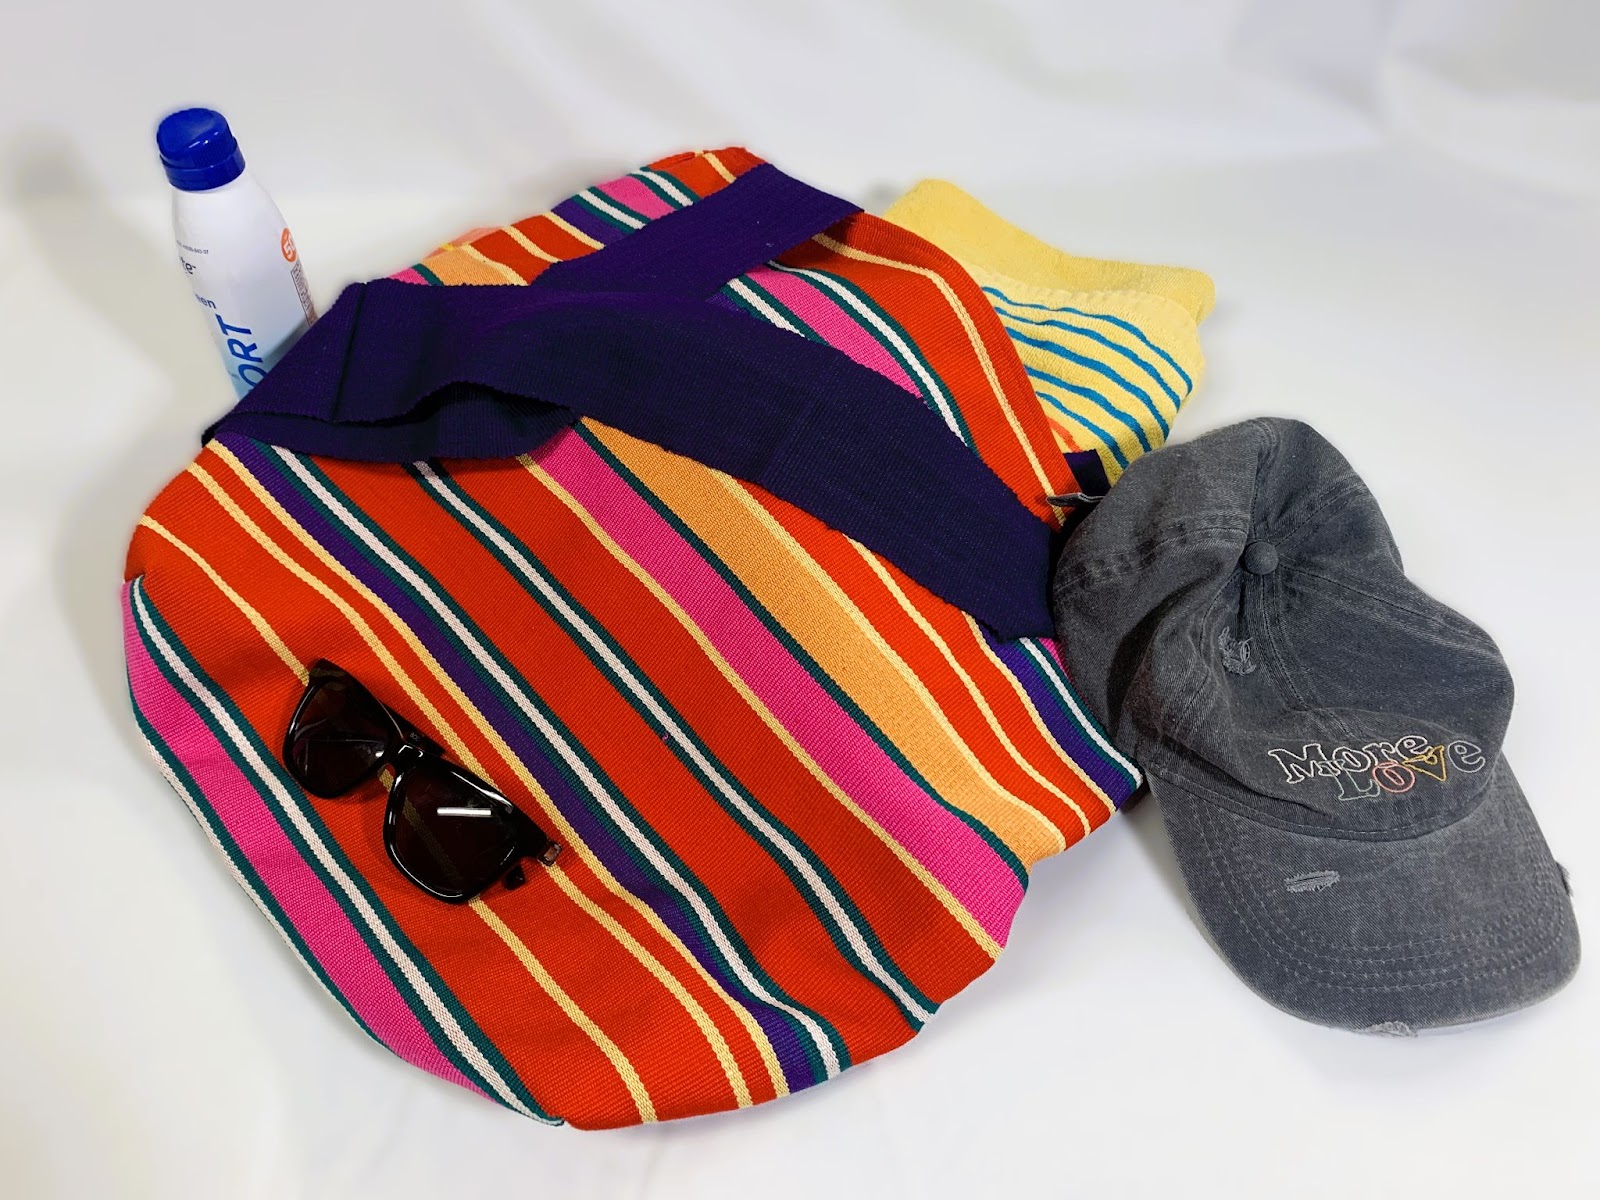
The first item on my Spring Break packing checklist is always the ideal tote bag. On my shop shelves, there’s a fabric that has been consistently whispering, “Bring me along on your vacation!”
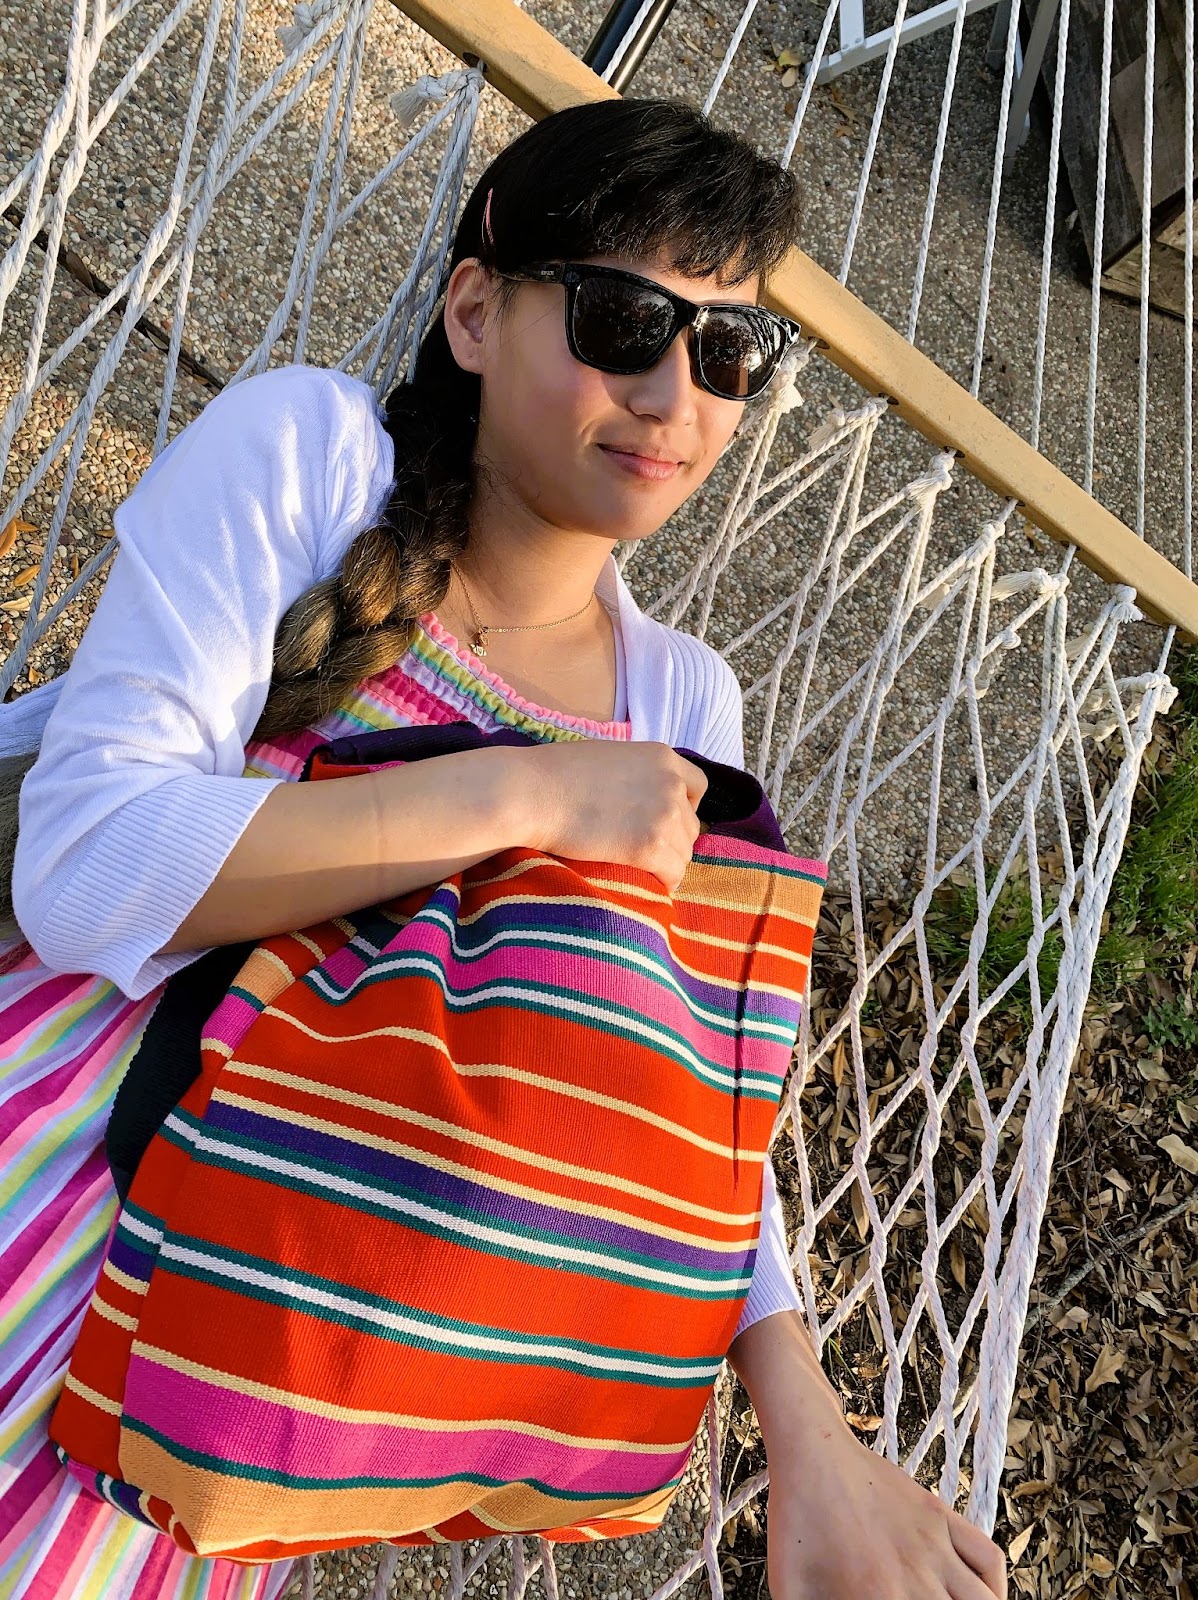
So today marks the day when I’ll craft a vibrant new bag specifically designed for a seaside vacation or a stay-at-home excursion to the farmers market. This bag is intended to accompany you from Spring to Summer and beyond.
Whether you’re taking your first plunge into sewing as a beginner or seeking a quick and satisfying project as a seasoned sewist, this is an excellent choice.
The versatility of this bag is remarkable. You have the option to add pockets or keep it simple, use a long shoulder strap or a shorter handle.
The beauty lies in your ability to pick any non-stretch fabric that suits your preferences, allowing you to coordinate it with your bathing suit, hiking boots, or even your mood.
You can find fabric that’s similar to the one that I used in my Etsy shop More Love Mama, or feel free to assemble it from your existing stash or repurpose materials lying around the house.
Materials needed to make the tote bag.
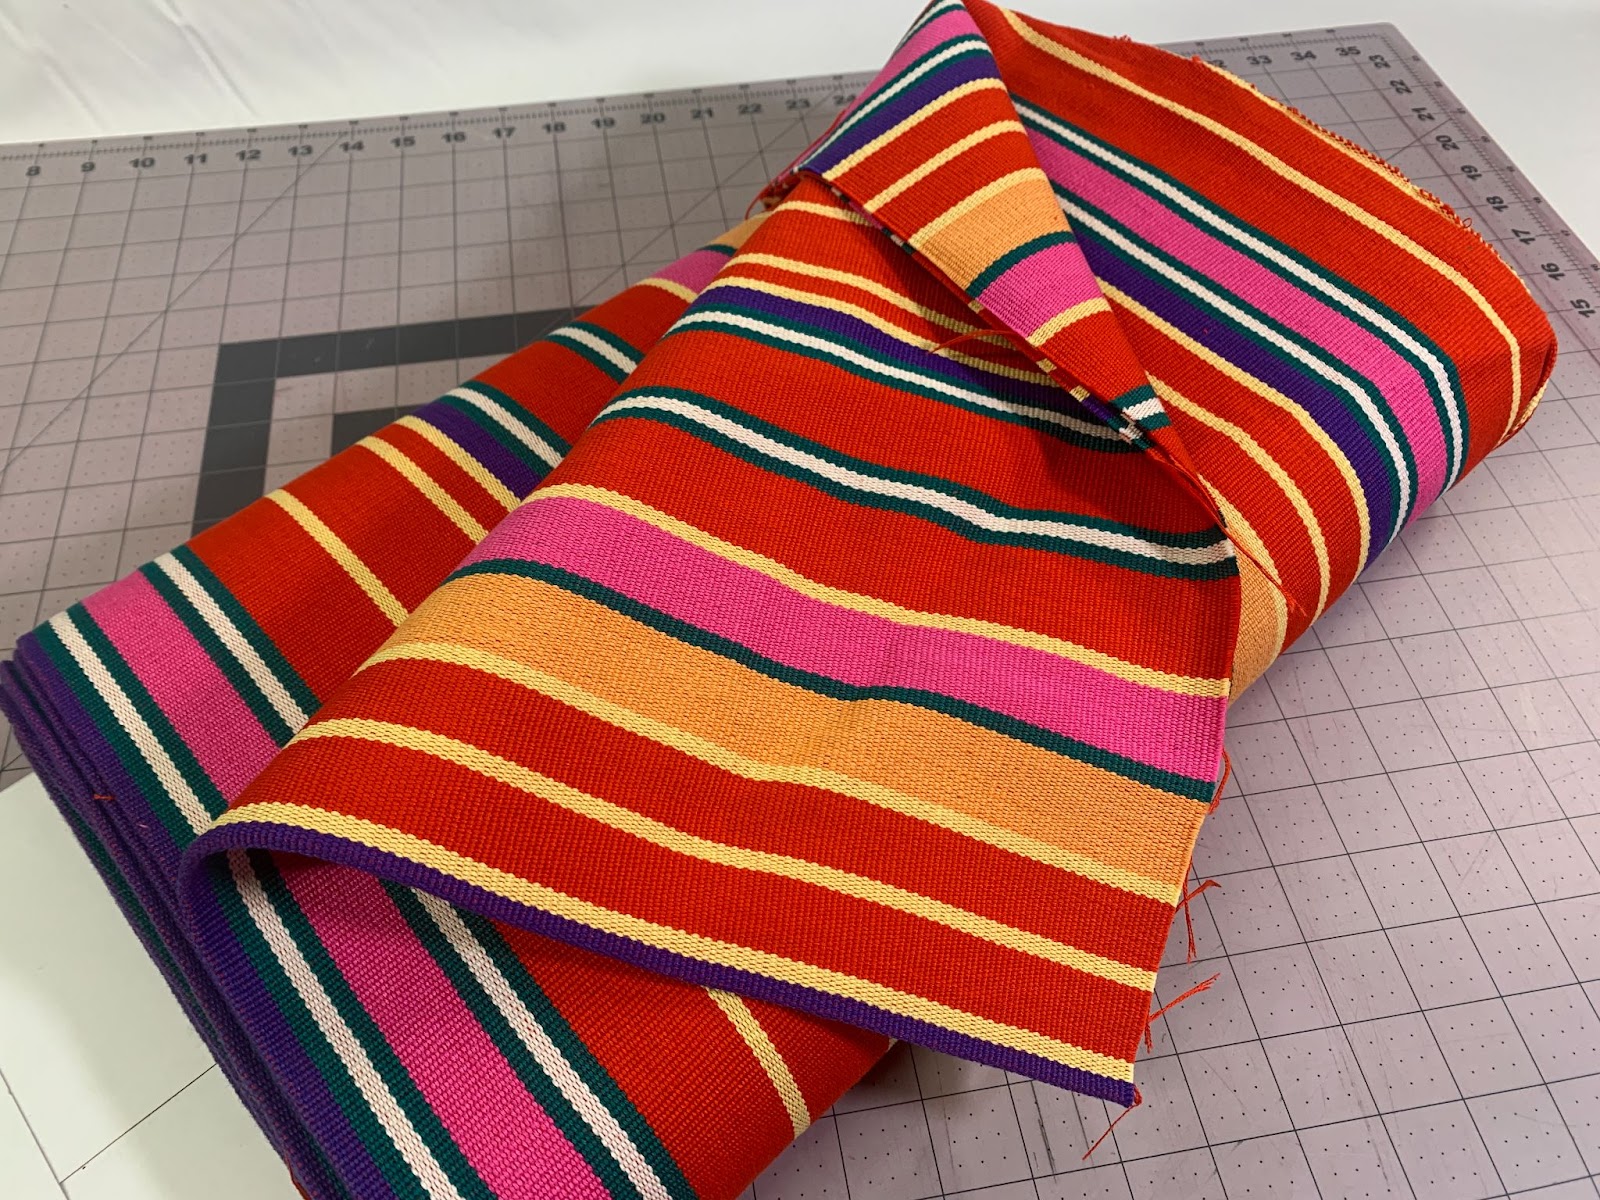
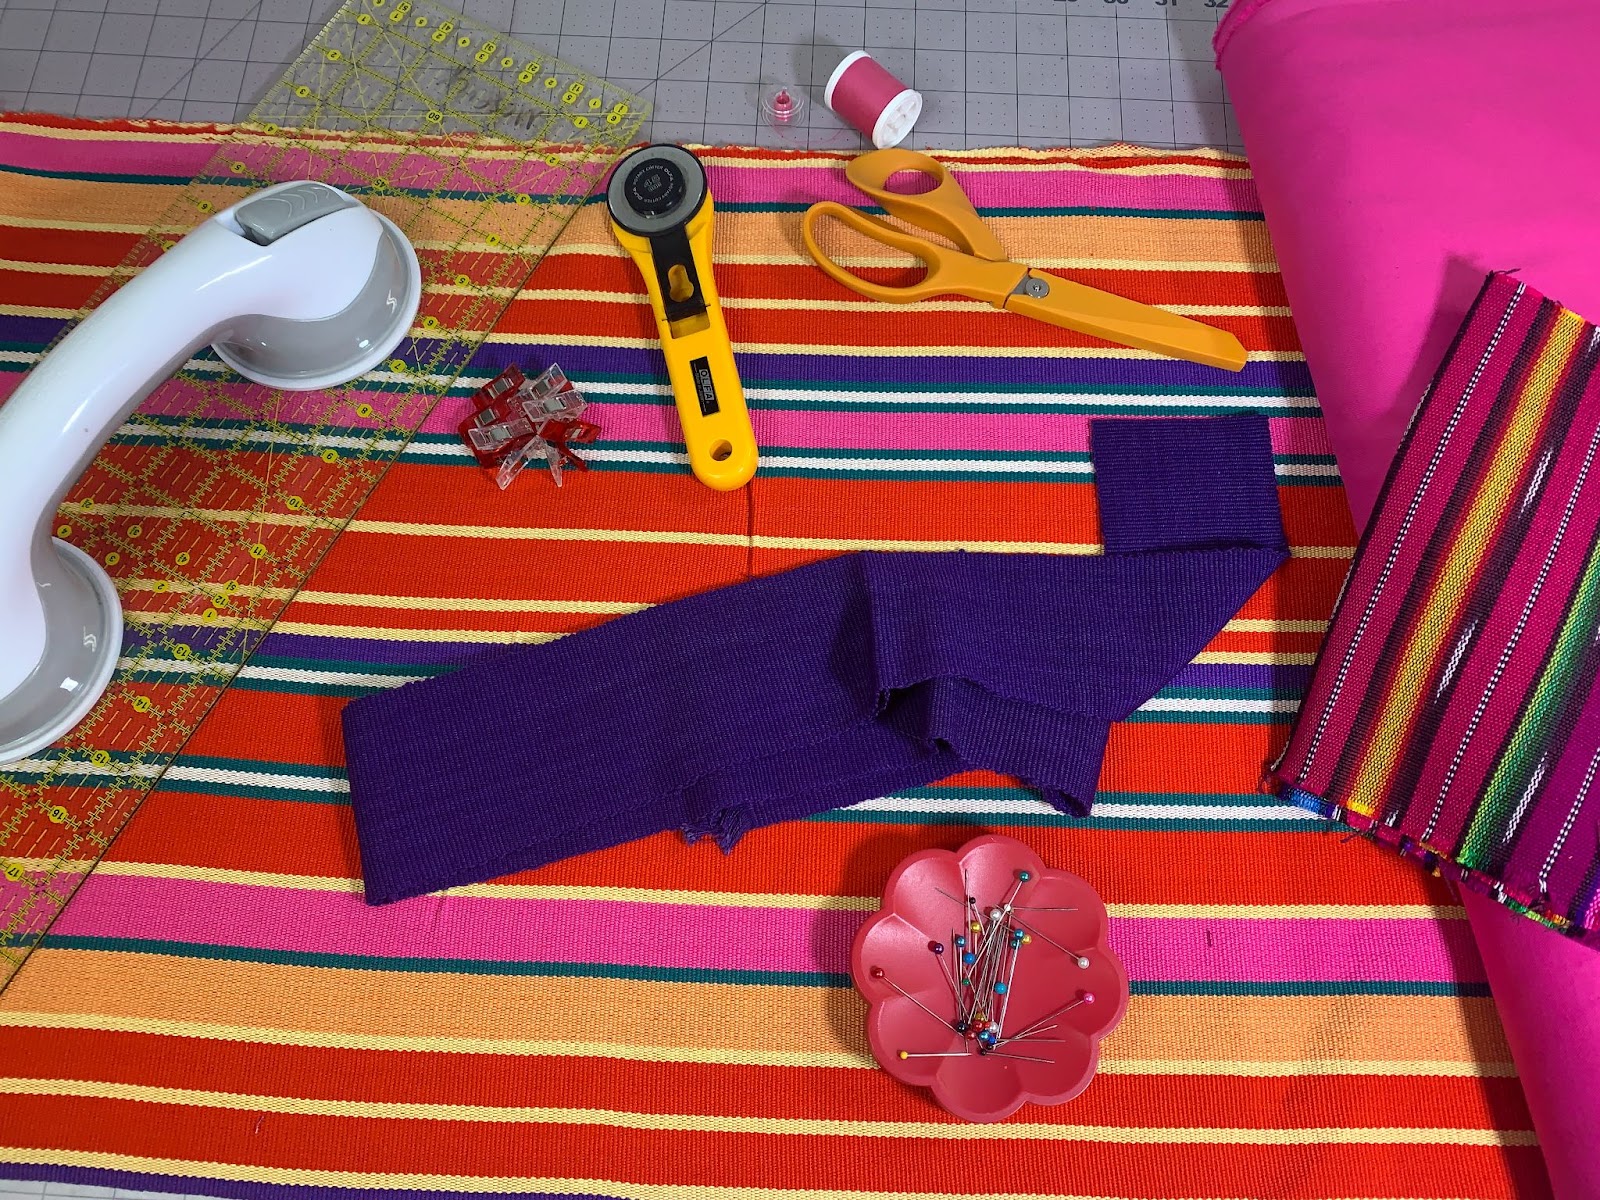
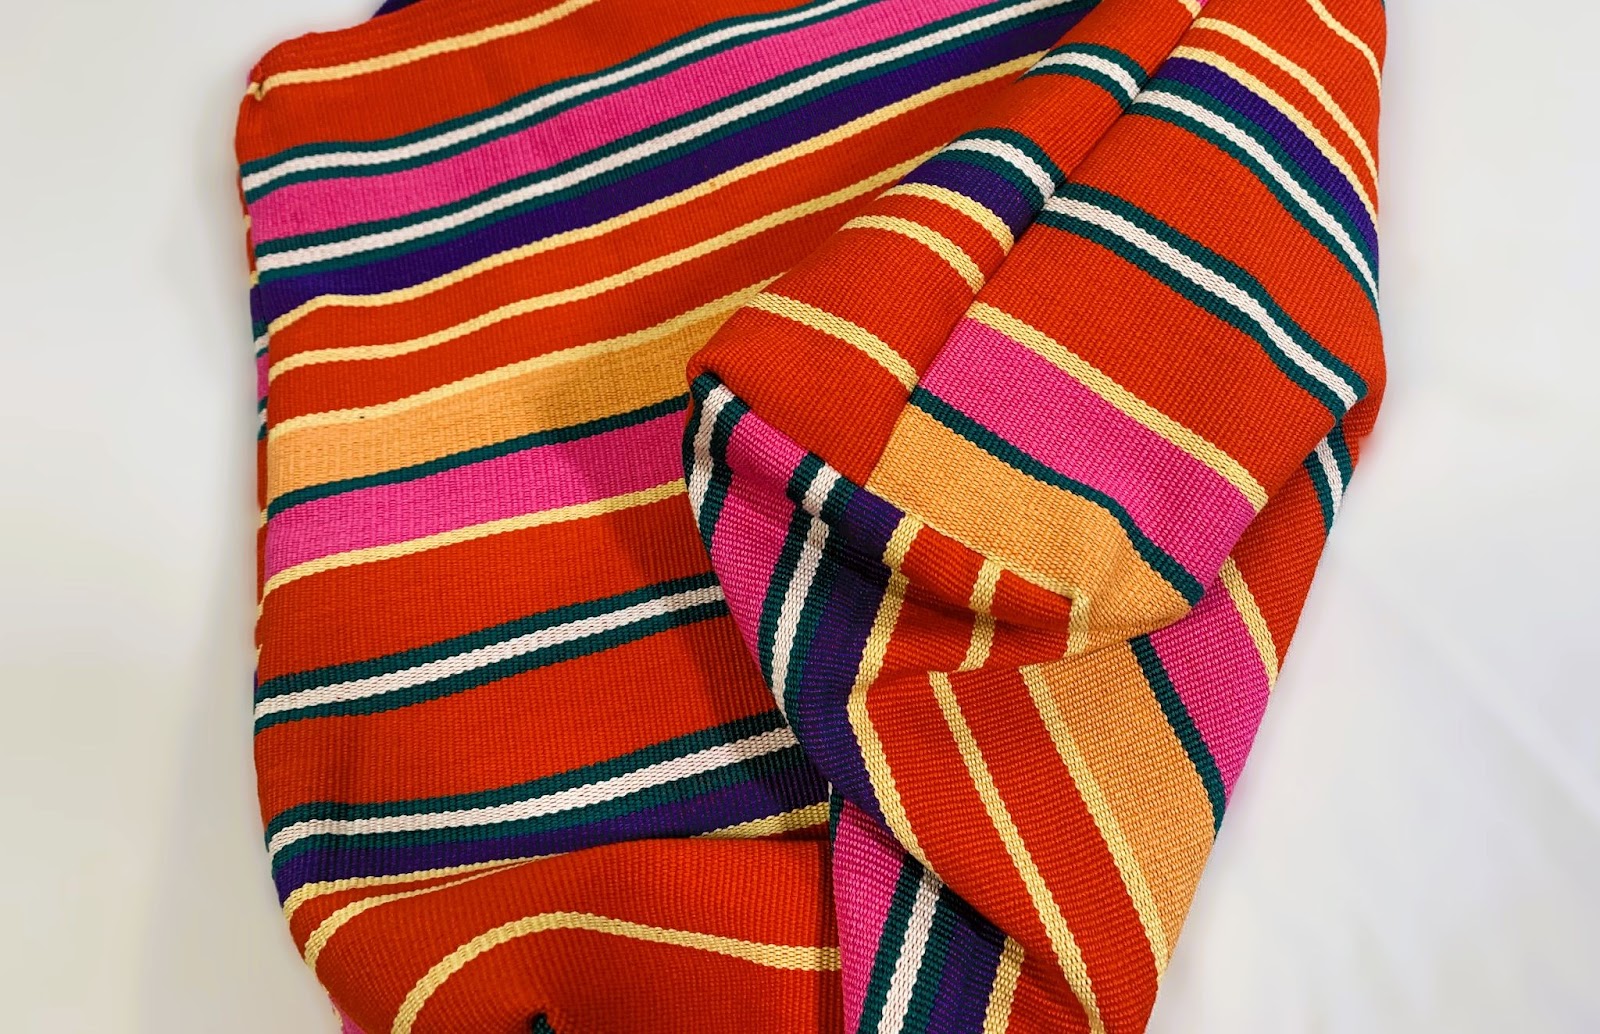
For today’s project, I’ve opted for a durable hand-woven Guatemalan fabric with a heavy weight. The fabric features a tight weave to keep sand from getting in and boasts vibrant, eye-catching stripes. Living in a fabric shop presents a lot of choices, but this particular fabric unmistakably exclaims “VACATION” to me! Below is a list of everything you’ll need for this bag project:
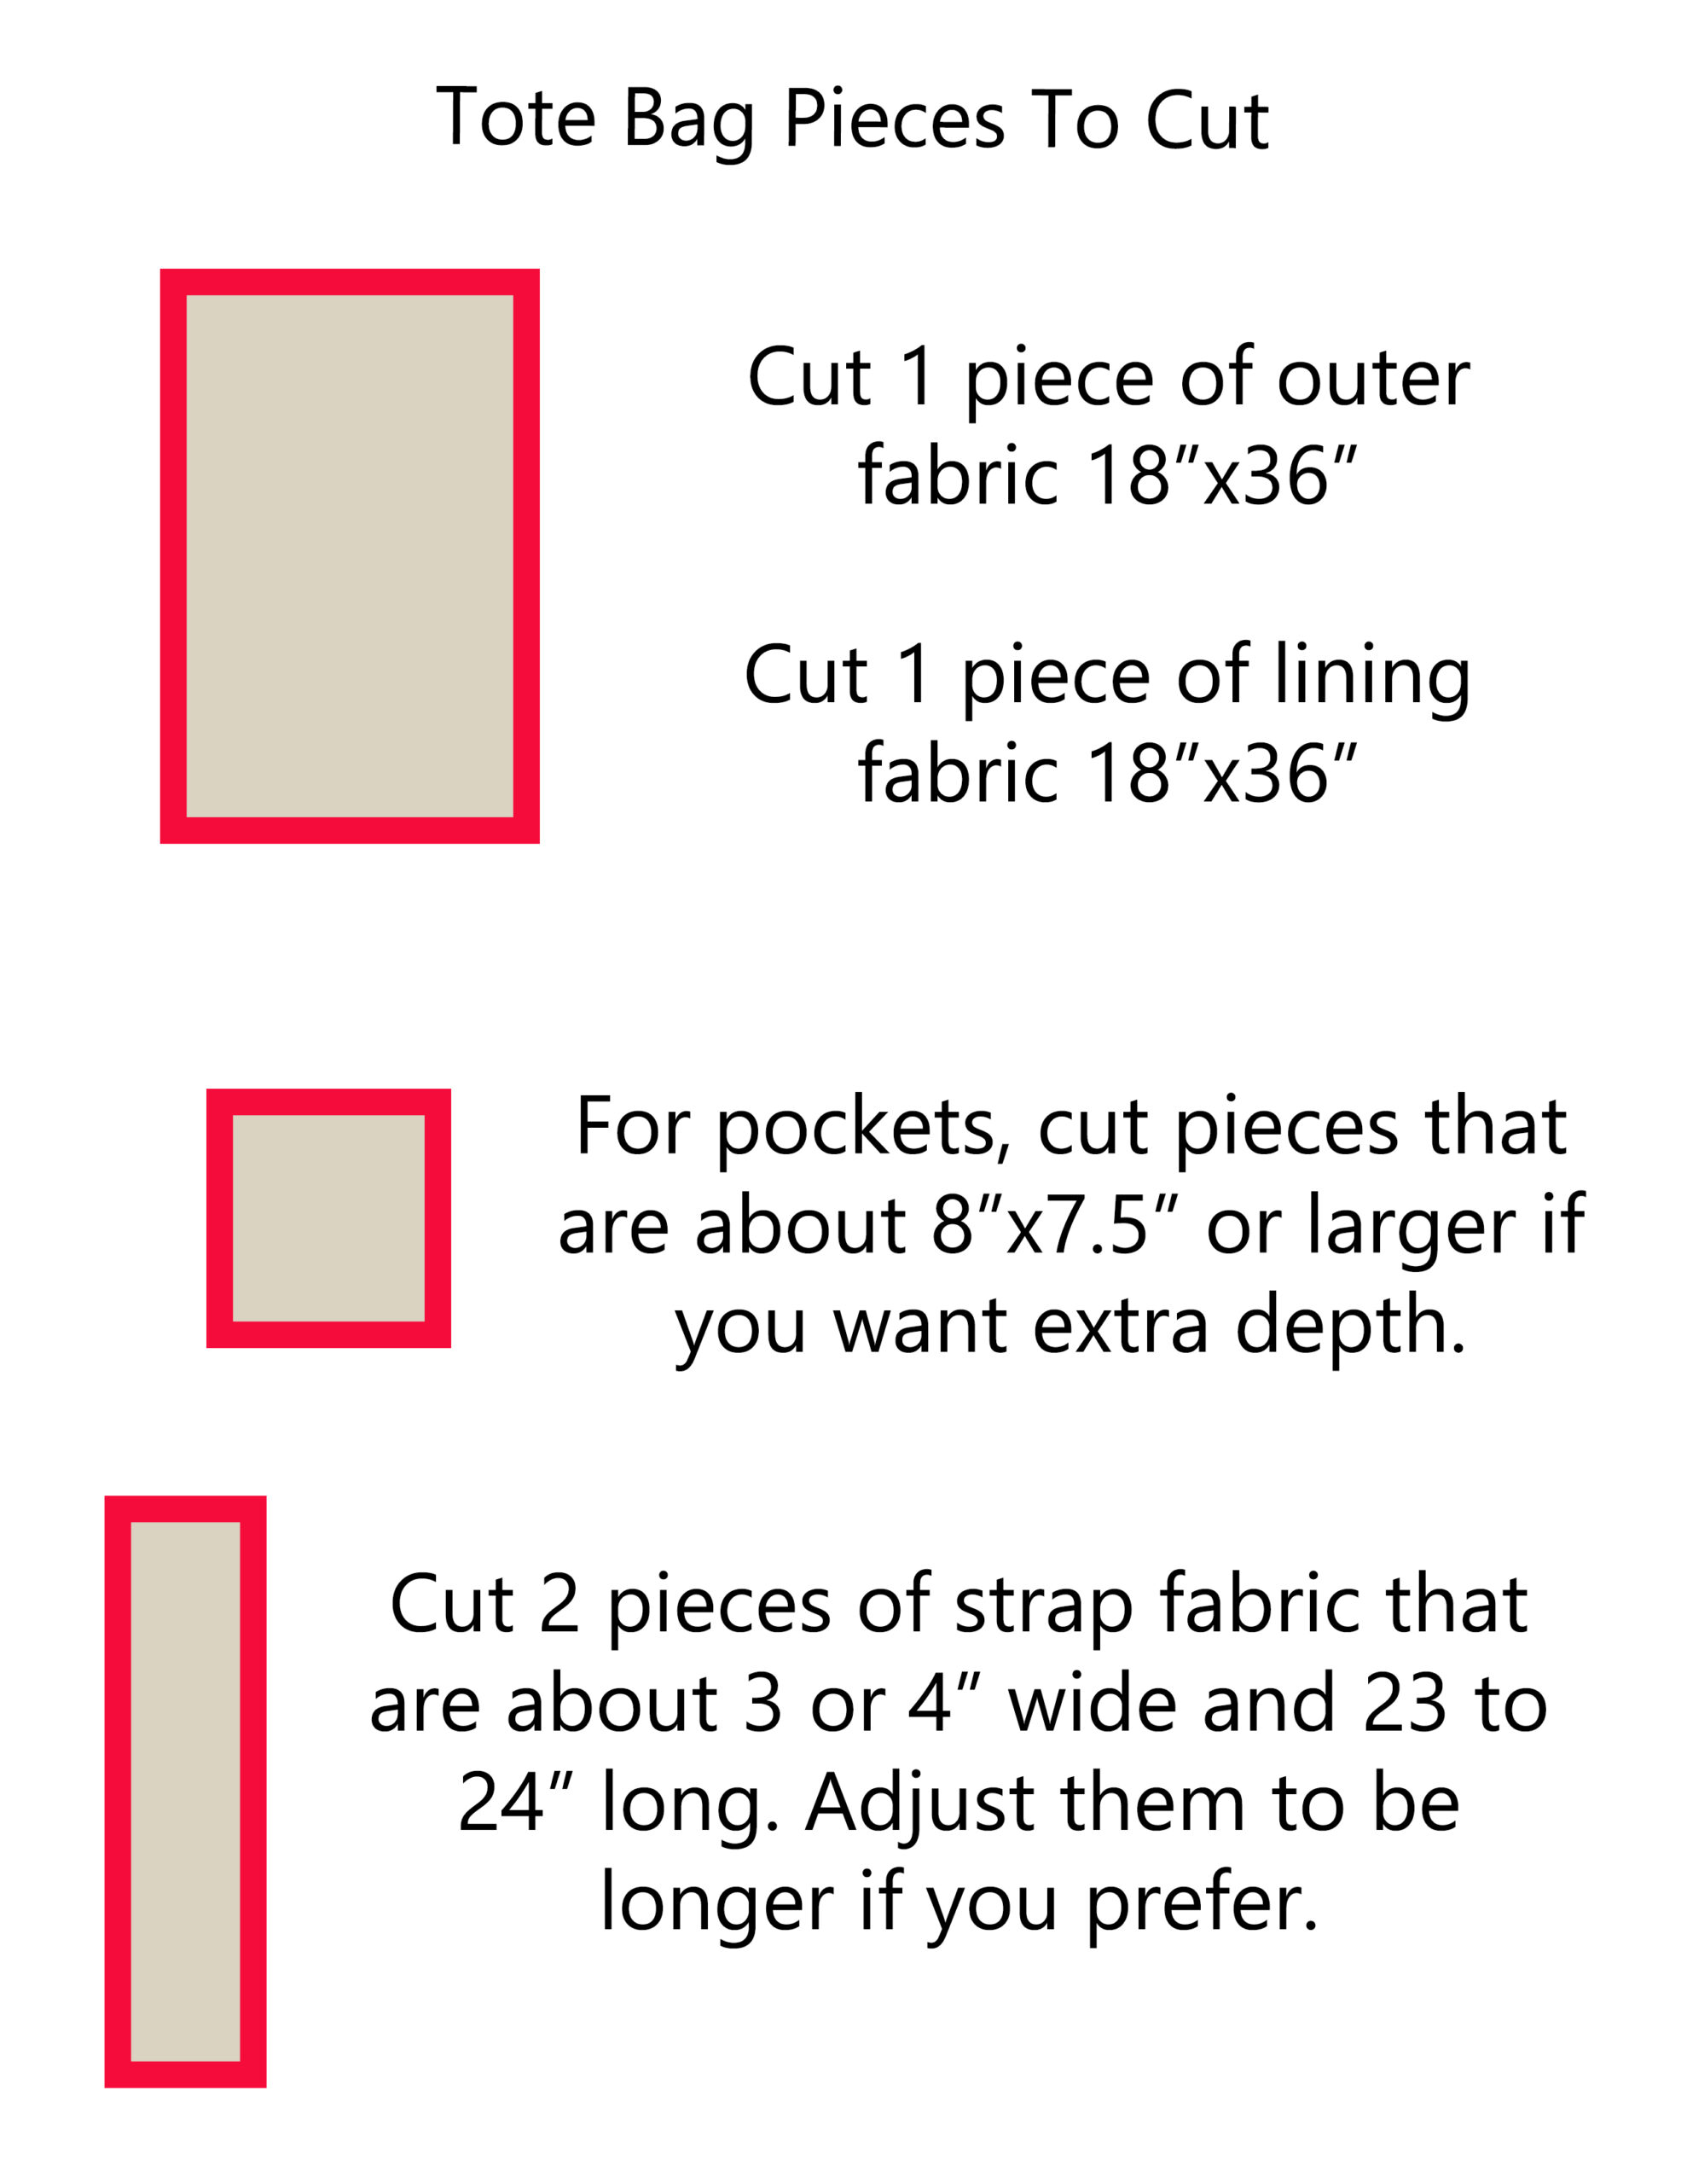
- ½ yard of outside bag fabric–Preferably cotton or cotton blend in a medium to heavy weight, like a canvas, denim, or hand-woven fabric.
- ½ yard of liner fabric–Also cotton, but it can be lighter weight than the outer fabric.
- Remnant fabric pieces for pockets–Any size for the pockets you prefer, or leave the pockets off, if you don’t want them.
- Material for the bag handle–This can be made from a variety of materials, including some of the same fabric as the outside of the bag, webbing, heavy ribbon, or Guatemalan belt fabric. It can be any length you prefer for your bag.
- Matching thread.
- Rotary cutter or scissors.
- Self-healing cutting board.
- Straight Edge ruler.
- Straight pins and sewing clips.
- Your favorite sewing machine and needles to handle the heavy-weight fabric.
Click here to download a template of fabric pieces to cut:
Cut the fabric.
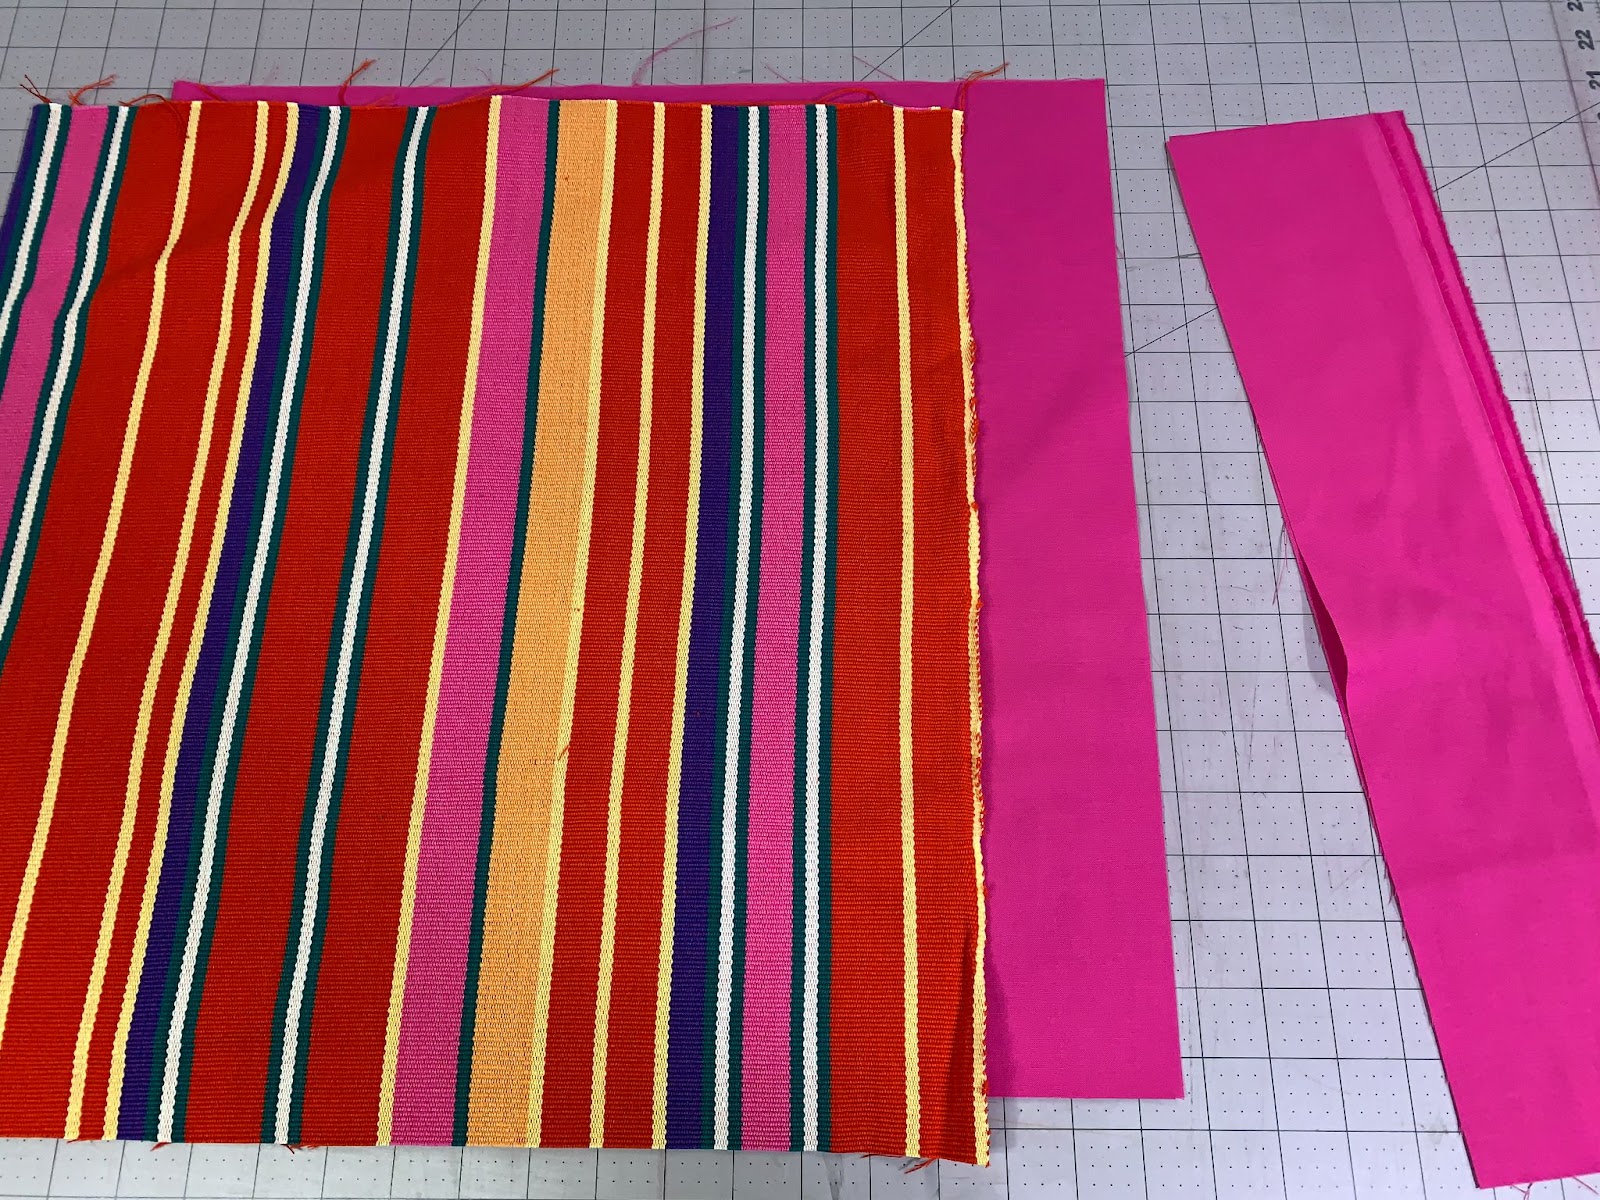
Begin with your chosen fabric. In my case, I’ve selected a fabric measuring 18 inches by 36 inches.
For the liner, I’ve opted for hot pink cotton, which is slightly wider (standard 44 inches off the bolt), and I’ve trimmed it to match the dimensions of the outer fabric.
Feel free to choose any color or fabric for the liner that suits your preferences. I personally prefer a lighter shade for easy visibility inside the bag, but you might prefer a darker color to conceal dirt.
Add pockets if you want to include those.
Moving on to the next phase, the next task involves adding pockets to the bag.
I’ve decided to create two distinct styles of pockets for this project. However, you have the flexibility to design any type of pocket, adjusting its size according to your requirements, or you can choose to leave them out entirely.
For the pockets, I’m utilizing a leftover piece of Guatemalan fabric that adds a vibrant touch of color to the bag’s interior.
Opting for a contrasting color compared to the liner fabric makes it more noticeable, which helps when you’re trying to find things like keys or sunglasses inside the bag.
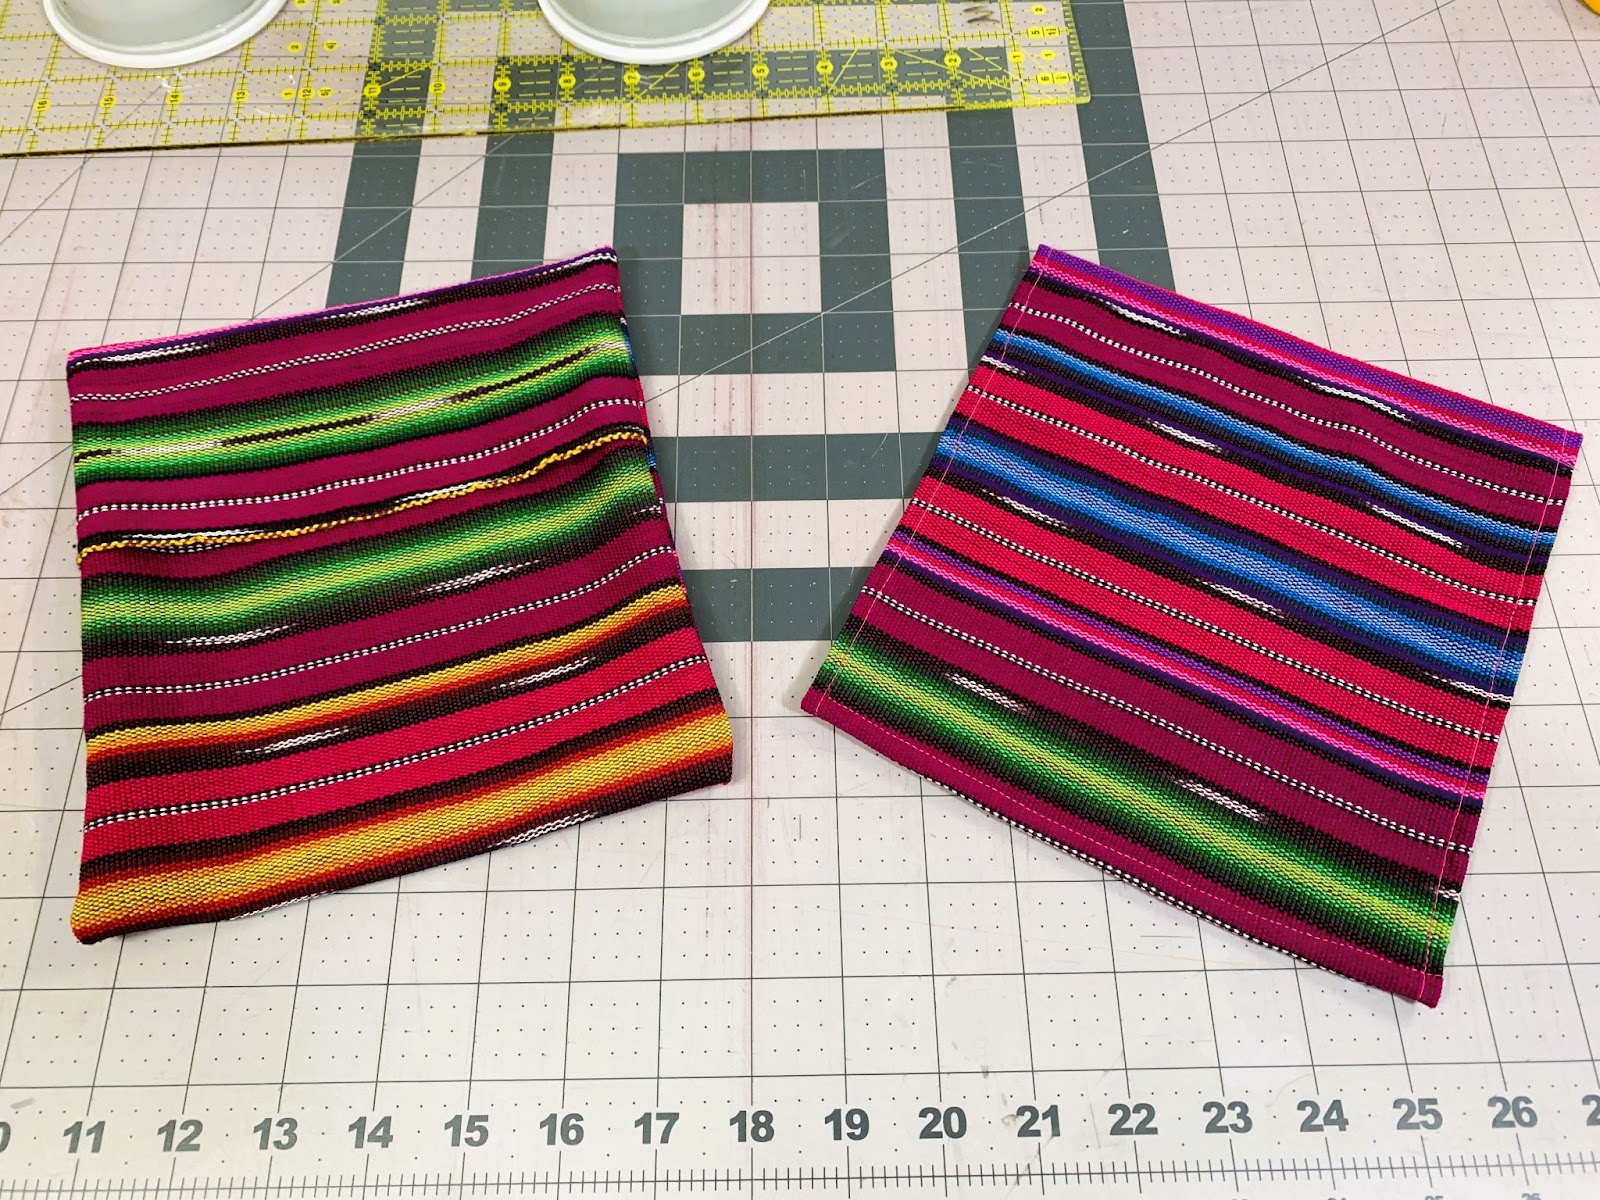
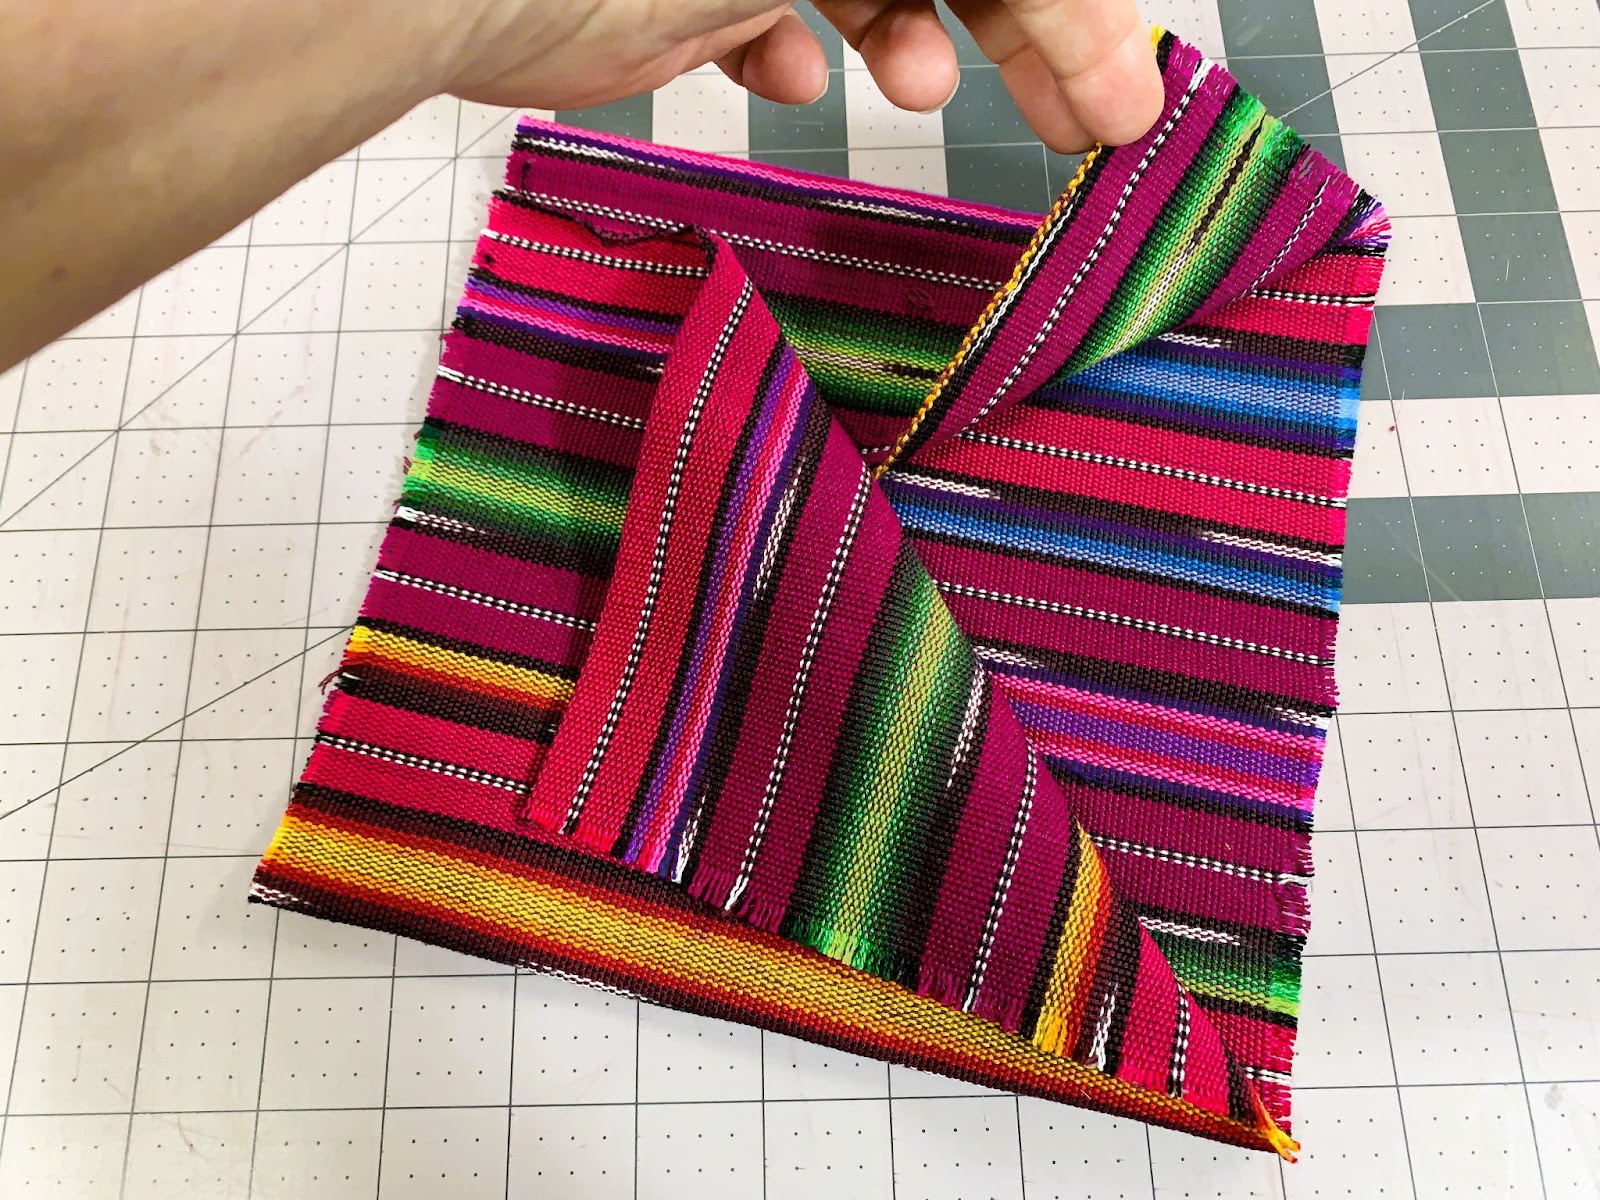
The first pocket I’m creating is an envelope style, providing a secure compartment within the bag where items can be tucked away without the risk of falling out.
It’s a simpler alternative to crafting a pocket with a zipper.
The fabric for this pocket measures 8 inches by 7.5 inches. To construct it, I’ll fold the fabric in a manner similar to an envelope, then sew the sides closed. Once that’s completed, a simple inside-out maneuver and the pocket is ready to be attached.
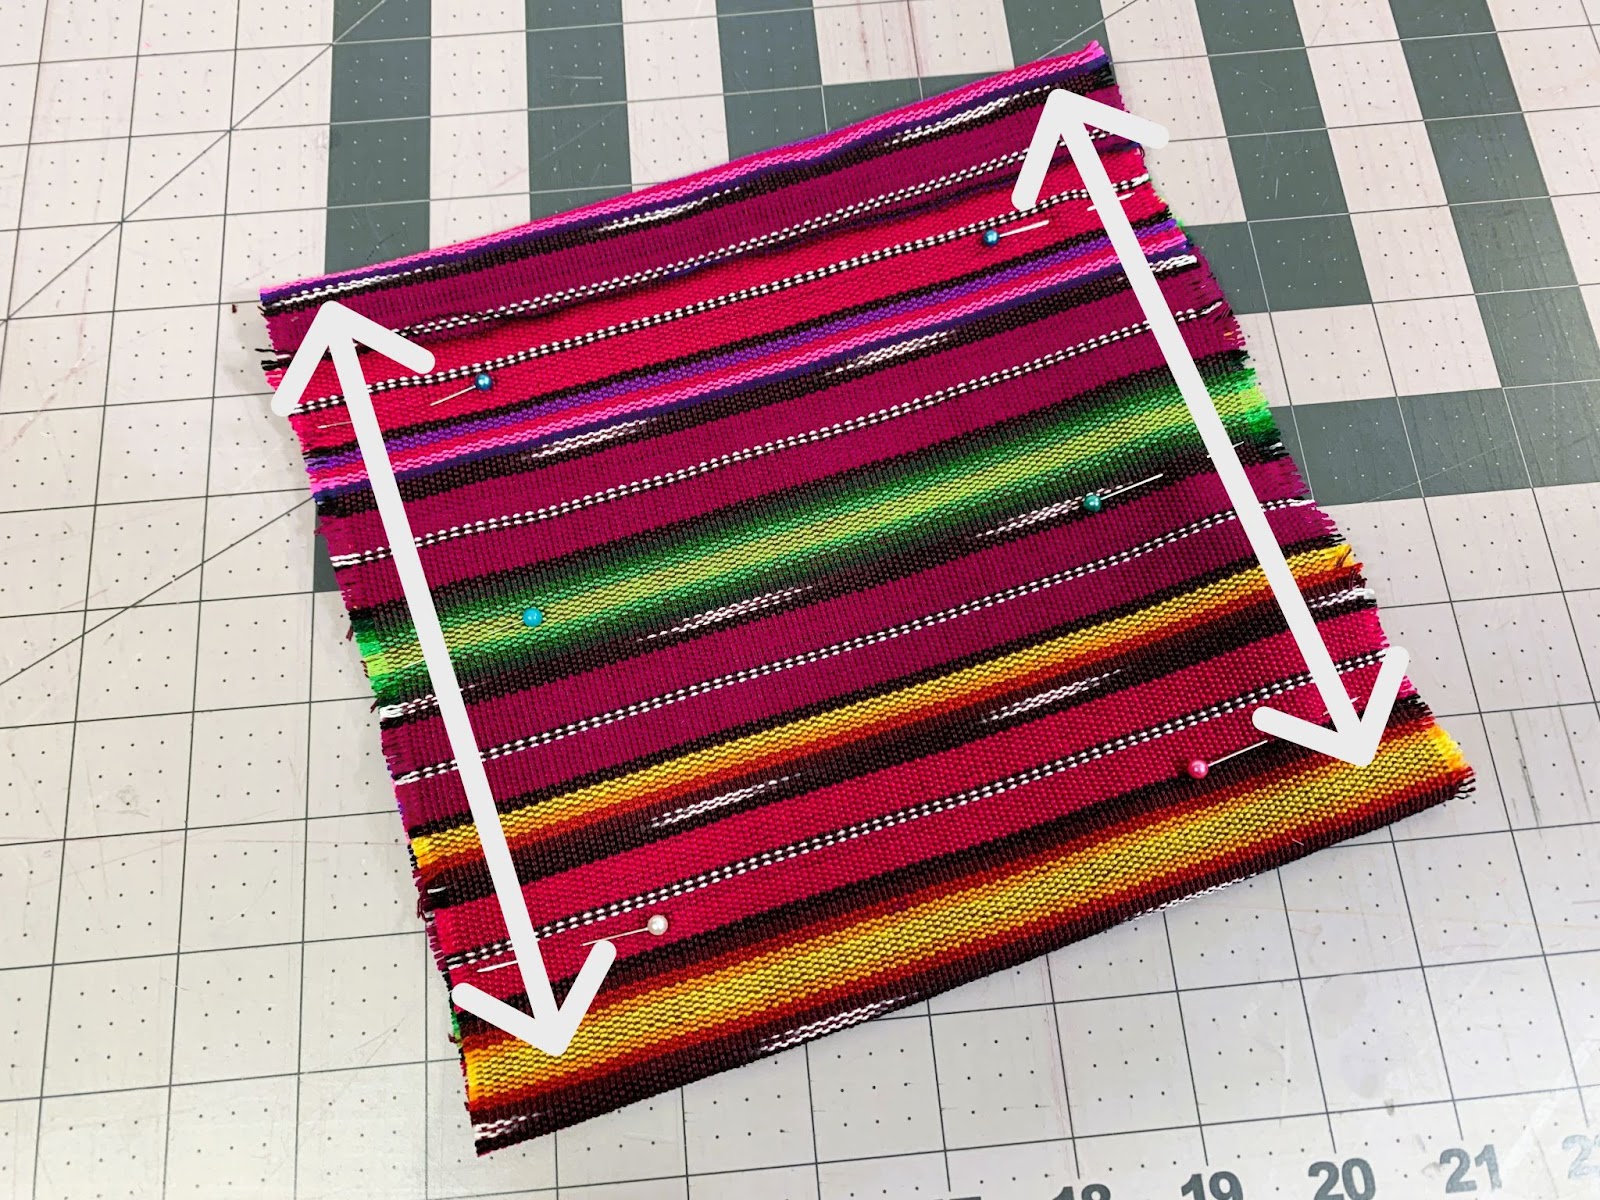
The second pocket is a straightforward flat pocket.
By folding in all four sides and sewing around the edges, the pocket takes shape.
With both pockets completed, the next step involves attaching them to the liner fabric.
Alternatively, if preferred, they could be sewn to the exterior of the bag. There’s also the option to add pockets both inside and outside, allowing for a multitude of pocket configurations. Add as many as you want!
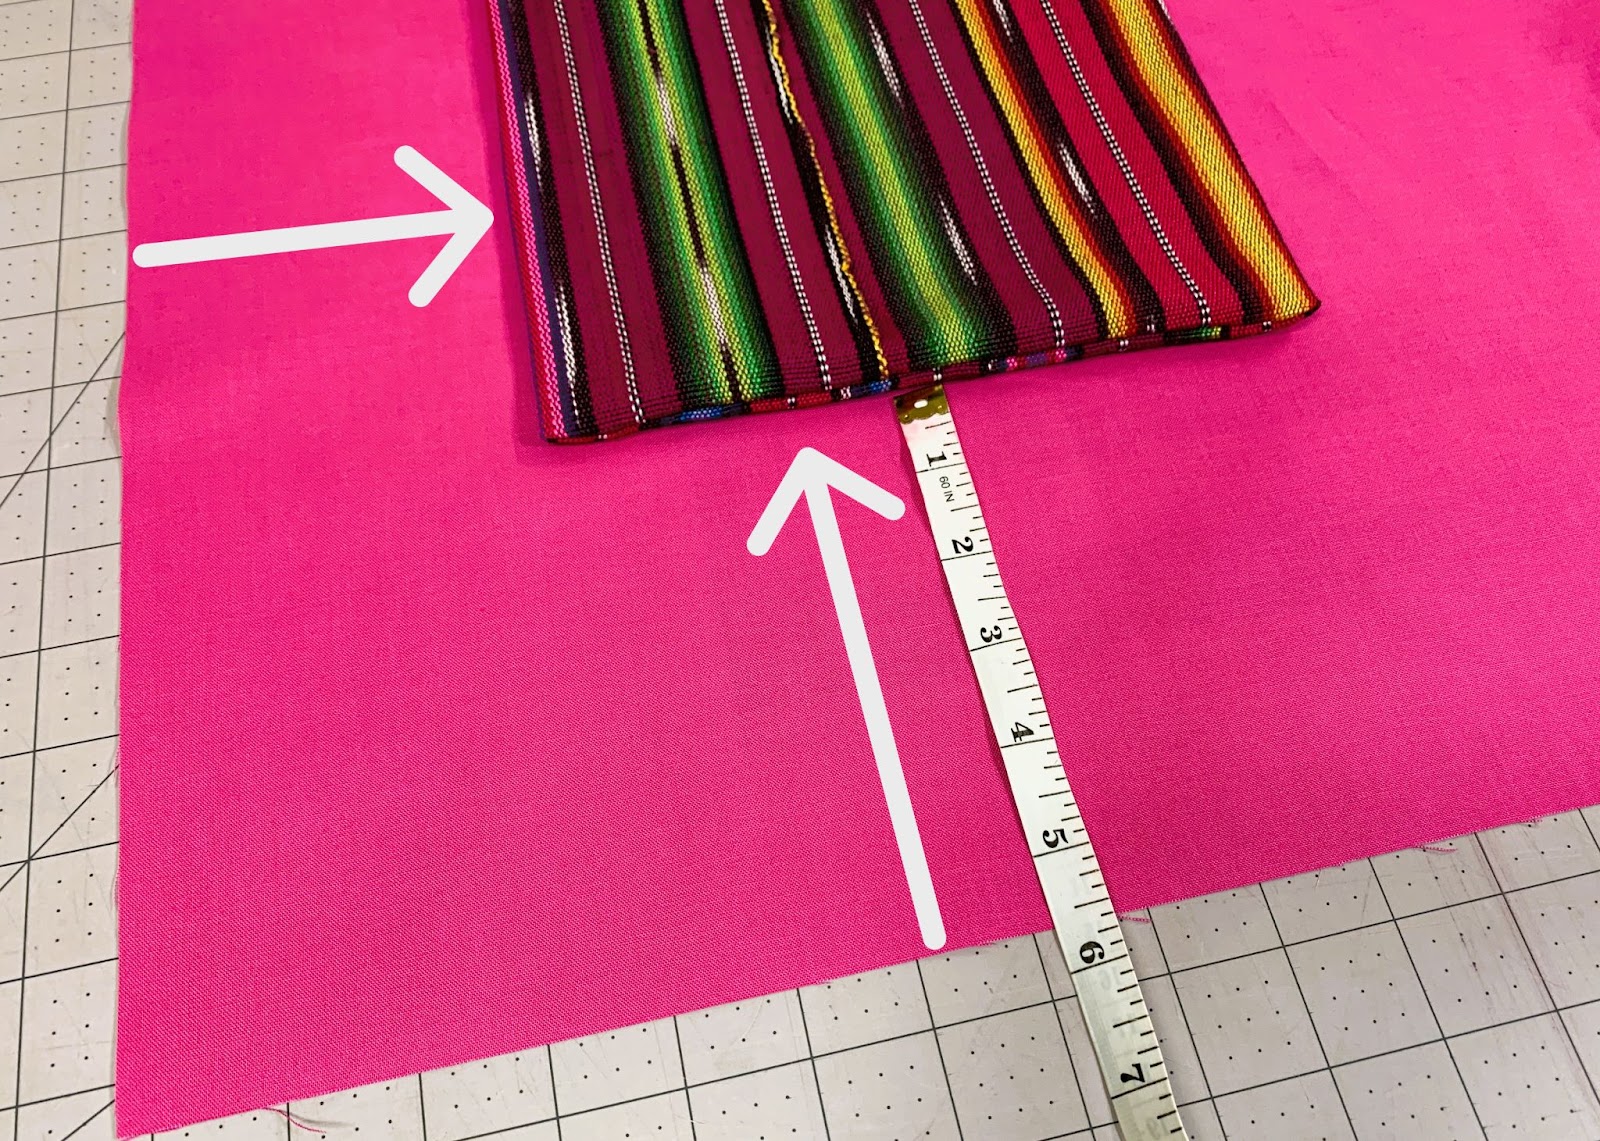
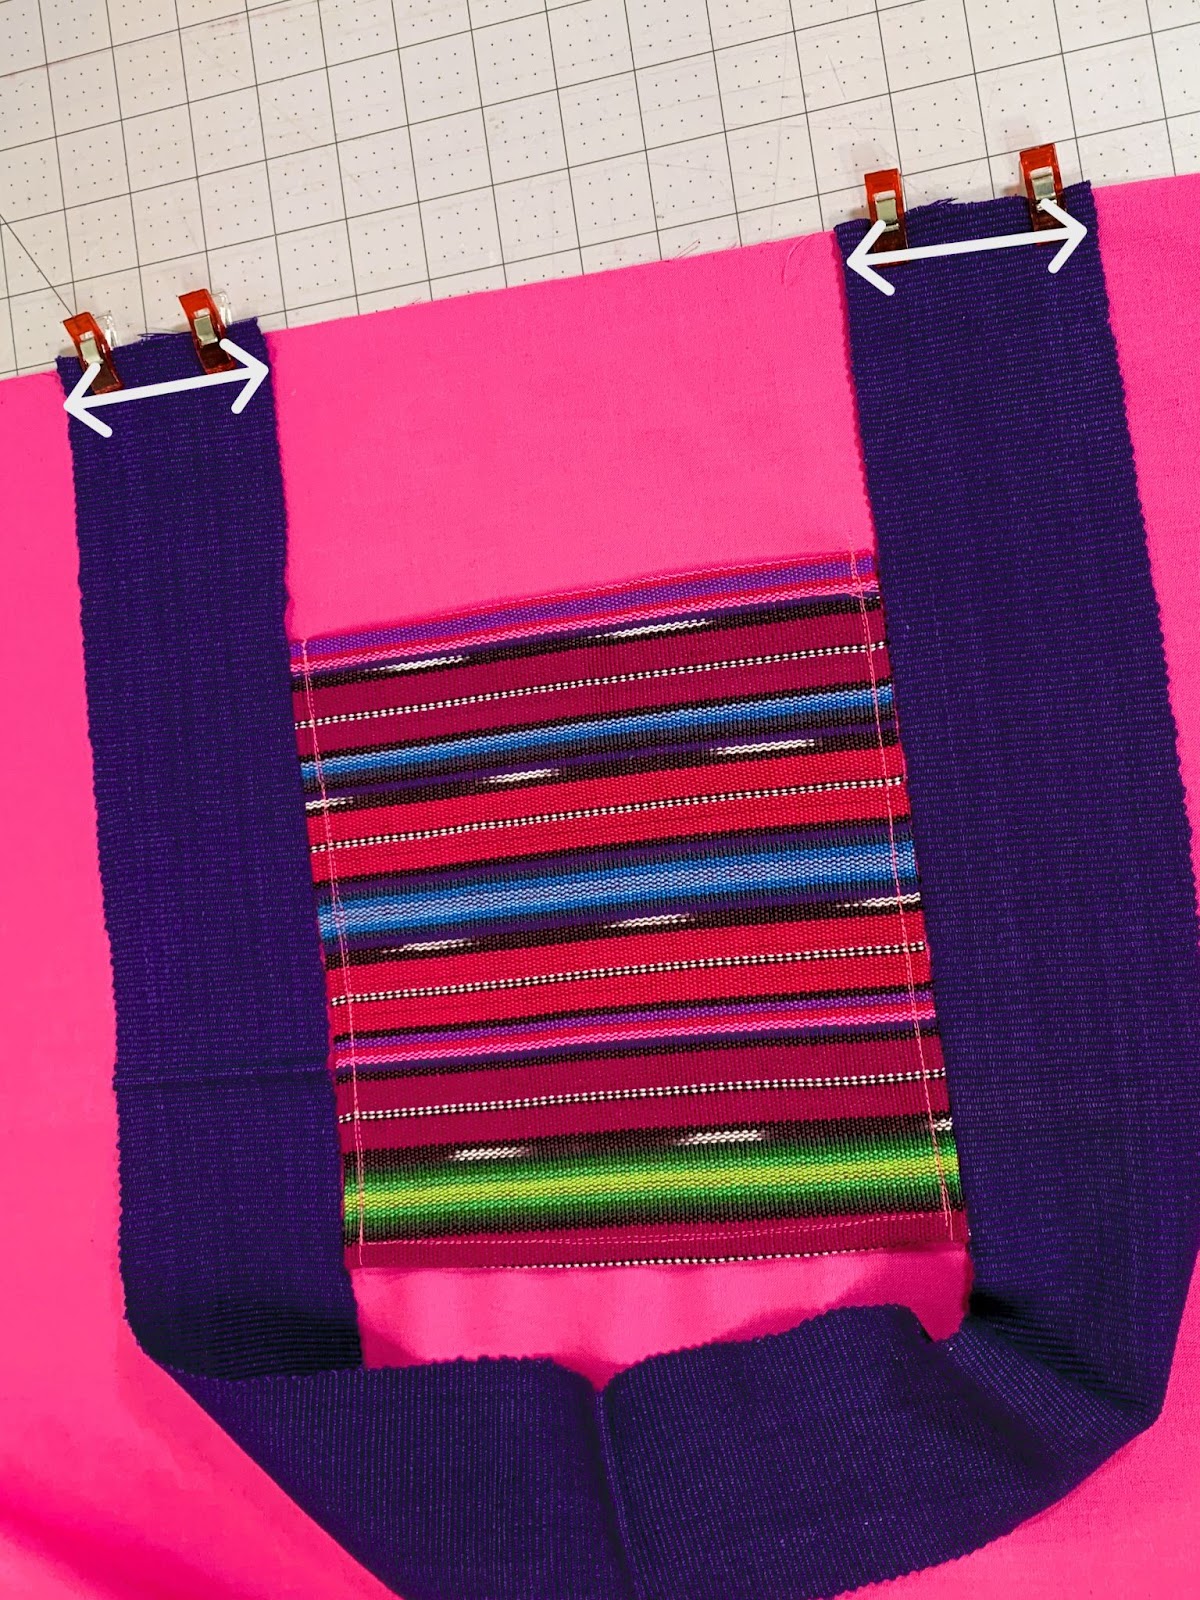
The plan is to center the pockets on either side of the bag’s interior, positioning them approximately 4 inches from the top.
It’s worth noting that this isn’t an exact science but rather a creative crafting endeavor. Feel free to place your pockets wherever suits your preference.
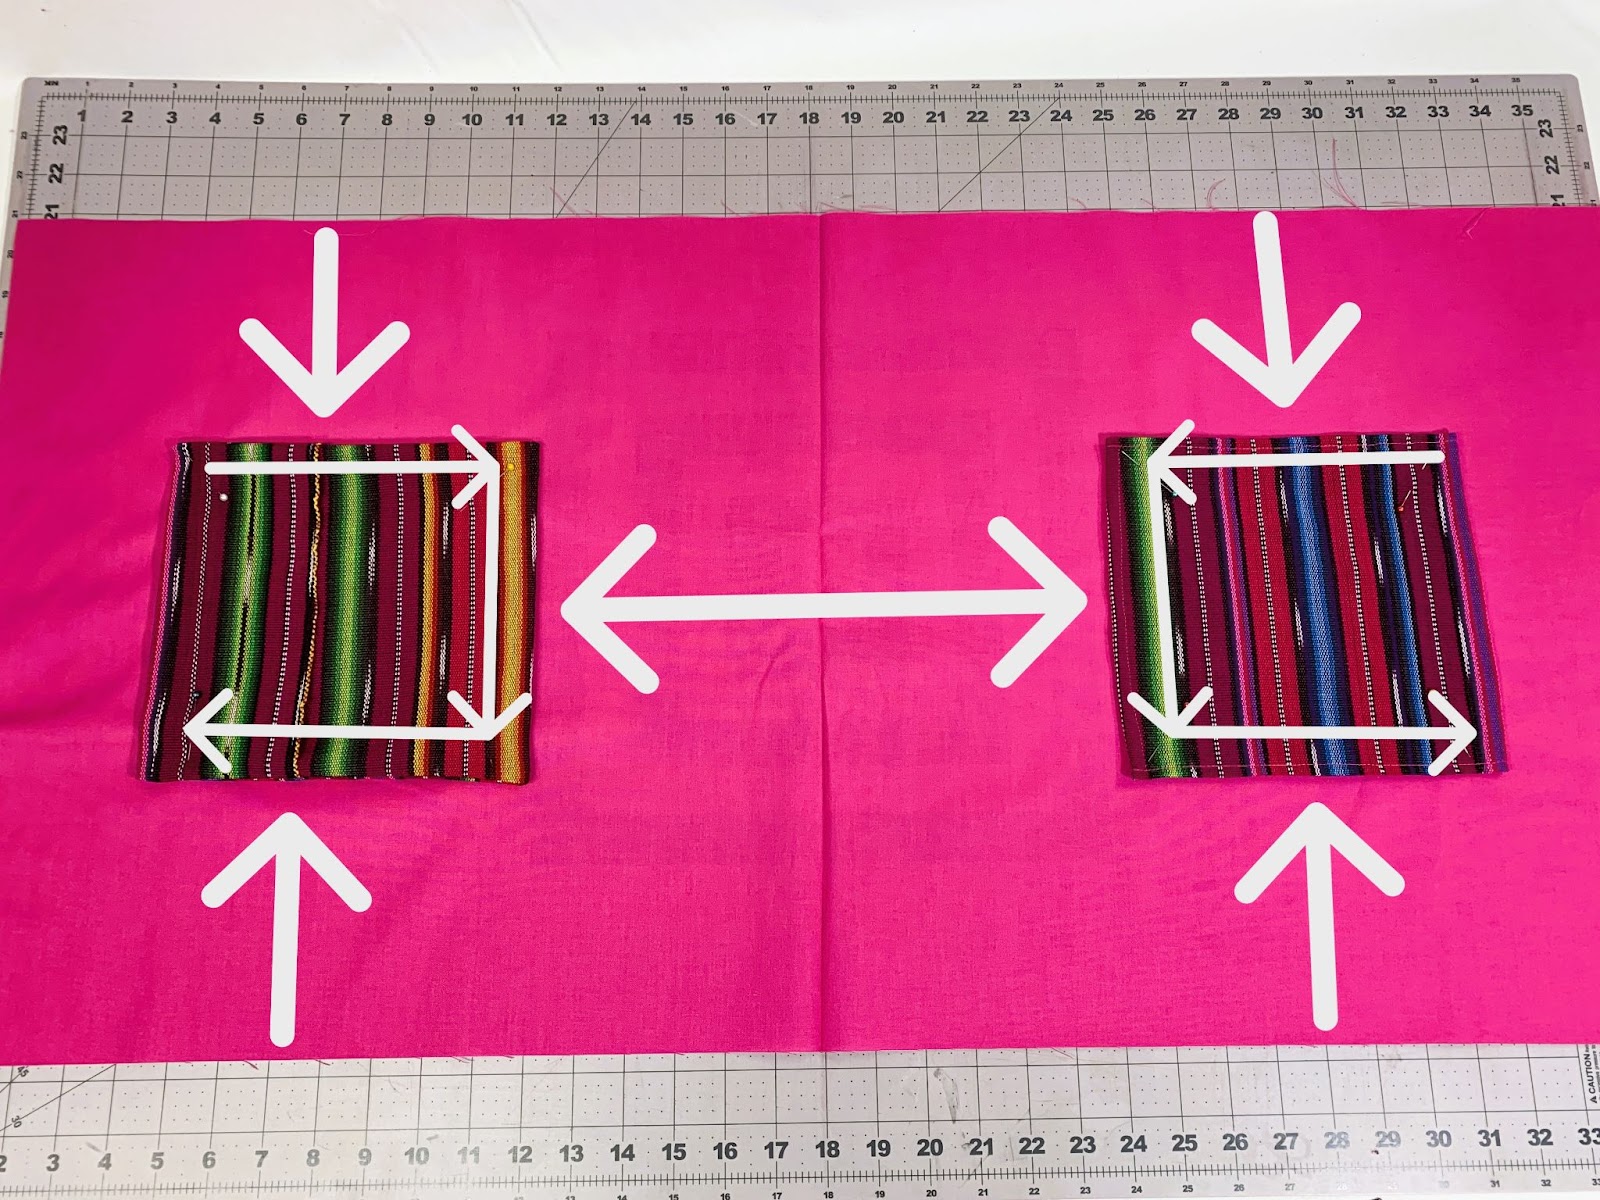
Lay the fabric lining piece flat and position the pockets on it on either side of the center fold. The 36″ length will be folded in half to make the bag shape, and the bottom of the bag will be where the fold is, so place the pockets on the lining and plan on sewing them so that the edge of the pockets that face the 18″ edge isn’t sewn down.
Those will be the edges of the bag opening, so the open side of the pockets should be facing them so that the right edge is open.
Using straight pins, I’ll secure them onto the liner fabric before sewing them in place with a straight stitch along both sides and the bottom.
Attach handles to the bag.
Once the pockets are securely in place, the next task is to sew the handles onto the bag.
I came across a Guatemalan sash that complements the purple stripe in the fabric, making it an ideal choice for the strap.
The sash, measuring 46 inches in length and 4 inches in width, was cut in half, and any fringes were neatly trimmed off.
Continuing with the process, I placed the straps on the same side as the liner fabric, aligning the edges of the straps with either end of the liner fabric.
It’s essential to ensure the straps are not twisted. When they were pinned in the right position, I sewed them securely into place.
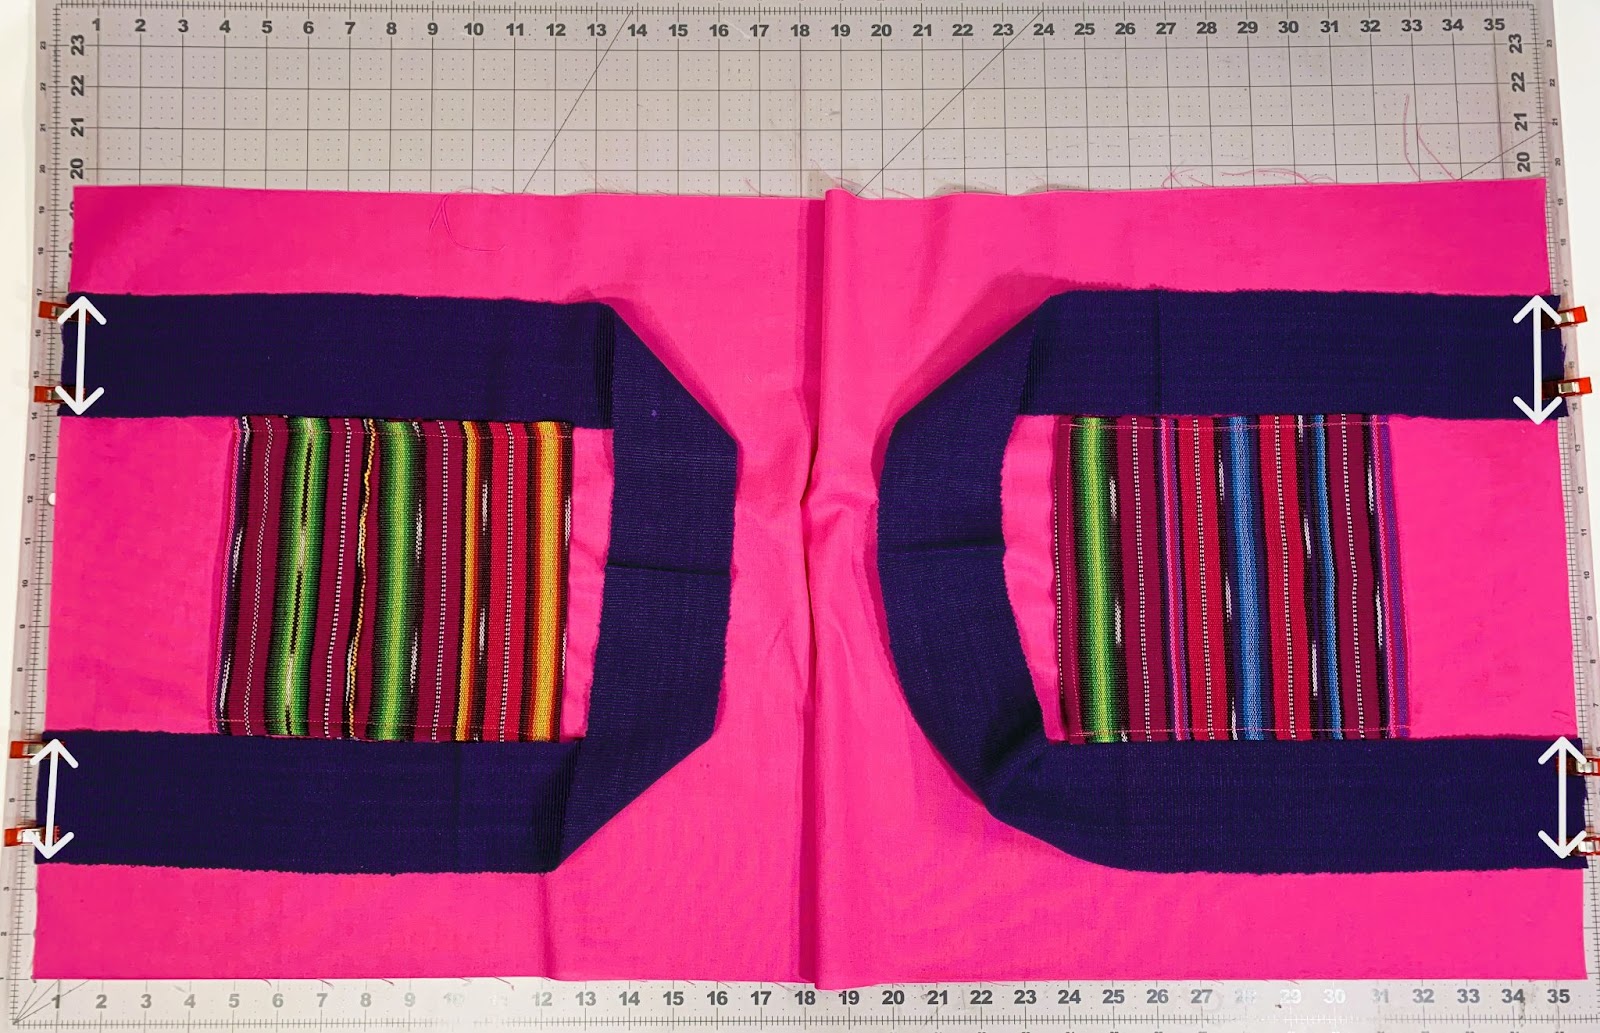
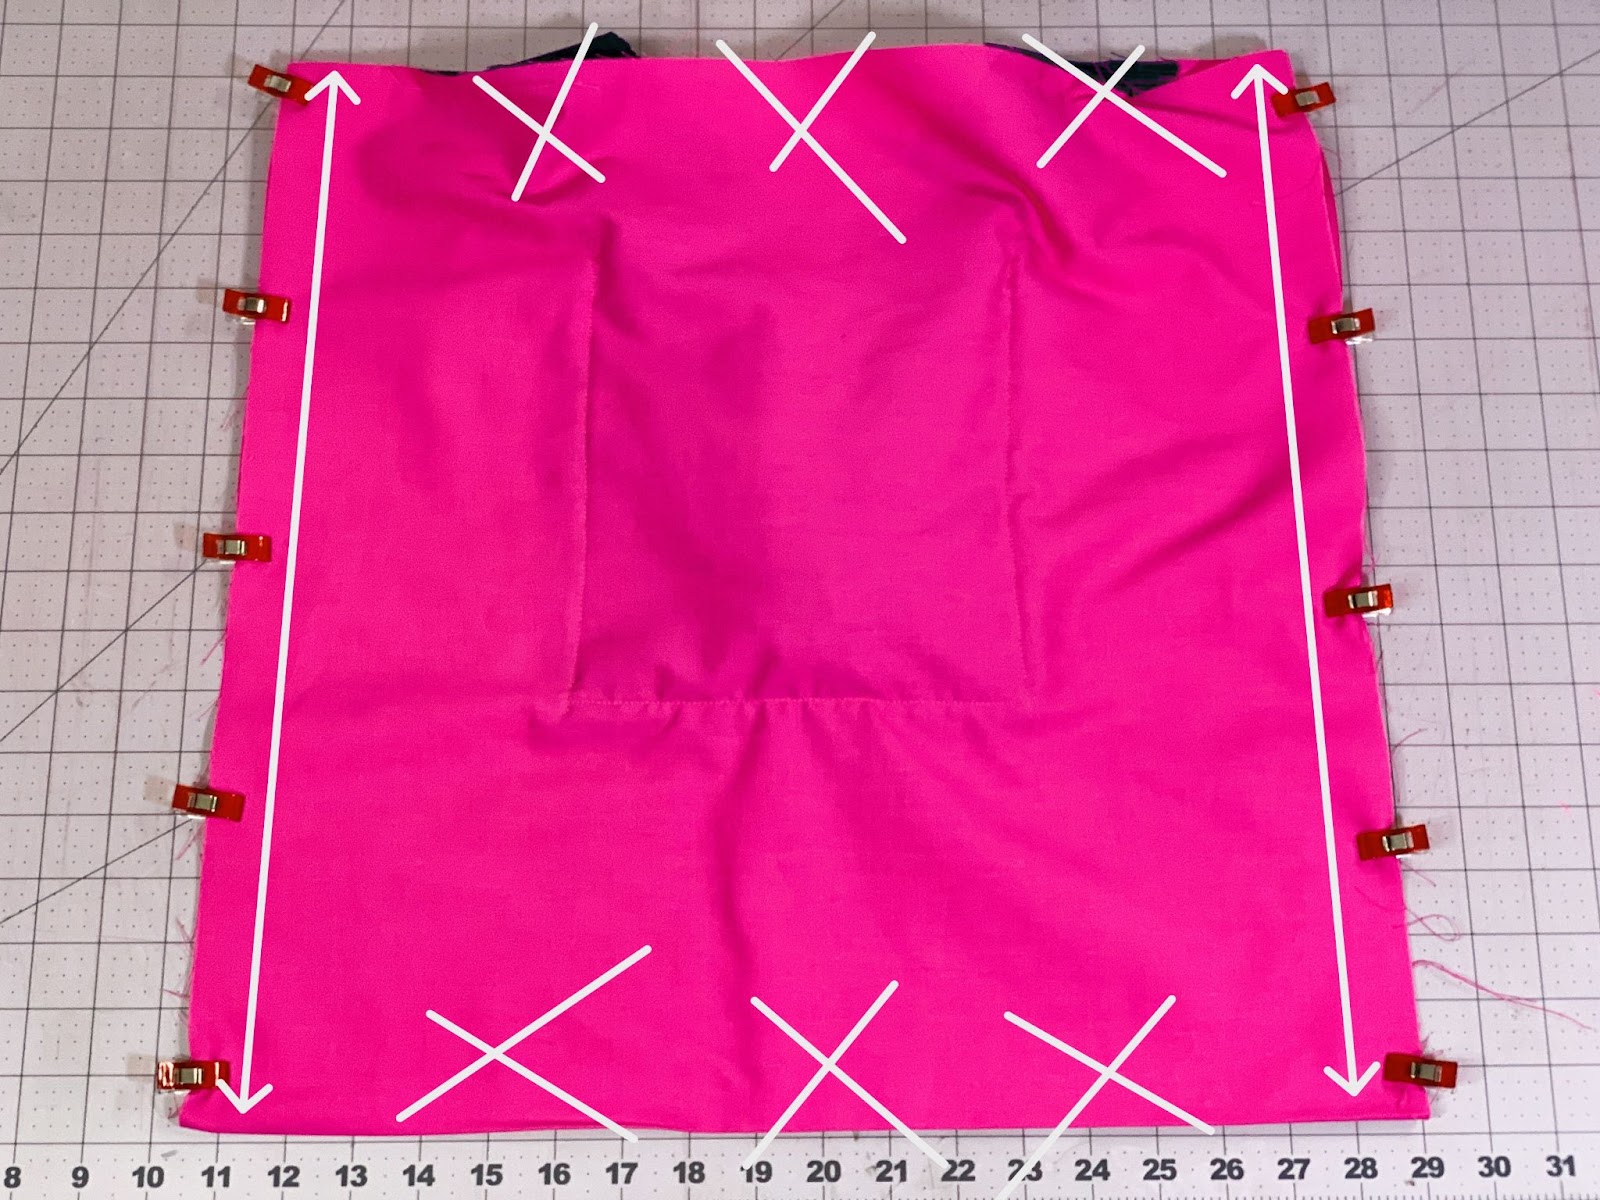
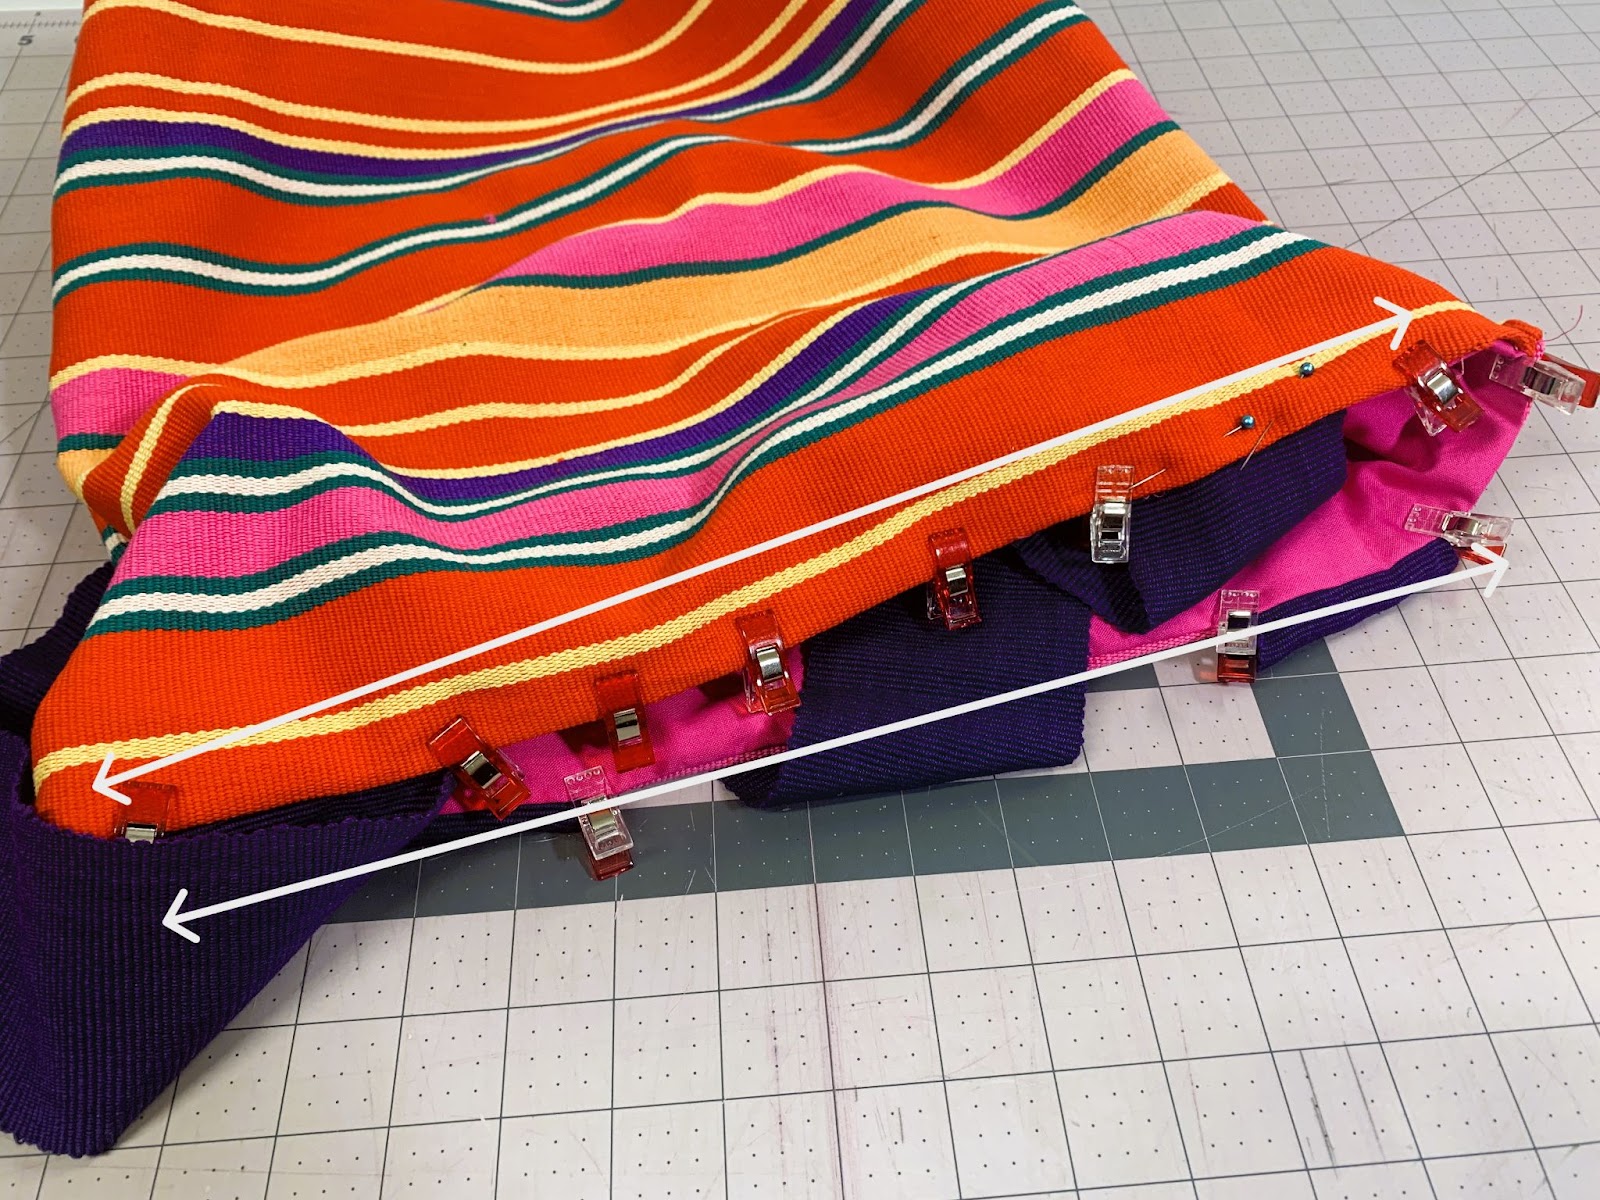
Moving forward, the next step involved folding the liner fabric in half, ensuring that the pockets and straps were on the inside. Stitch along the two sides of the bag, leaving the top open.
It’s crucial to note the white X’s on the photos, as these areas should not be sewn.
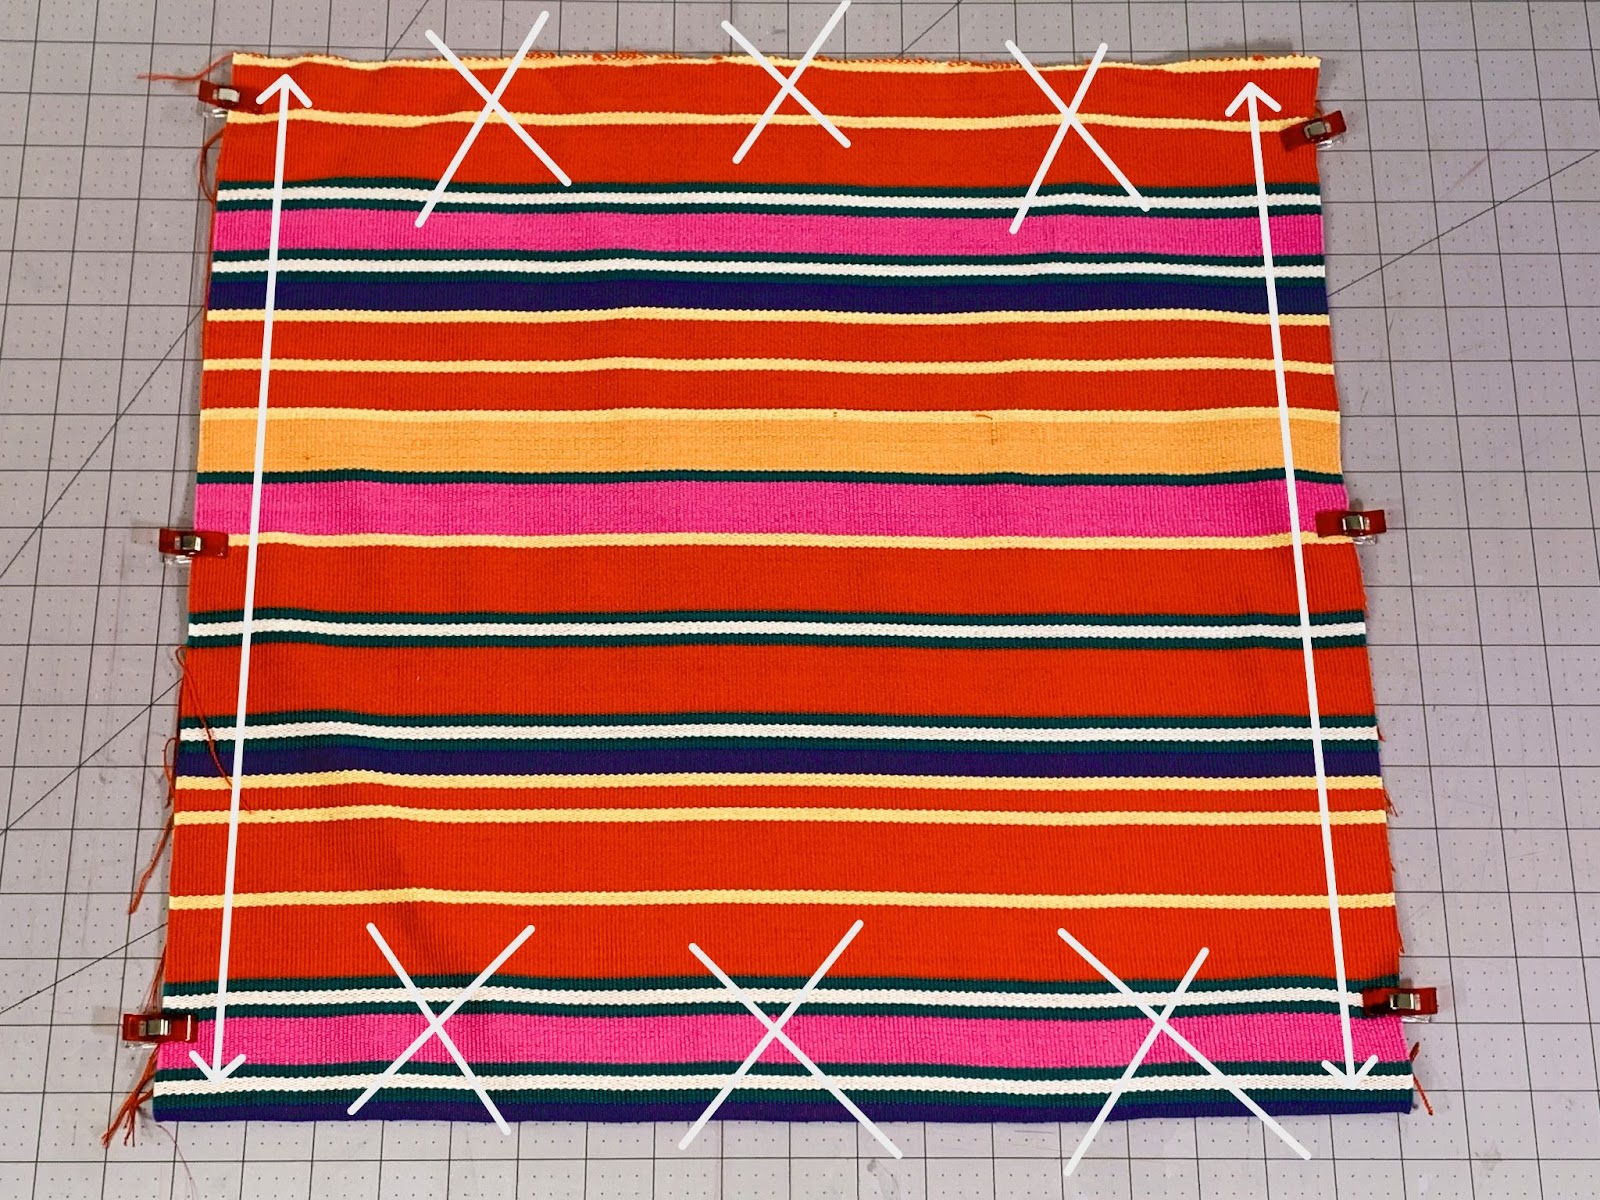
Repeat the same process with the outside fabric.
When folding the outside fabric in half, ensure that the two good sides are placed together. Although Guatemalan fabrics lack a distinct good or bad side, for most prints, it’s easy to distinguish between the two sides.
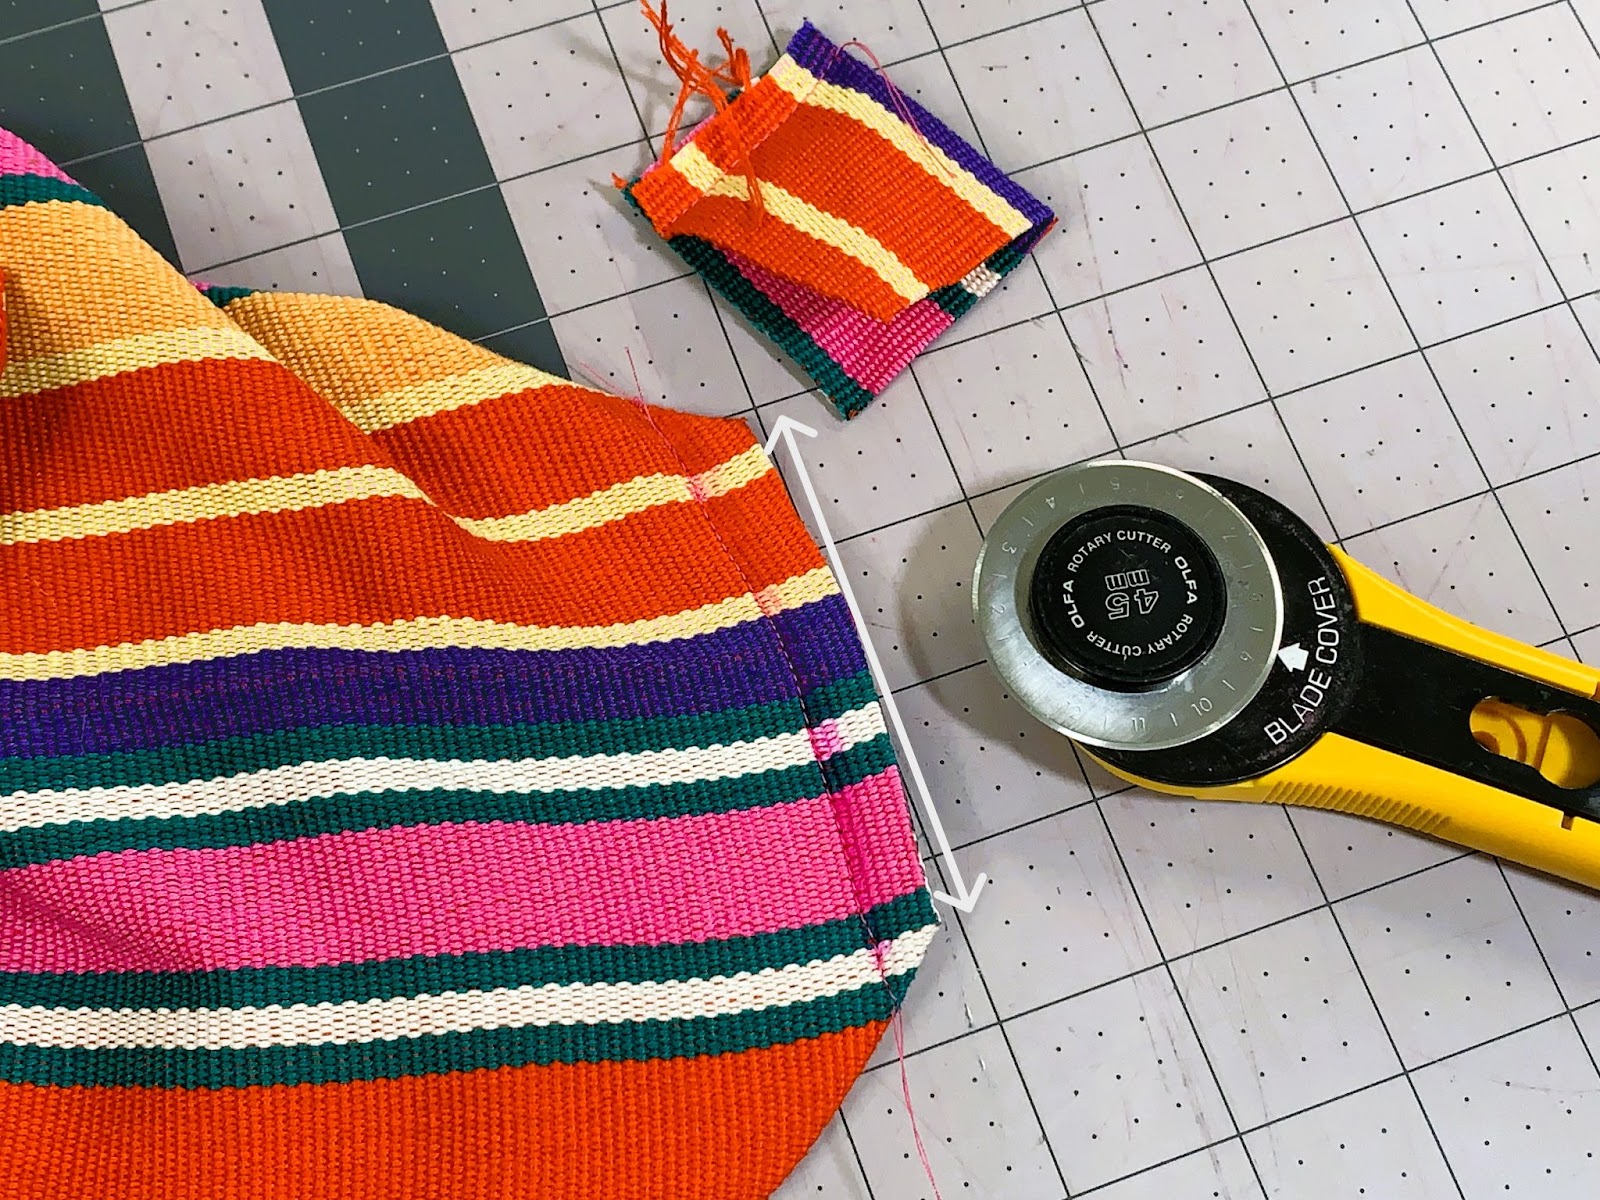
Square up the bottom of the bag.
Now, it’s time to square up the bottom of our tote bag. In cases like crafting a book bag or a computer bag, this step might be left out.
However, for my beach tote, I want the bottom to be the ideal size to accommodate a rolled-up beach towel, so squaring it up will result in a wider base.
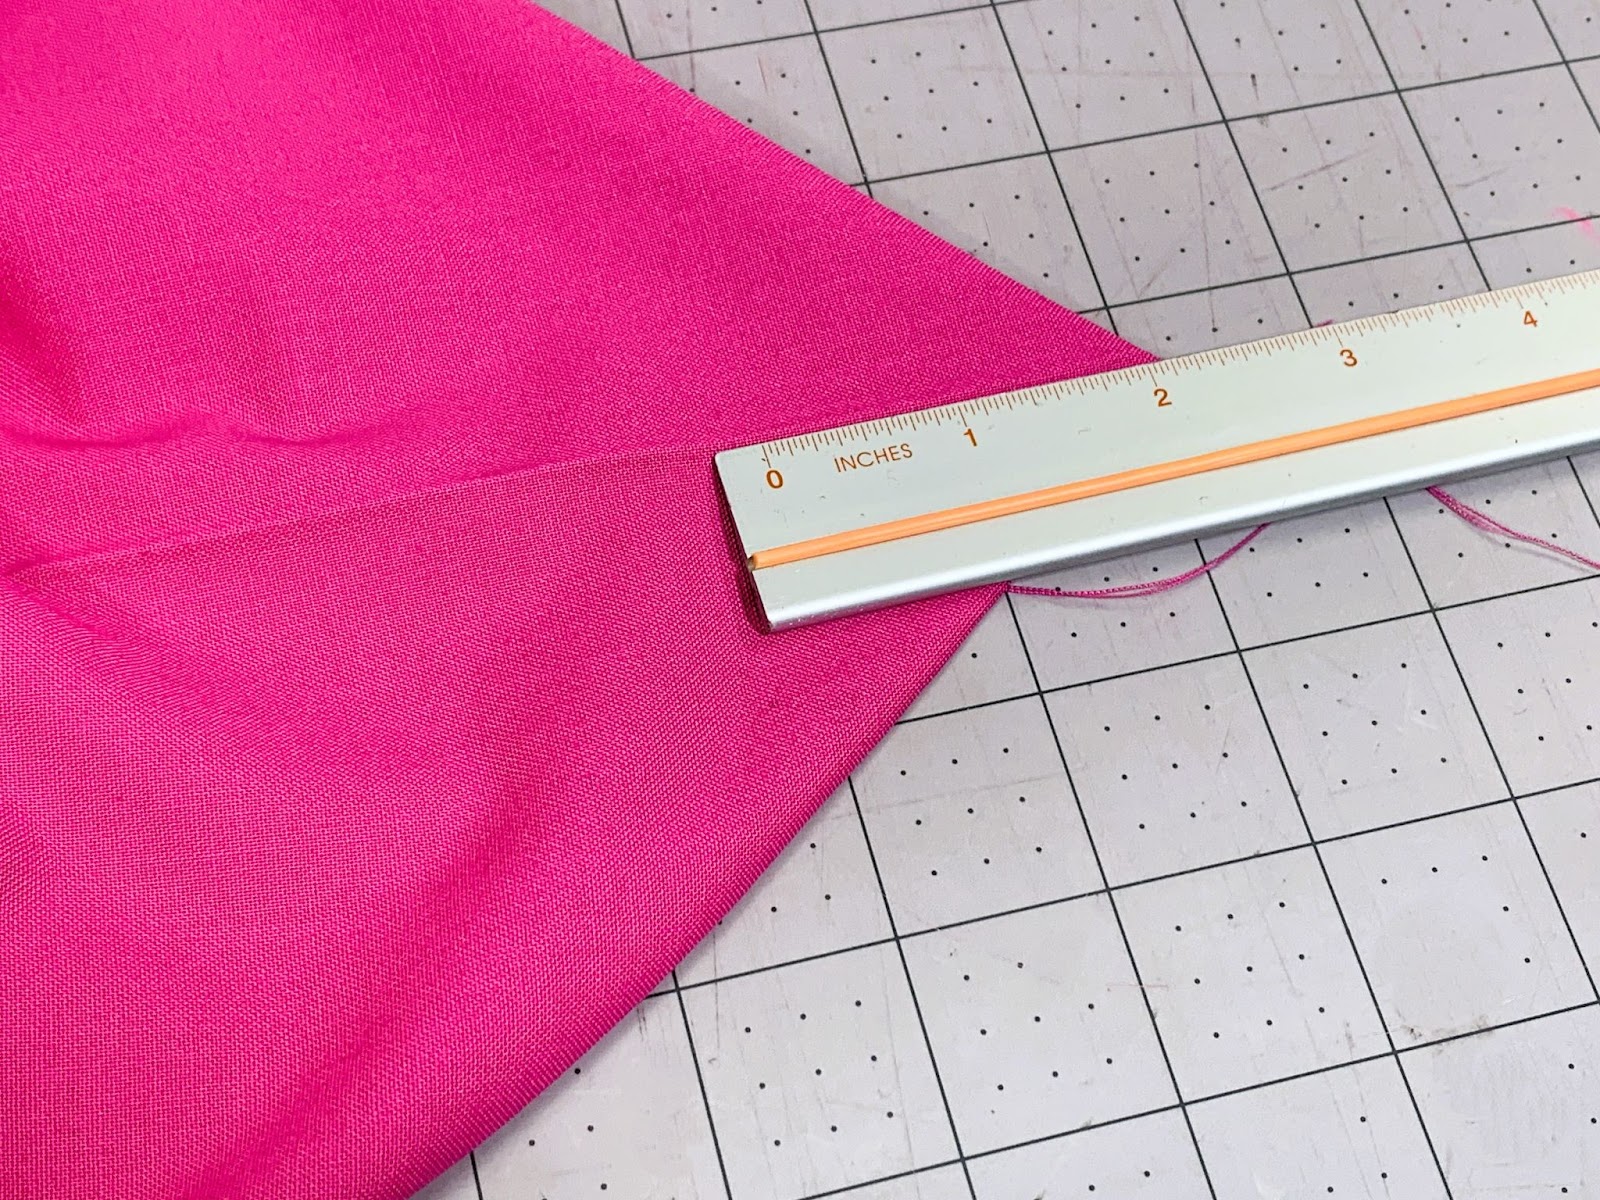
To begin, extract the bottom corner of the inner fabric that has just been sewn and lay it flat, ensuring the side seam is positioned in the center.
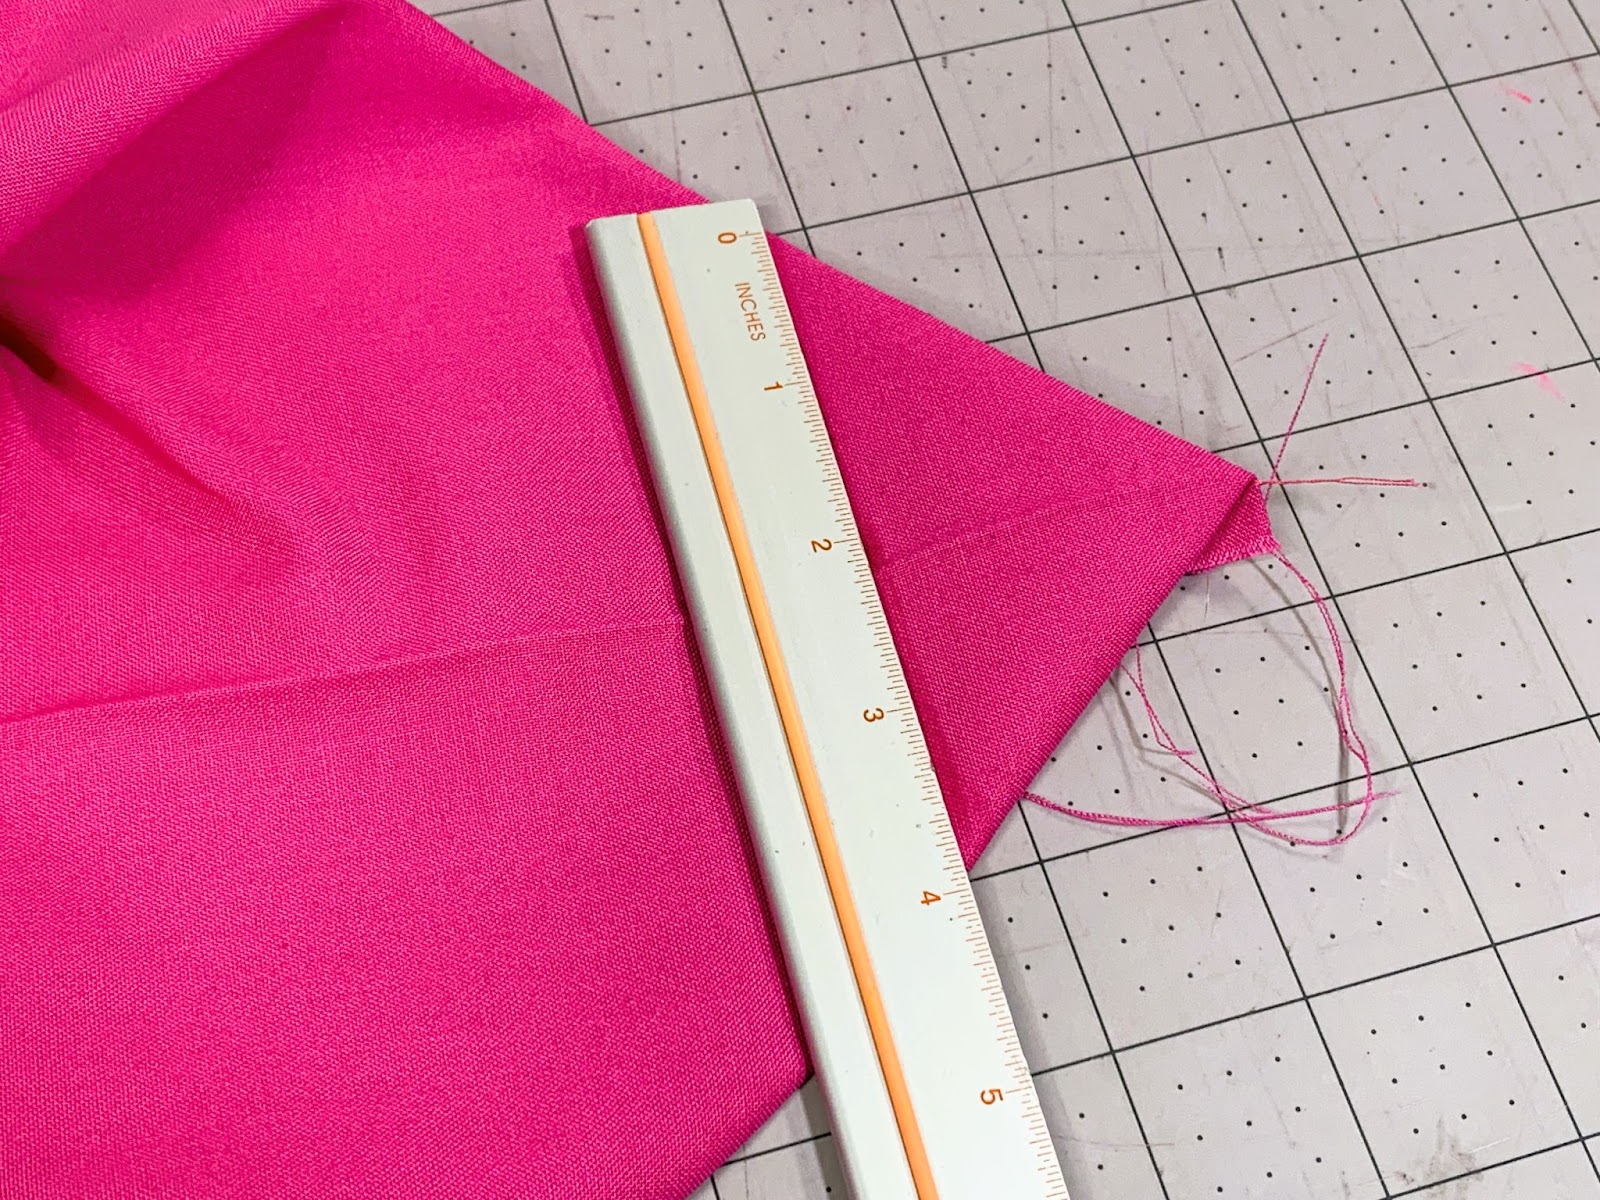
Proceed to measure 2 inches in from the tip and mark that point.
Start by pulling out the bottom corner of the inner fabric that you just sewed out and lay it flat, with the side seam in the center. Measure in 2 inches from the tip and make a mark.
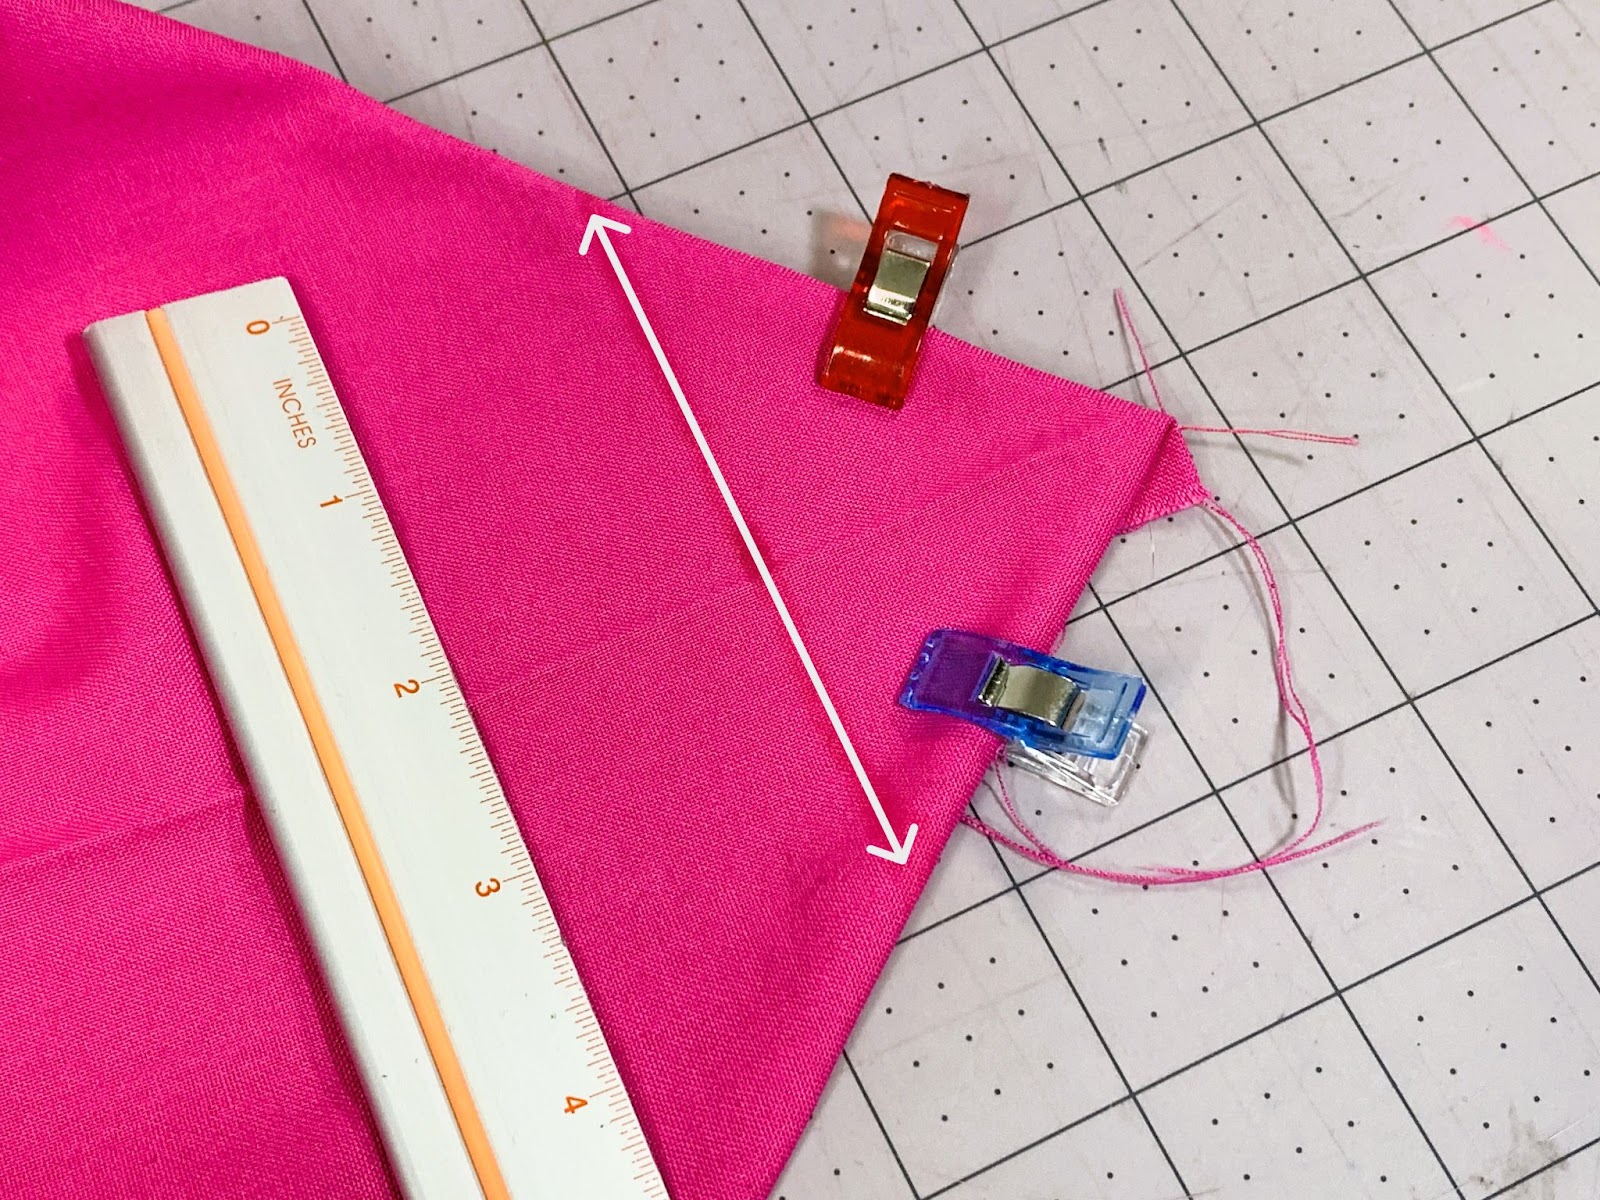
Now draw a line across that corner. It should be approximately 4 inches across. You can use a sewing pen or chalk.
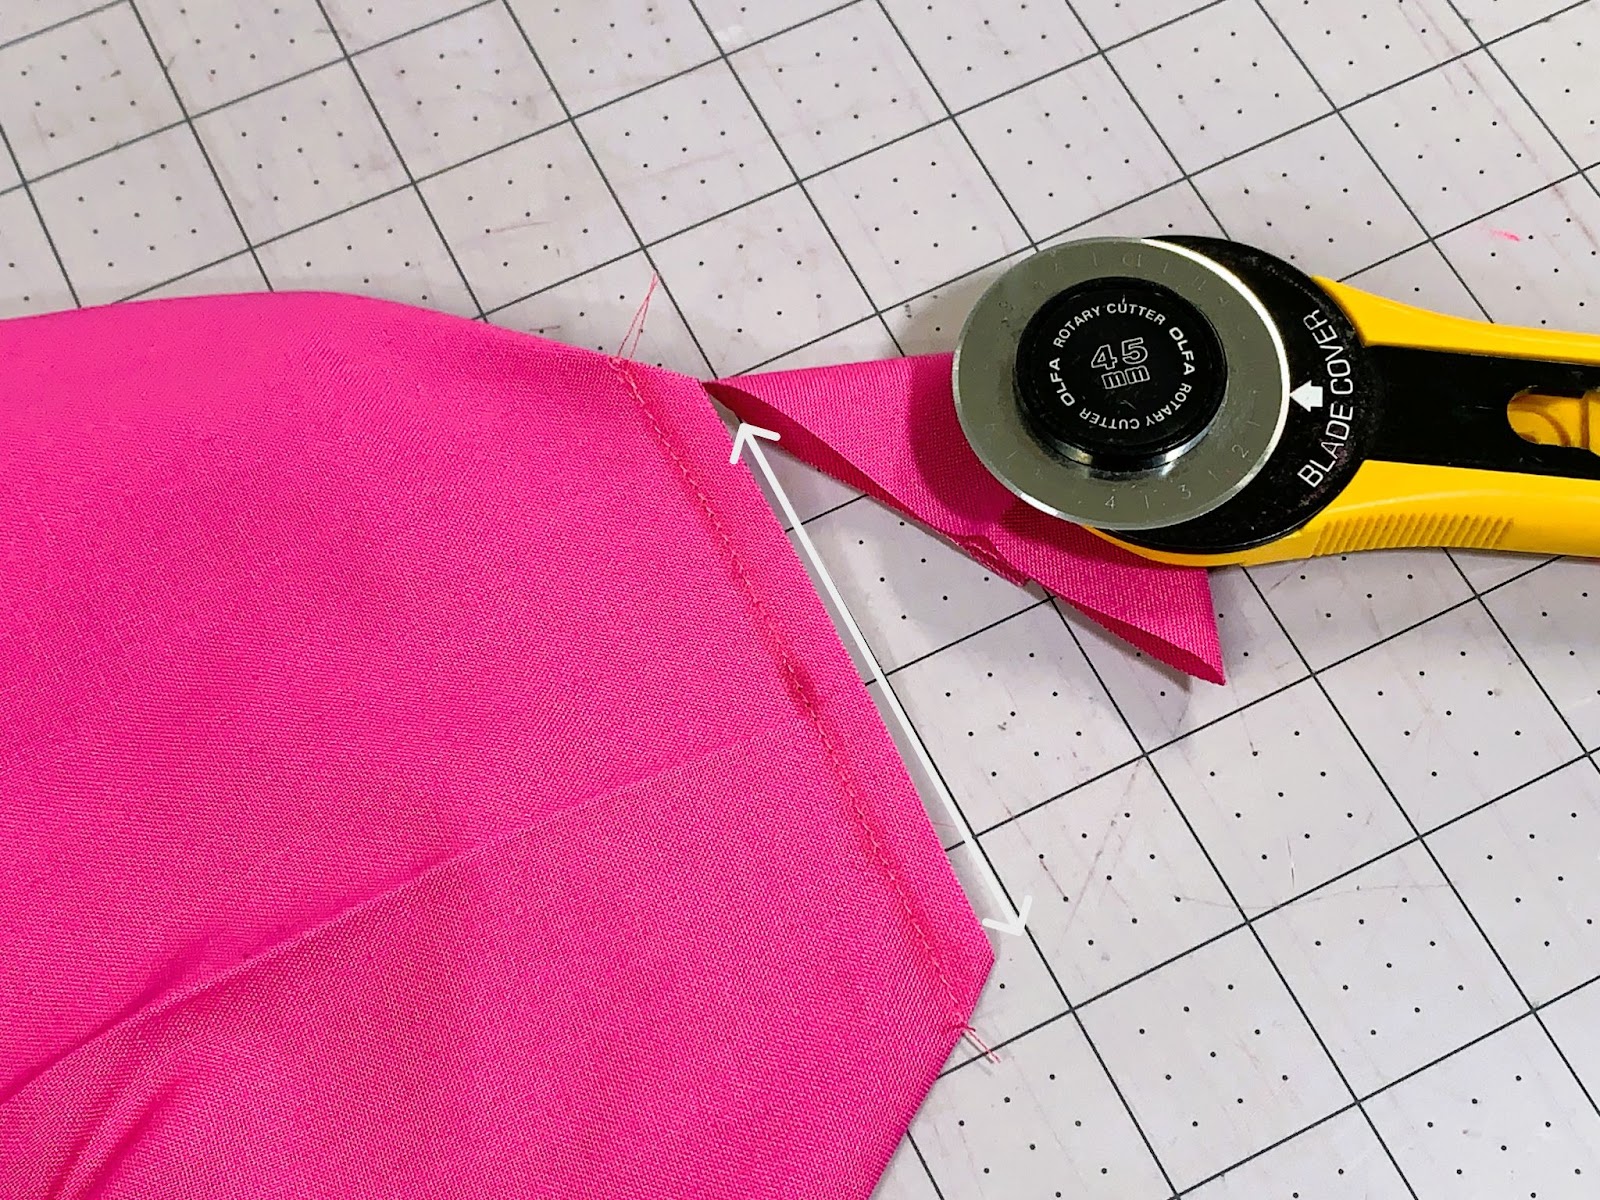
Pin it down and then sew along that line. Then cut off the corner. Do the same thing with the other corner and both corners of the outer fabric.
At this point the tote bag is almost finished!
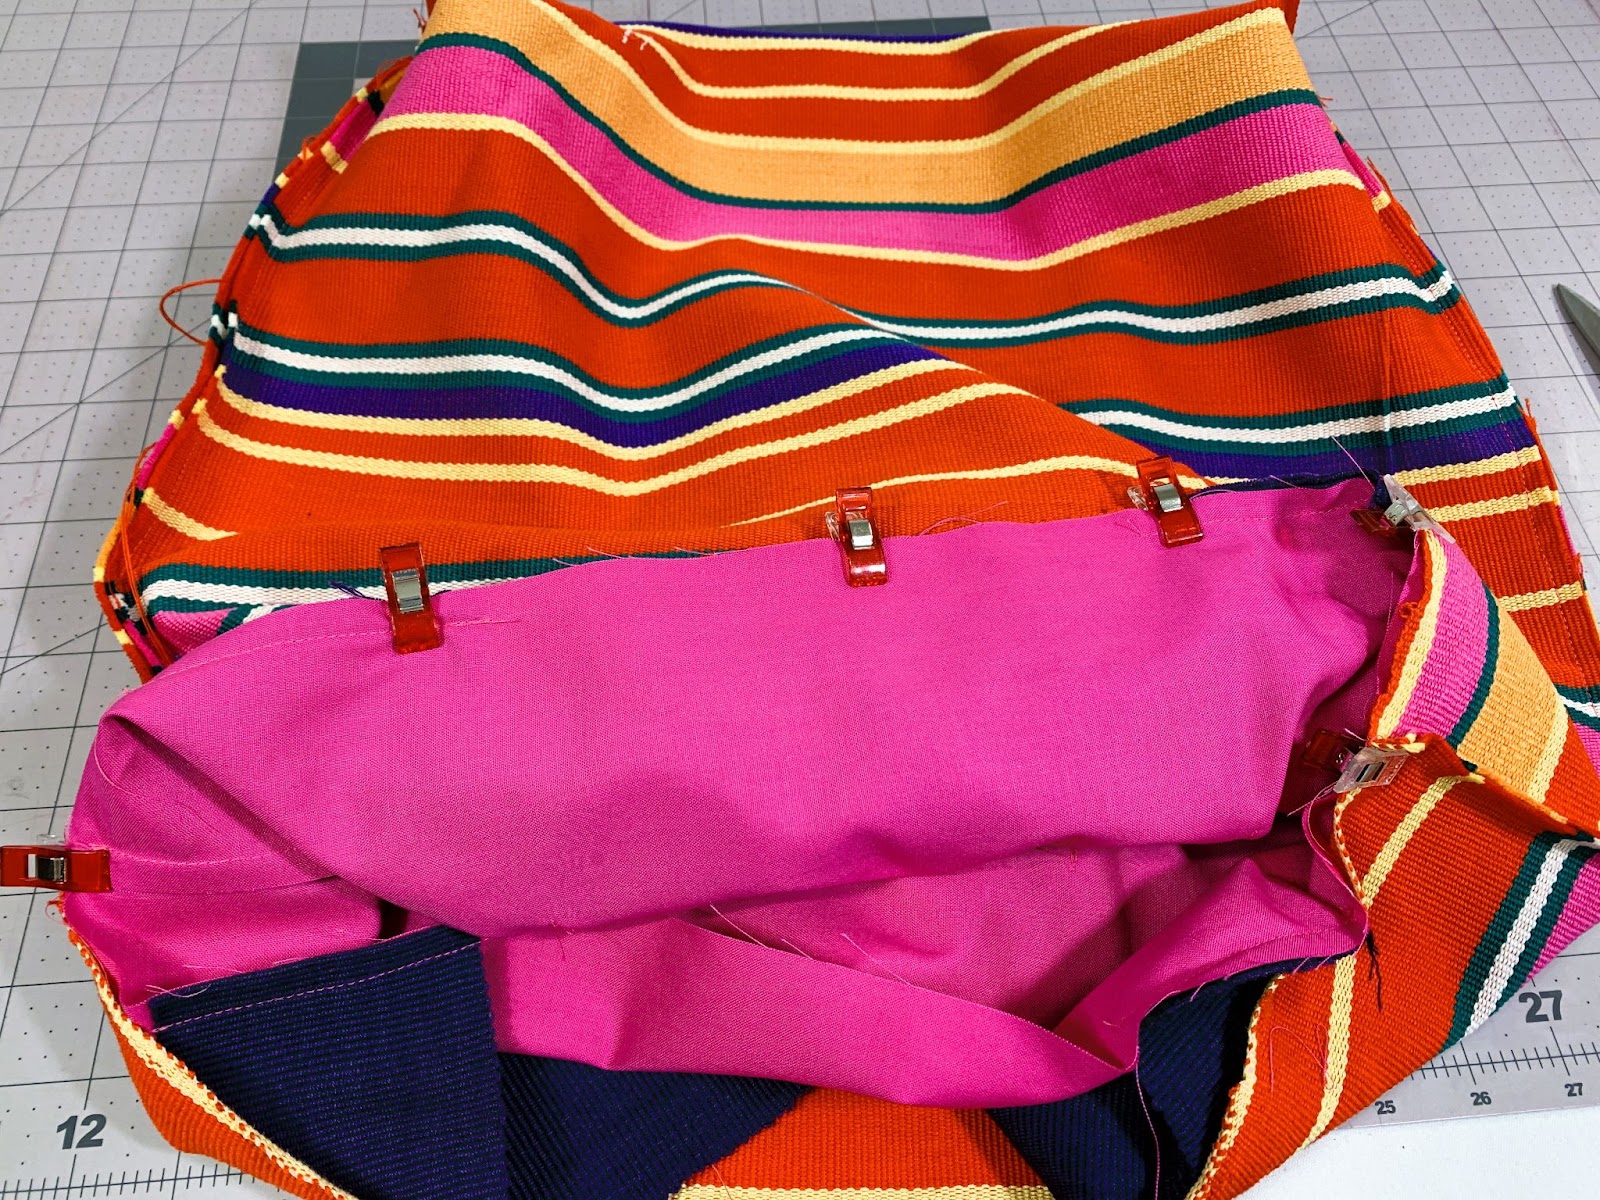
Add the lining to the bag.
The next step involves joining our outside fabric and liner.
Turn the liner fabric right side out, placing the pockets and straps on the exterior.
Now, insert the liner into the outside fabric, which should still be turned the wrong side out.
Ensure that the straps are neatly tucked in, then proceed to clip the top edge of both the inside and outside bags together.
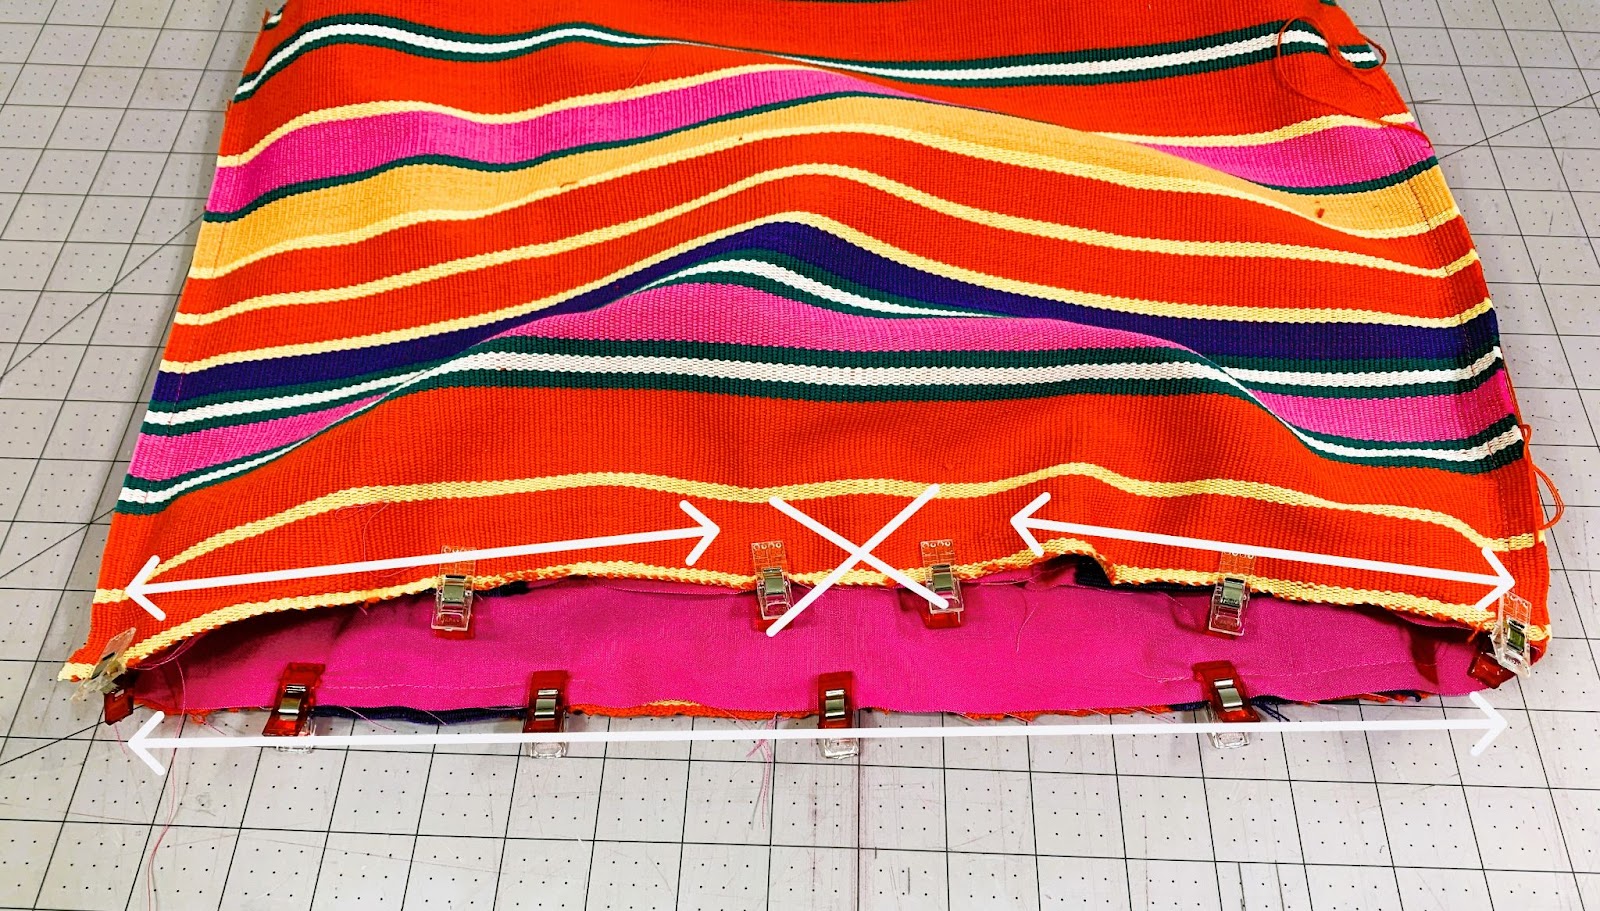
Proceed by sewing around the top, leaving approximately a 2-inch gap open.
Refer to the white X, indicating the area where the sewing was omitted to create the gap.
This opening will be utilized to turn the entire project right side out.
Carefully pull the entire bag through the small hole, exerting gradual effort to avoid tearing any of your stitches.
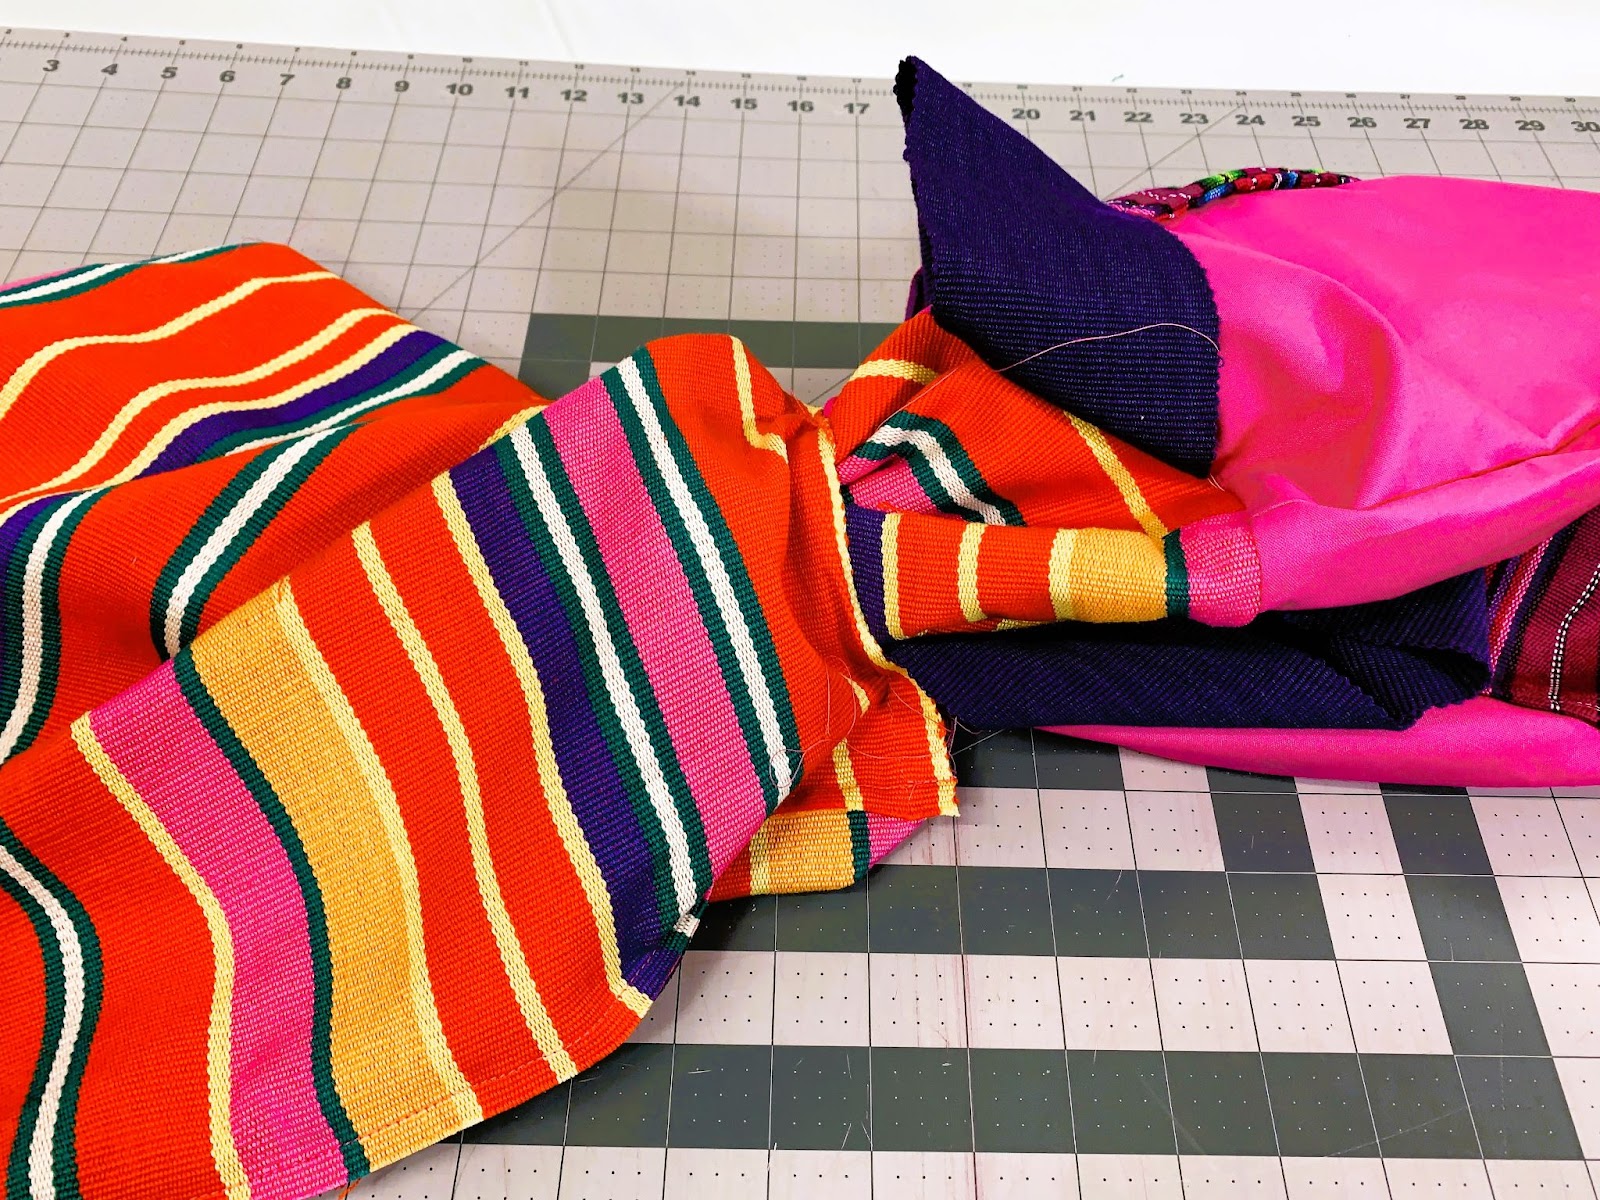
Then push the lining fabric back inside the finished bag. You should have 2 pockets on the inside and 2 straps sticking out the top.
After successfully turning, stuffing, and arranging the bag to your liking, proceed to topstitch all the way around the top of the bag once.
Be meticulous in closing the opening left from turning the bag right side out.
Next, perform another round of topstitching all the way around for a polished finished look.
Push out your corners so that they are nice and squared up and you’re ready for your trip!

Add your accessories and you’ll be ready for your trip. And once your trip is over, you can use the bag to carry your groceries or any other items in style.