This is a pretty simple quilt pattern, as far as patterns go, because it’s basically stitching long straight stitches to make squares and checkerboards. It’s a variation on the Irish chain quilt, and you really do have to look at it closely to see the resemblance to a basic Irish chain.
But I promise that it’s in there, and it’s not that hard to make because it’s all squares and straight lines, no weird angles or curves.
Some of the links in this article are affiliate links that will pay a small commission if they’re used to purchase something. To see the entire affiliate policy click here.
This is an easy pattern to make!
This is the kind of project that you could easily do in a weekend if you wanted to make a small display quilt that quickly, but I decided to go for a full bed size because I had a specific bedroom in mind for this one.
It’s a long story that I’ll skip, but I needed to make a quilt for my daughter’s bedroom that would match the walls, which are orange.
That’s another long story that I’ll skip, but I decided that I should make this more difficult for myself, so I designed a bunch of fabric and had it printed on Spoonflower.
The finished size of the quilt ended up being around 85 x 85″, which will fit a full-size or queen-size bed with a lot of overhang on the sides. It would fit a king-sized mattress but it wouldn’t hang over the edge too much.
This chart from Good Housekeeping shows different mattress sizes, so you can figure out the basic size that you’ll need.
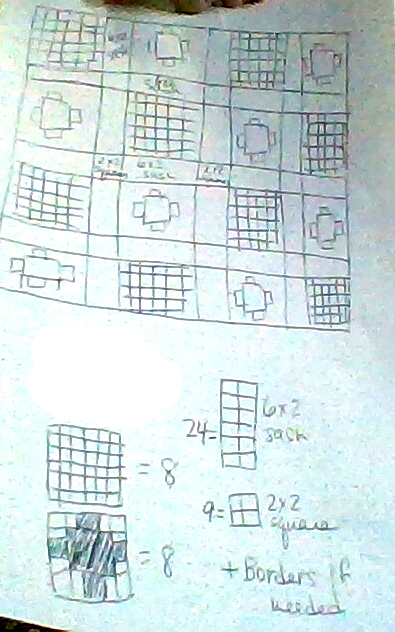
And this is the sketch that I did for myself to show how many pieces I would need to put the quilt top together. You might want to refer back to this when you’re going through the instructions, because it can get confusing if you’re just reading them.
How much fabric to buy.
For the size that I made, which would fit a full/double or a queen mattress, you need about 8 yards of backing and binding fabric, plus 12-13 yards of fabric for the quilt top. One yard of that should be the solid color that will go in the center of the squares in the pattern, but the rest can be coordinating random colors.
This is a good pattern to use for a scrap quilt where you want to use up smaller pieces.
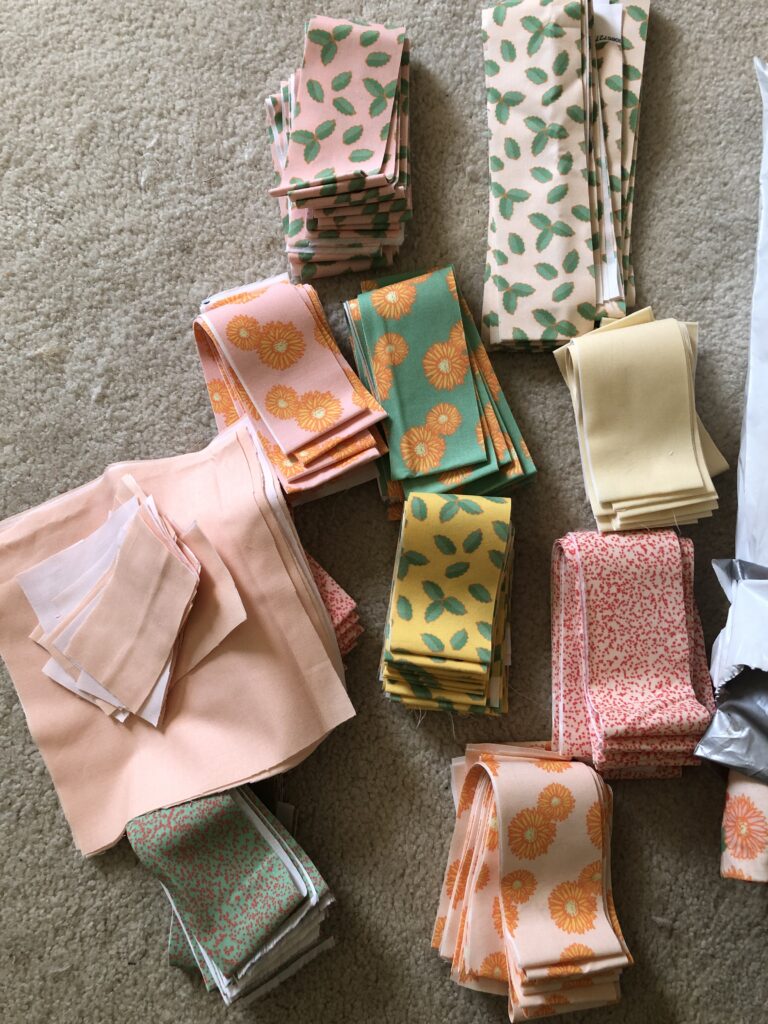
After figuring out how big the finished quilt needed to be, based on the size of the batting that I had bought, I figured out how much I needed of each piece and cut everything out using a rotary cutter and a self-healing cutting mat.
I would completely and without any doubt recommend that you get a rotary cutter if you’re going to be doing this much cutting of straight lines.
I actually couldn’t find my rotary cutter to begin with, so I was using scissors, but I stopped after about 10 minutes when I saw how crooked everything was going to be.
Now I’ll say right up front that I don’t care if things are crooked, and you’ll see that as we go through the pictures of this quilt, but even I want things to start out straight to give me the best chance of having all the seams line up.
So these are the number of strips that you’ll need for this pattern in the size that I made:
- Eight 8.5″ squares of the plain fabric
- Thirty two 4.5″ x 2.1″ rectangles in the plain fabric
- 2.5″ wide strips to sew into panels (I cut 1/2 yards of each pattern into 42″ long strips across the length of the fabric)
- Forty eight to fifty six 5.5″ squares for the inner border
- 8-9 yards of the backing fabric, depending on how wide the outer border will be.
- 96 individual 2.5″ squares (or pieces of the strips)
I tend to buy too much fabric, though, so you might be able to get away with a little less. If you have extra you’ll be able to cut extra pieces if it turns out that you need more of one component.
Start sewing the quilt top.
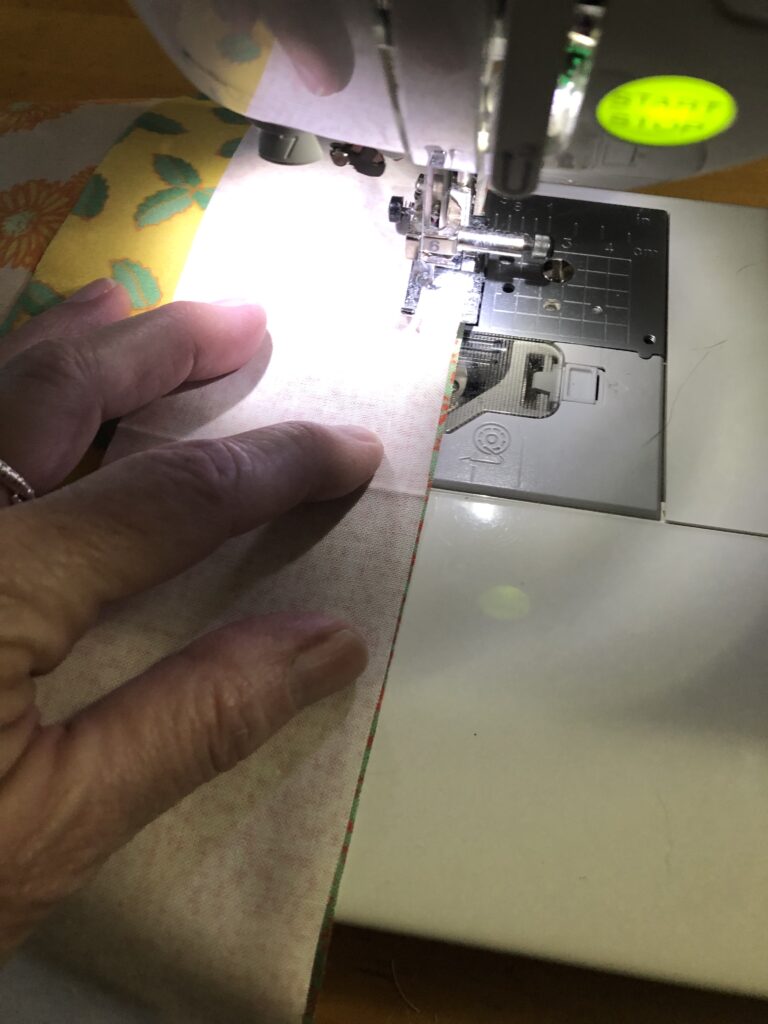
Once everything is cut out and ready to go you can start stitching together all of the longer strips that will make the checkerboard squares in the main pattern.
My goal was to make each square 12 in wide when they were done, but I was sewing the seams a little bit too big, so they ended up being a little smaller than that.
If you do the same thing, it’s fine as long as you’re consistent because the seams of the patterns will line up, but the final square might be a little too small.
That’s not a huge deal, but you might need to add an extra border on the outside if you want the quilt to be a specific size.
That’s what I ended up doing, and it worked out fine, as you’ll see further on.
I figured out how many squares I would need for the main checkerboard sections, and I sewed that many strips together with 6 strips across the width. The fabric strips were 42″ (the width of the fabric) by 2.5″ wide so that hey would end up being 2″ wide after sewing with a 1/4″ seam.
I also sewed some strips together that were only 2 strips wide, because there are some sections that will need a narrower checkerboard.
Iron the sewn panels.
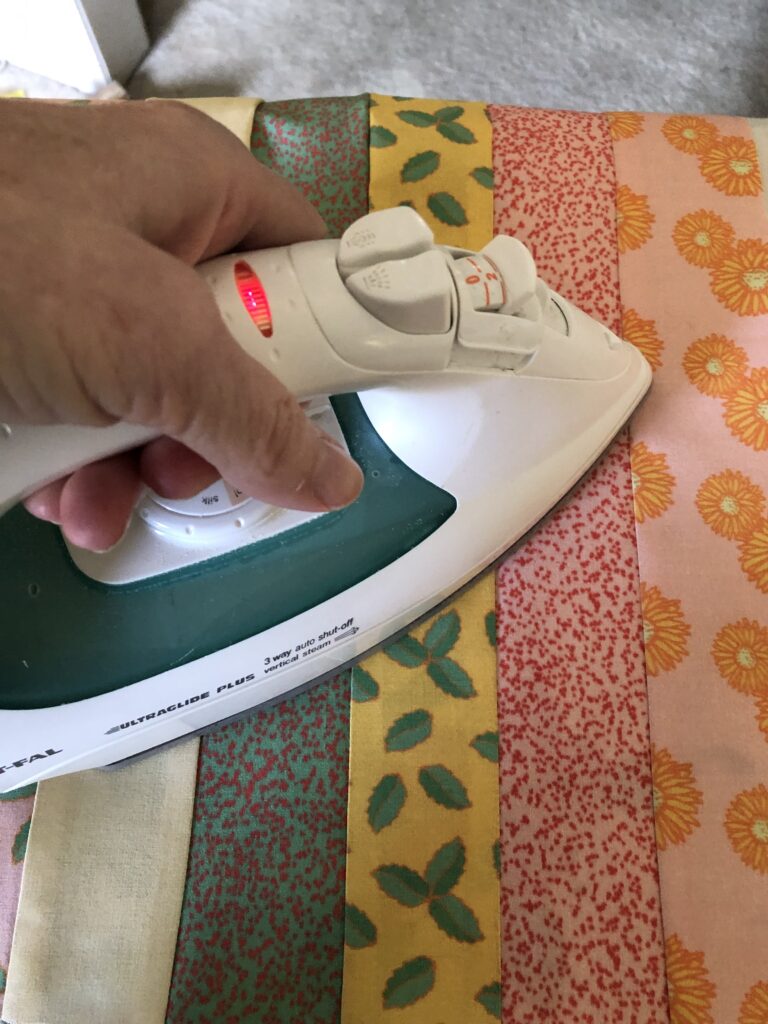
I will be the first to say that I hate ironing more than anything in the world, but it is important to iron the sewn pieces so that the section lies flat when you try to attach it to the next section.
So after you’re done seaming things together, go ahead and iron them so that everything is flat and ready to match up to the next piece.
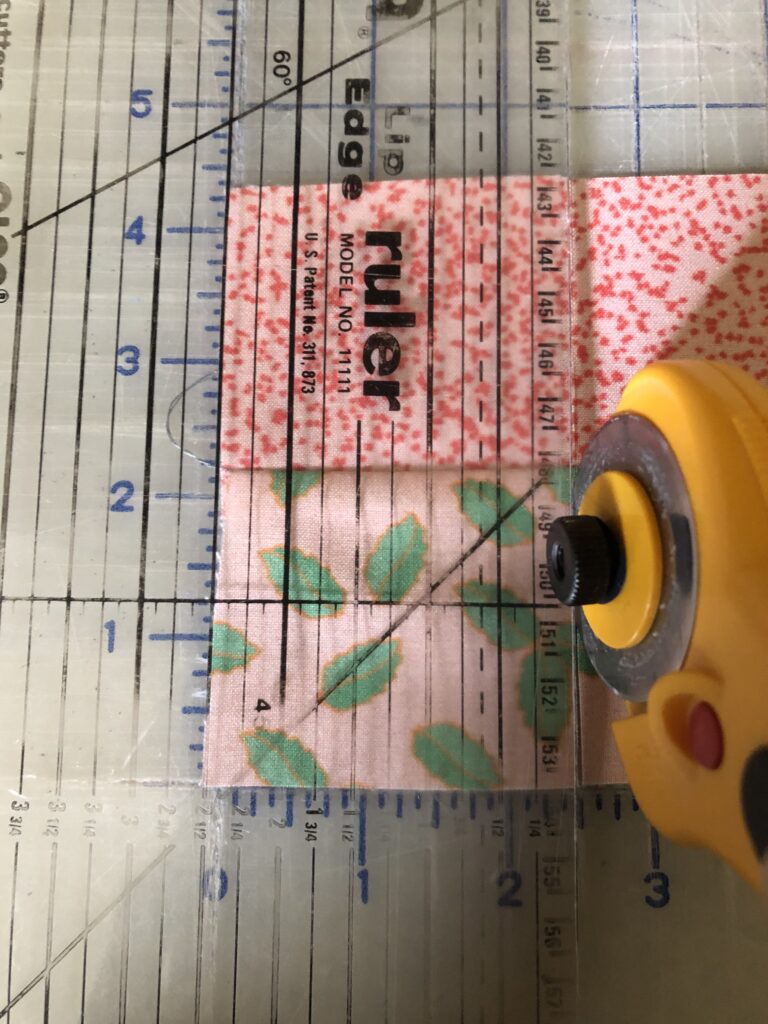
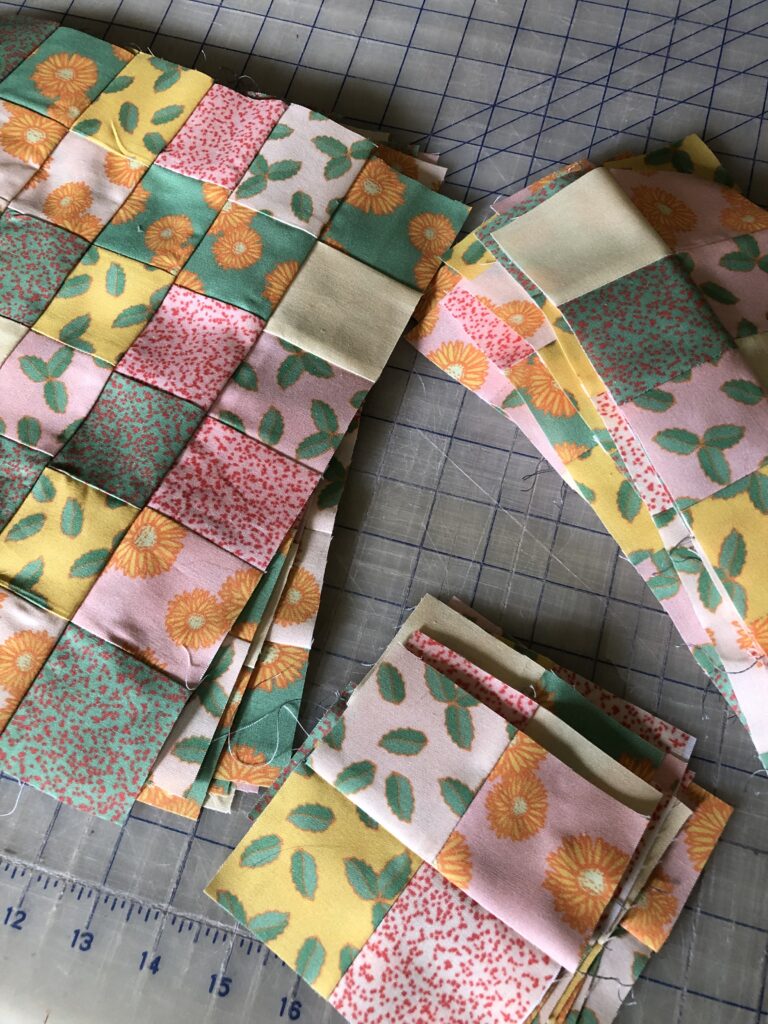
Cut the panels into more strips.
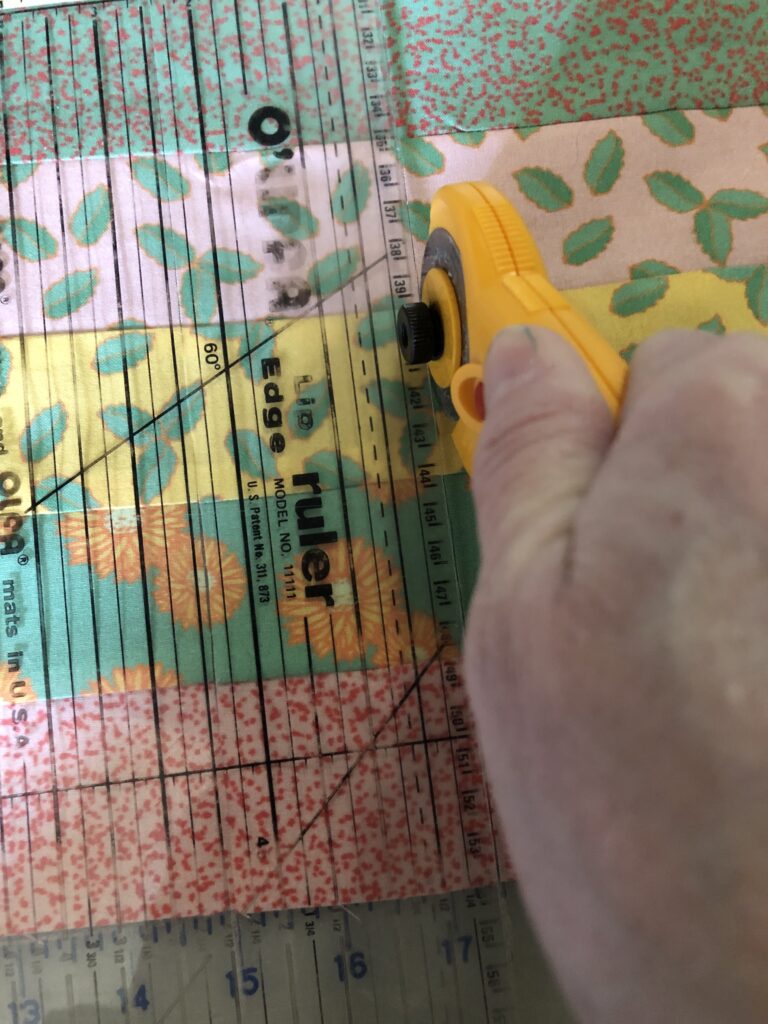
After ironing the strips that were sewn together, I went ahead and cut them into 2 and a half inch wide strips, cutting at a 90° angle across the sewn part.
Those are going to be sewn together to make the larger checkerboard sections in the main part of the pattern, as well as the checkerboard border that goes in between those sections.
The larger pieces will end up being thirty six 2″ squares total, arranged in 6×6 2″ squares.
The 24 checkerboard inner borders will be 6 squares x 2 squares.
I mentioned that I also sewed some strips of 2 pieces together, and I went ahead and cut those out also to make the small pieces that will go in between the longer sashing strips and the main squares of the pattern. You’ll need nine of these little squares total.
You can put the inner sashing together by making 1 super long strip of a checkerboard, That’s what I ended up doing, as you’ll see in a bit.

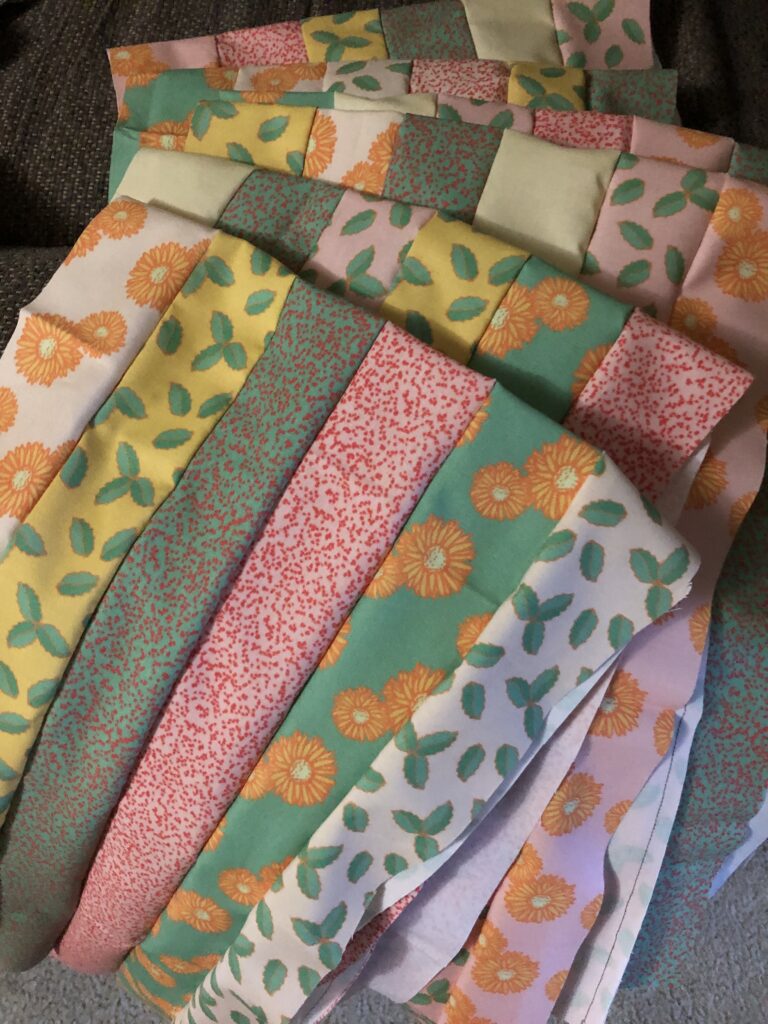
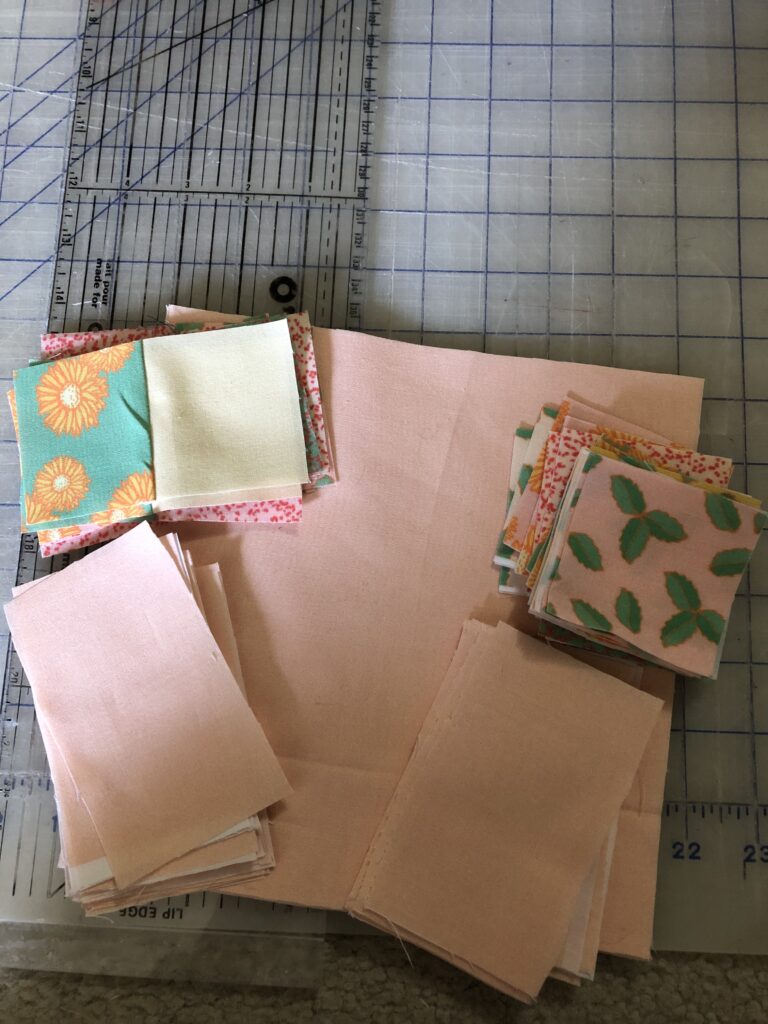
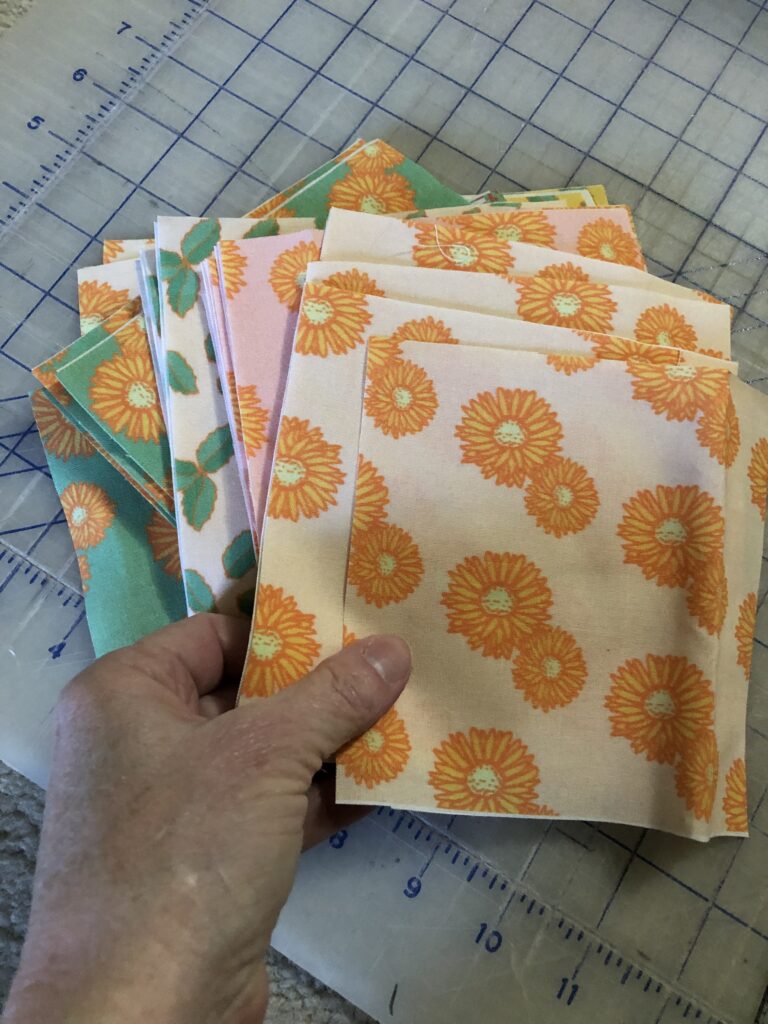
Here are the strips that are cut out and ready to go.
Sew the strips together to make the main checkerboard sections.
I then took 6 strips and sewed those together to make up the checkerboard sections that will be in the main part of the pattern.
For that you need 48 strips that you’ll sew together to make eight squares that are the main checkerboard sections.
The checkerboard pieces should all be made from the smaller squares, and you’re going to have 8 that are the largest size, 9 that are a 2×2 square, and 24 that are strips of 6 but only 2 rows wide.
When you’re done, they’ll be ready to assemble when you put the main plain square sections together.
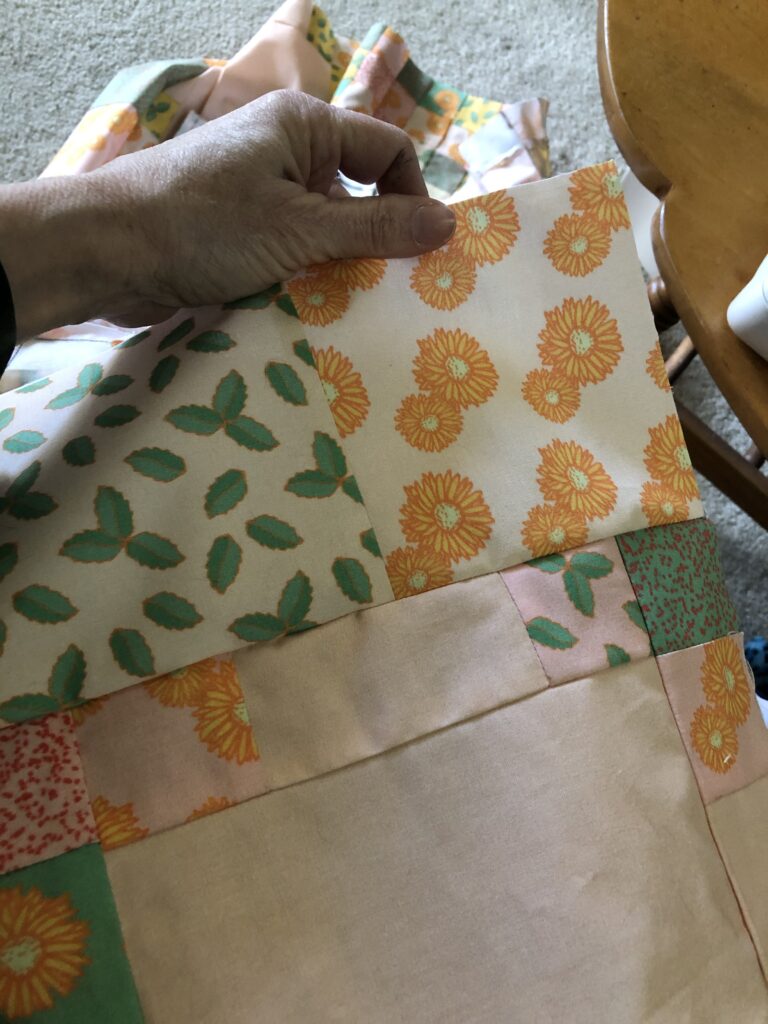
Make the main pattern squares.
Next is to make those main plain square sections.
This will give you a large open area to do a quilted pattern on if you want to do that, so that will be the focal point of the needlework on the quilt when you’re done.
These sections are made up of a combination of plain fabric and the same patterns that made up the checkerboard, in order to give the impression that they’re a stairstep-type pattern.
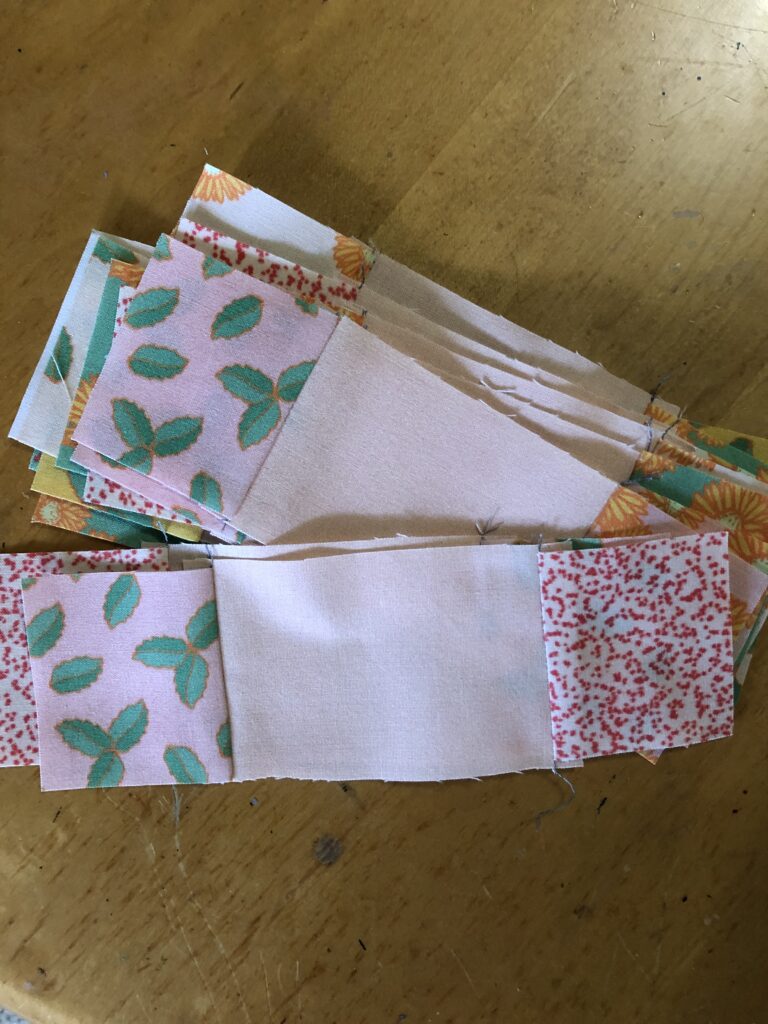
Cut 96 2.5″ squares in the different patterns to attach to the plain rectangles, or you can use some of the 2″ wide strips and 32 of the single squares.
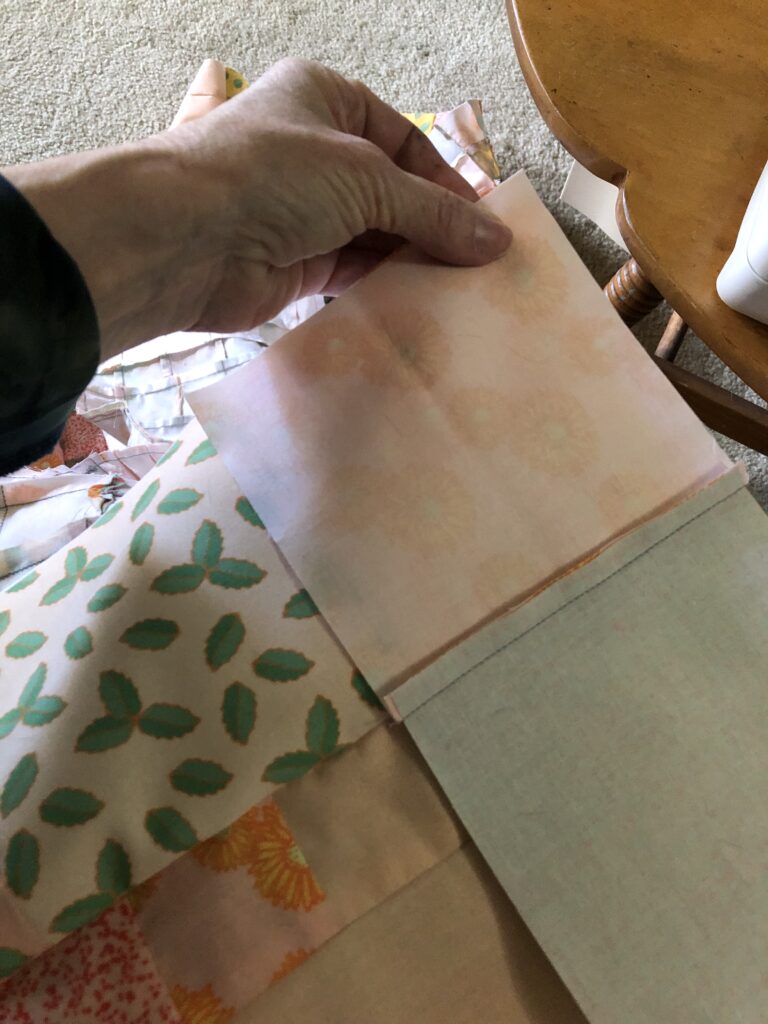
Take the 4.5″x2.5″ plain fabric rectangle and sew the 2.5″ squares to the ends.
Then take half of those strips and sew an extra piece of fabric to them to make it 2 little sections on the end of the larger section in the middle. Another way would be to sew one square to half of the rectangles and the double square to the other half.
You’re going to need 4 strips per large center square to do this. So if you have 10 of the large center pieces that you’re going to be making, you need 20 of those smaller strips that have the plain section and 2 on the ends, and 20 of the smaller strips that have the plain section and 1 square on each end.
For the quilt that I made, I had 8 of the plain squares, so I made 16 of the shorter rectangles and 16 of the longer ones.
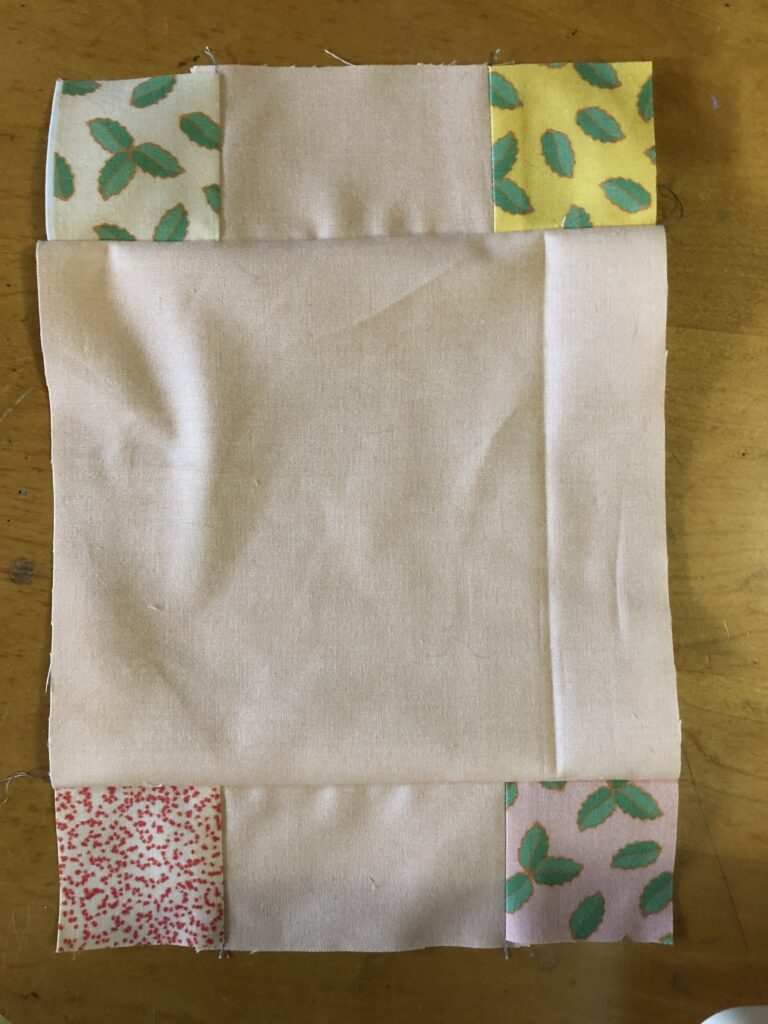
Sew one of the smaller strips on each end of the large plain fabric peace. Leave the other side open because you’re going to have to put the longer double strip on that side to match up to the extra length you just added to the square.
Now take the pieces that have 2 of the small patterned pieces and sew that strip on to that long and of the plain center piece.
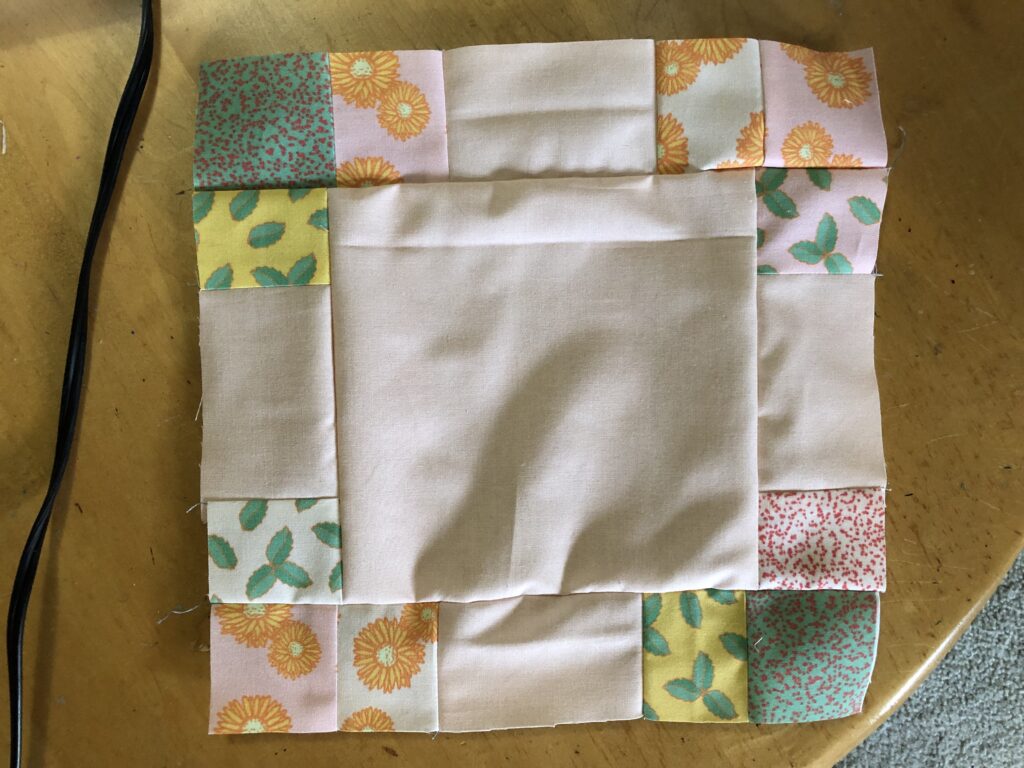
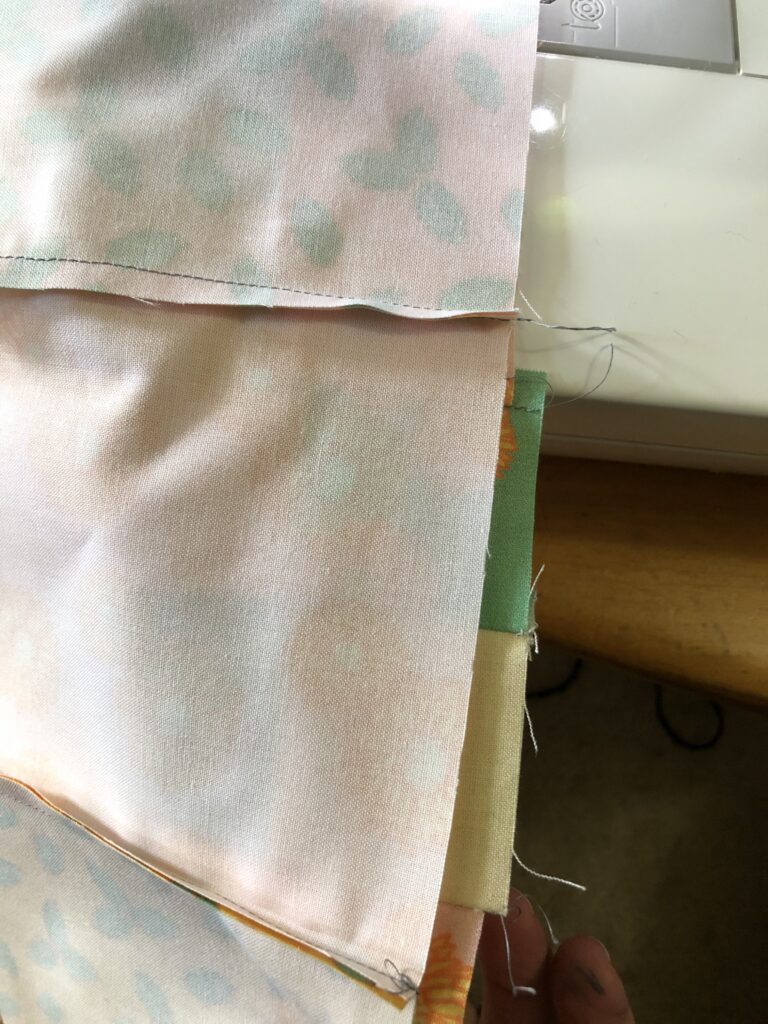
As you can see here, my pieces are not completely square, and it doesn’t matter.
If you’re the kind of person who has to have everything super even, I would suggest that you’re very, very careful with the seaming that you do to make sure that everything is perfectly even.
If you don’t, it will drive you crazy if that’s the kind of thing that bothers you.
I personally don’t mind. If my quilts are a little wonky it’s okay, the overall effect is always nice, and it doesn’t bother me.
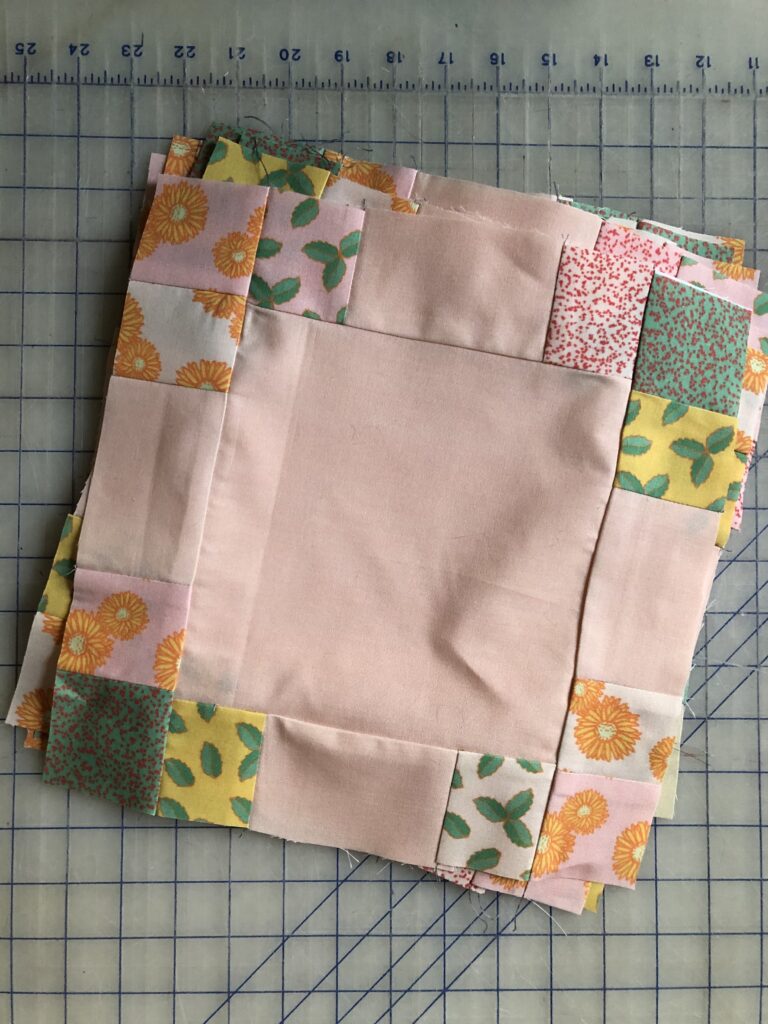
When you’re done with the number of squares that you need, iron them and make them as flat as you can because this is a part where you do want them to be as square as possible.
I don’t mind if things don’t line up perfectly, but I do mind if the quilt itself is a little uneven, because that will affect you when you do the final quilting and put everything together.
Square off the main squares.
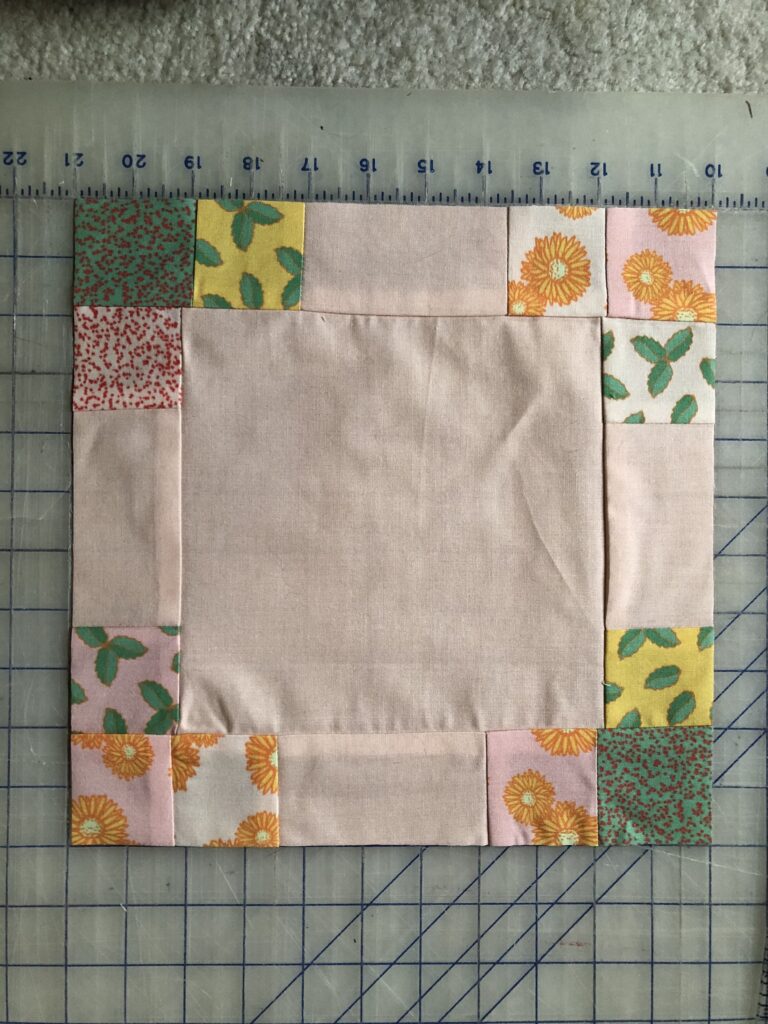
After ironing the squares, what you’re going to do for these center squares and for the checkerboard ones is to square them off. I had intended for mine to be about 12 in square, but I made the seams too big, so they ended up being a little over 11 in.
That’s fine, as long as everything is the same size they’ll all go together fine, but the final quilt is going to need the extra border to add some width to it to make up for the smaller center squares, like I mentioned earlier.
But anyway, square off the squares including the checkerboards and the center medallion pieces so that they are as square as possible and consistent sizes.
Now that you have all the pieces assembled, you can sew the quilt top together.
Sew the pieces together to make the quilt top.
The way that I did this was to sew 2 pieces of the checkerboard, 2 pieces of the main squares with the plane square center, and 3 strips of the sashing checkerboard in between those.
I was making my quilt top 4×4 of the larger squares, basically, so I made 4 strips like that.
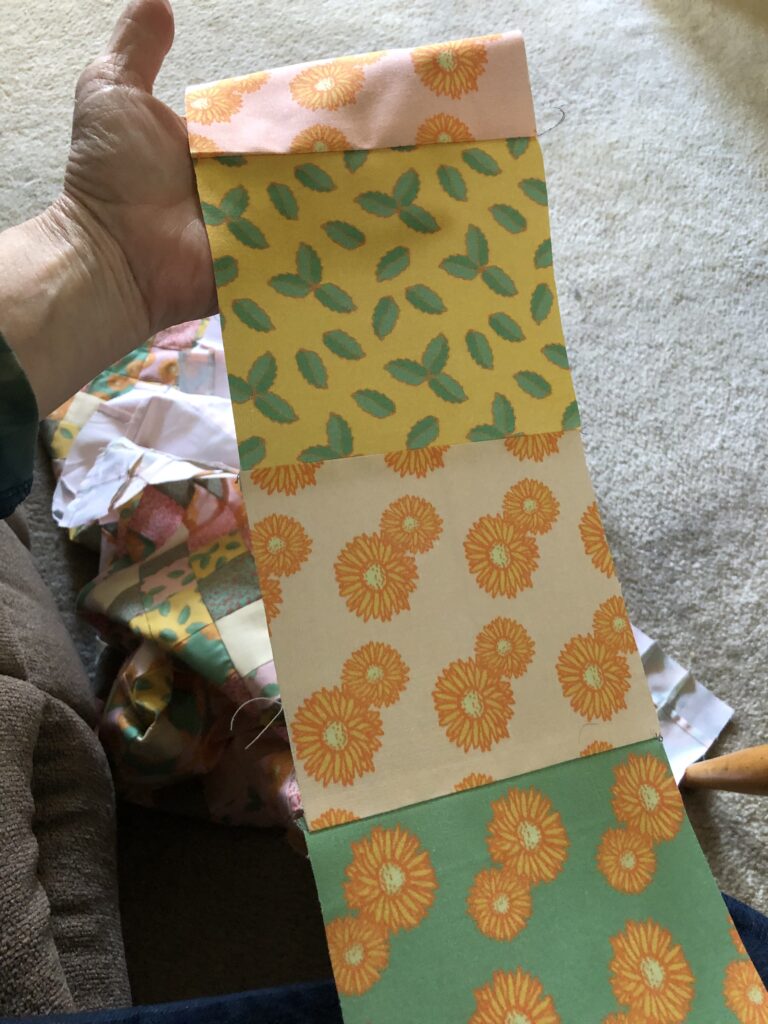
The little squares all run together, but if you look closely you can see that the strip is made from a plain square, a sash strip, a checkerboard, a sash strip, and it continues alternating like that.

To make the sash that goes between those large strips, you sew the sashing strips that are longer together with the 2 little square ones, and you make 1 long strip.
That’s going to go in between the rows of the main patterns that you made with the larger squares.
Sew the rows together, alternating so that the plain squares match up the next time with the checkerboard square.
Put the sashing strip in between each of those rows, and when you’re done the whole thing should be a large square piece made up of alternating pattern squares and smaller checkerboard sashing strips.
The sashing in between the larger squares plus the sashing strip between the 2 strips of larger squares evens the size out.
And if you make sure that you’re lining up the quilt squares in an alternating way, it will create a look like the checkerboard is continuing around and on to the next row.
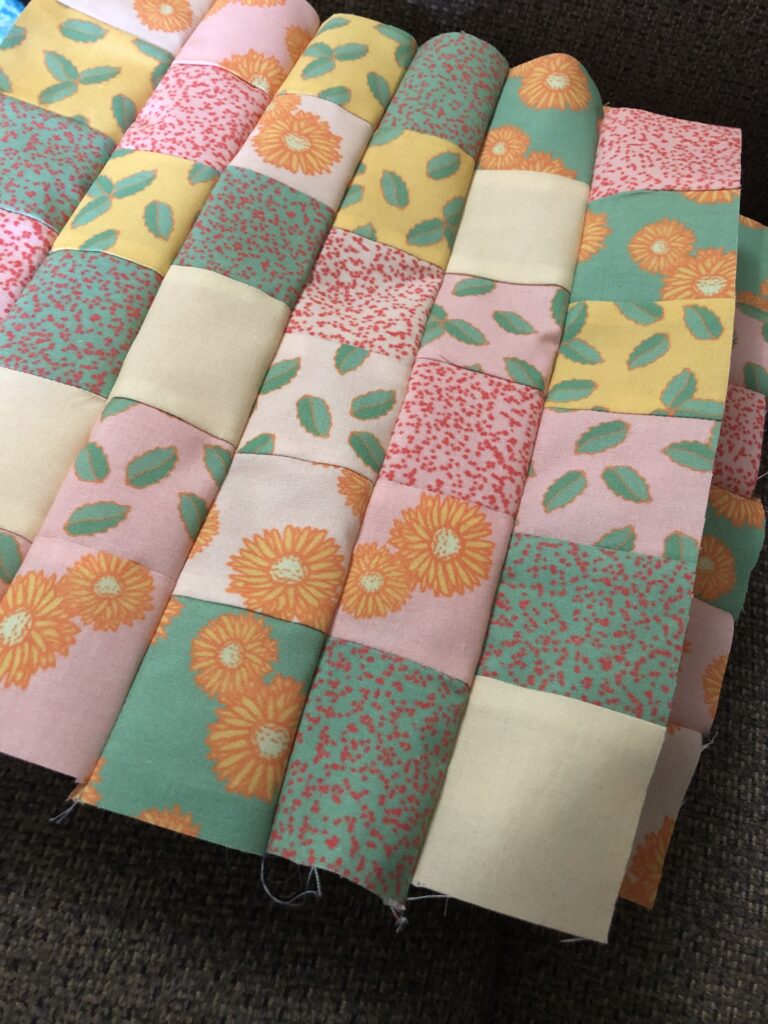
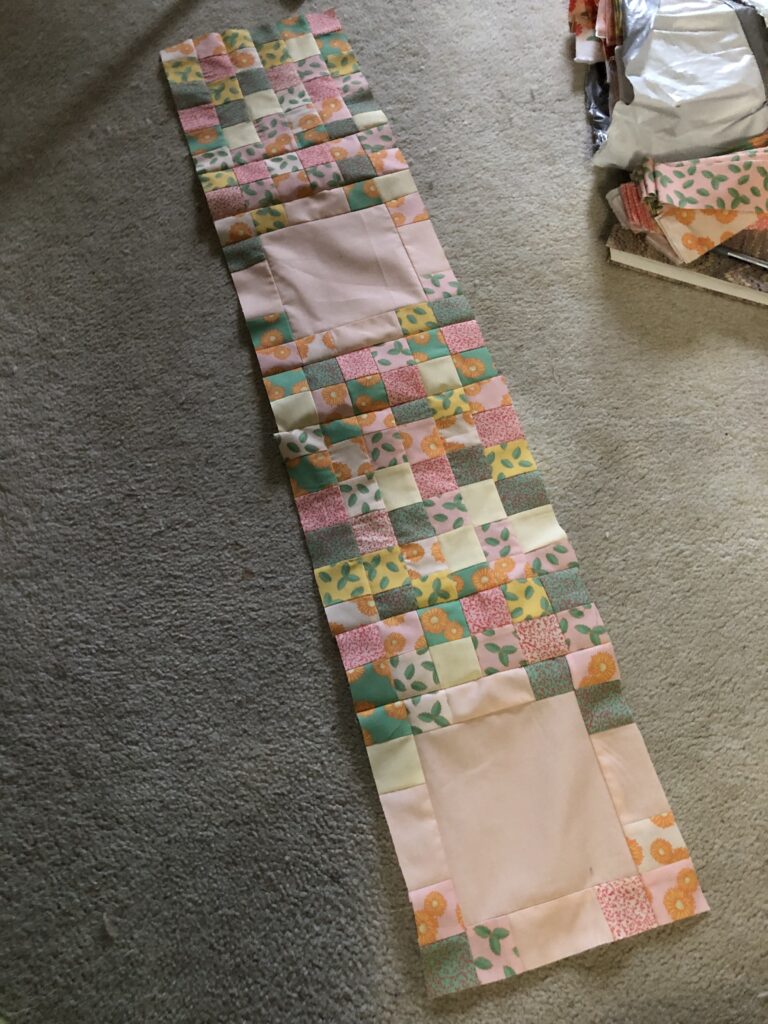
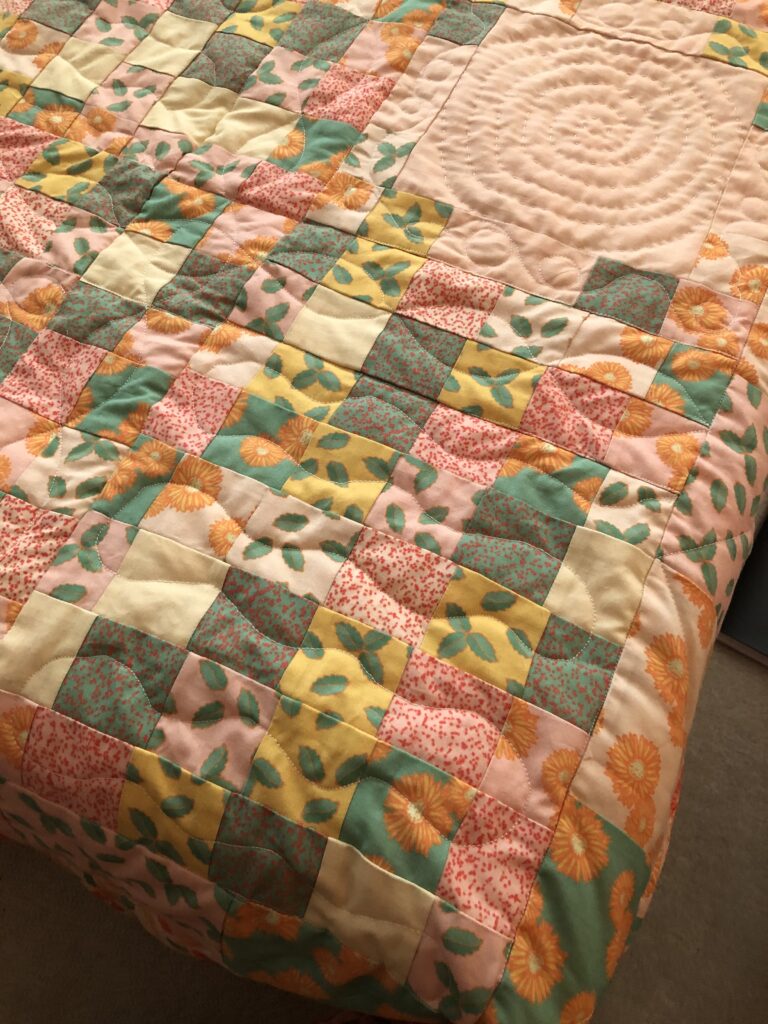
Here’s the main part of the quilt top after I pieced all of those sections together.
You can see that it’s not even with the tiny squares, and that a lot of them don’t line up perfectly, but that’s okay.
Because those pieces are patterned, it’s not super obvious unless you really look at it, and I’m just going for overall effect and for something to put in this one specific bedroom.
This is a nice pattern if you have a lot of scrap fabrics and you can make one that looks like a crazy quilt, or you can keep it more monochromatic and have it look more blended.
You could also do a crazy quilt effect where the checkerboard is, and I might actually try that, because this is a pretty simple pattern to piece together since it’s all right angles.
Making a crazy quilt square section in the larger sections, plus a crazy quilt sash section, might be really interesting visually for another project.
Sew the borders onto the quilt.
Since this did come out smaller than I expected, though, I decided to put a double border on it to make it bigger overall on the top of the quilt when it was finished.
I cut out a bunch of 5.5″ square pieces of the patterned fabrics and I sewed those together with quarter inch seams so that each one would be 5 inches wide when they were all seamed together.
A 5-in wide border going all the way around the quilt will add 10 in total to the width and the length of the quilt.
Sew the squares together and make a long border strip that’s the same length as the edge of the quilt.
Since I didn’t square off the main part of the quilt, I did run into places where some of the edges were uneven.
That’s easy to fix, just sew straight across and line up the seam with the 2 pieces on either end of that one that sticks out.
Or you could just cut off that piece that sticks out and have everything lined up correctly.
I did the first border the same way as I did the little borders on the main section pieces. I sewed one border along one side, then another border along the side opposite that side, and then I sewed the other 2 sides on.
When you sew the last 2 sides on, you’re going to have to add an extra square on either end to make up for the extra length that the border created when you added that to the first 2 sides.
After I added the first border, I cut two 10-in wide strips of the main fabric that’s going to be the backing, and I sewed that all the way around the entire quilt so that there is an extra 20 in of width and length total.
The final width and length of this particular quilt ended up being 85 inches square, so that’s pretty close to the size of the batting that I had, which said it was 90 x 108 for a full-size bed, if I remember correctly.
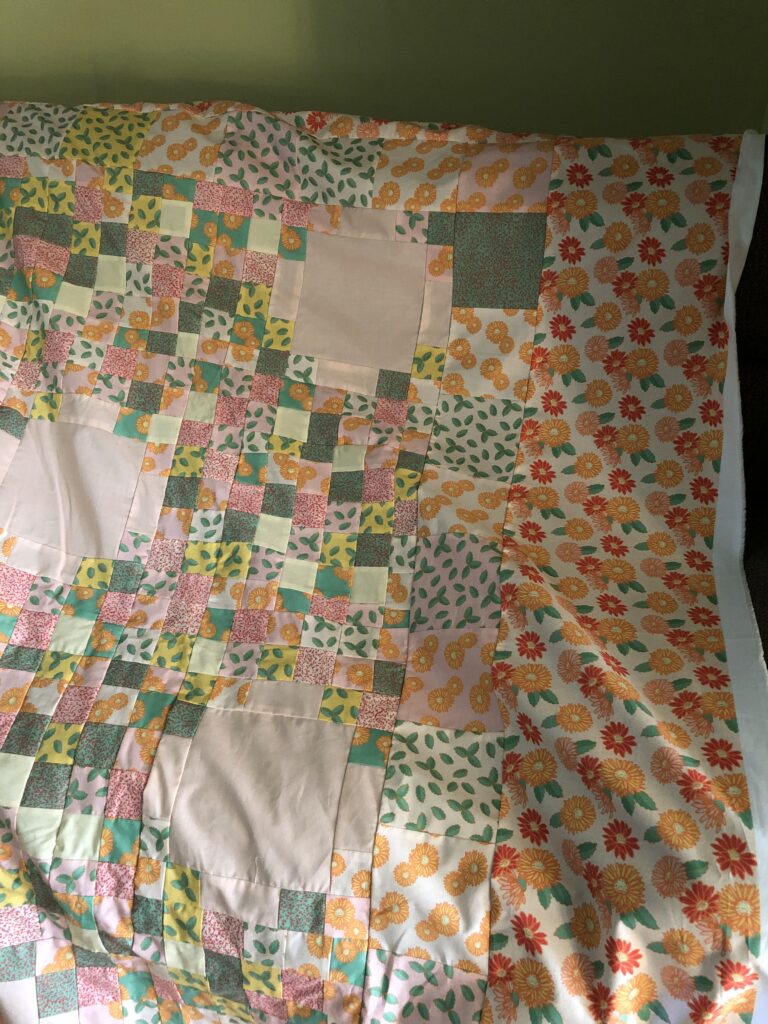
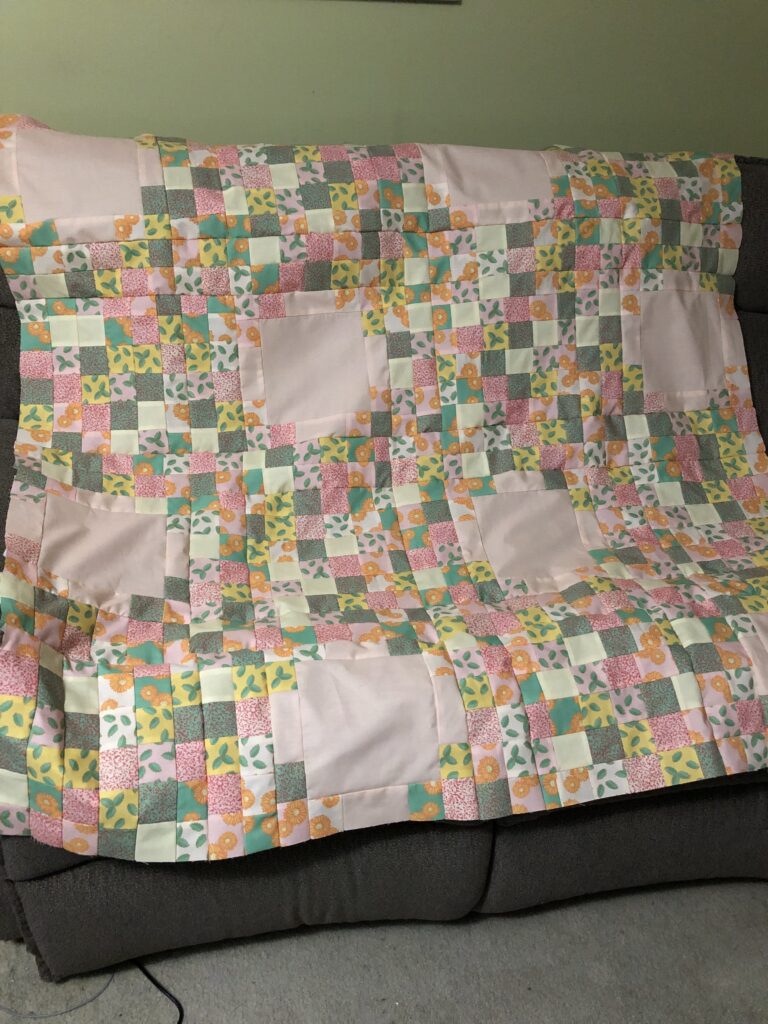
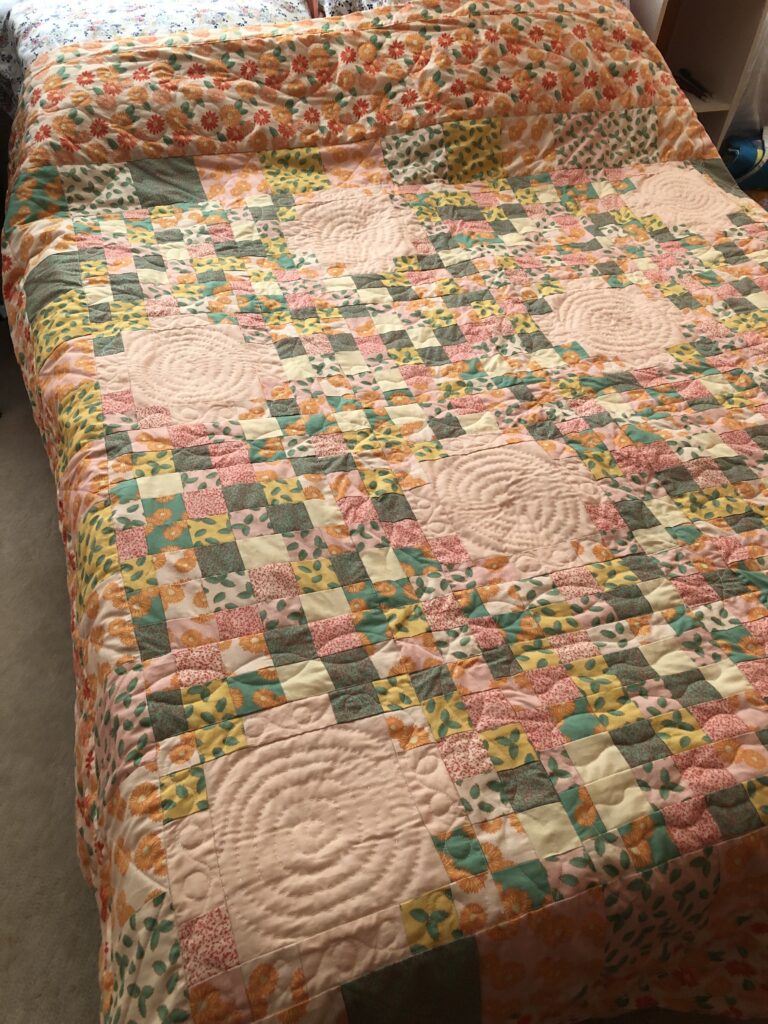
Here’s a view of the main part of the quilt with both borders on the right hand side. If I had just gone ahead and done an extra wide border with the main fabric that’s also going to be the backing, I think that would have been too much.
The main fabric for this has all of the colors that the other patterns have in them and elements from the patterns are pulled from the main fabric.
But it’s interesting how the patterns look a lot pinker in the main part of the quilt then they do on the border fabric.
Anyway, I think it will work in that bedroom that has orange walls, and the width is going to work with the bed that’s in there now.
Put the quilt layers together.
The next step is to make the backing of the quilt and then layer everything so that you can get ready to do the actual quilting.
A quilt has a backing fabric, a batting center, and the top of the quilt, which is the piece that I just made by piecing everything together.
I cut 3 continuous 2.5 yards length pieces of the backing fabric so that there would only be seams going down the length of the quilt.
If you can get a backing fabric that is just as large as the quilt itself is going to be when it’s done, that will work too, and it will avoid having any seams on the back at all.
You can do that by getting a bed sheet to use as the backing fabric, but I wanted to use this fabric that I had designed specifically for this project, so I did have to seam 3 pieces together.
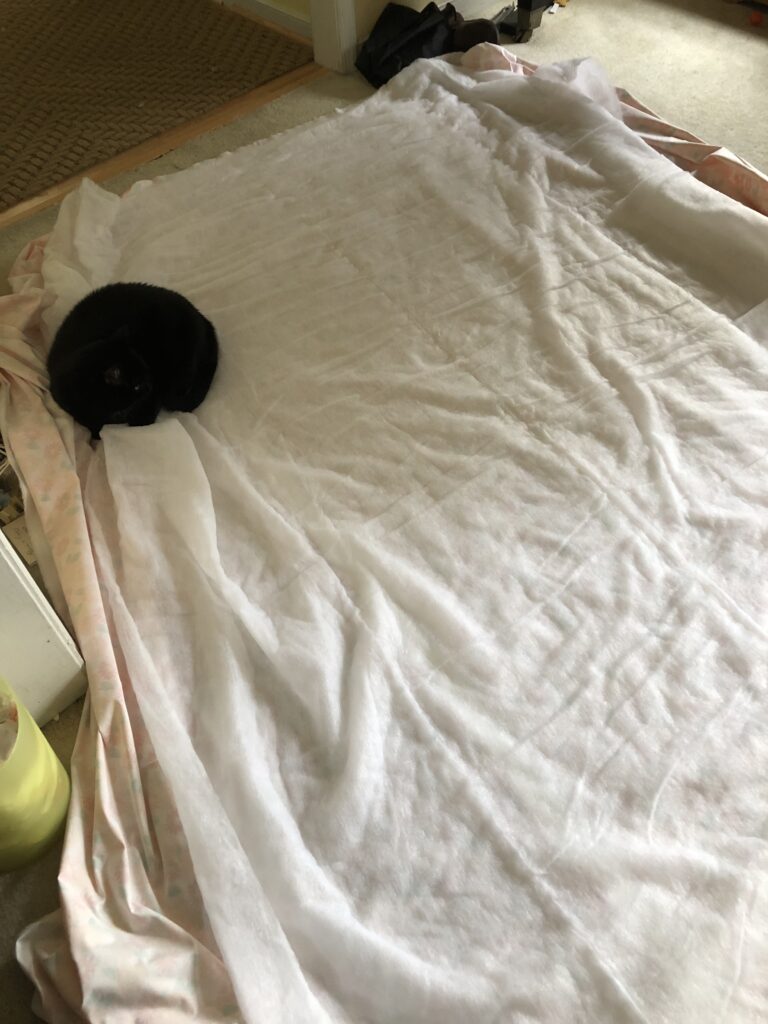
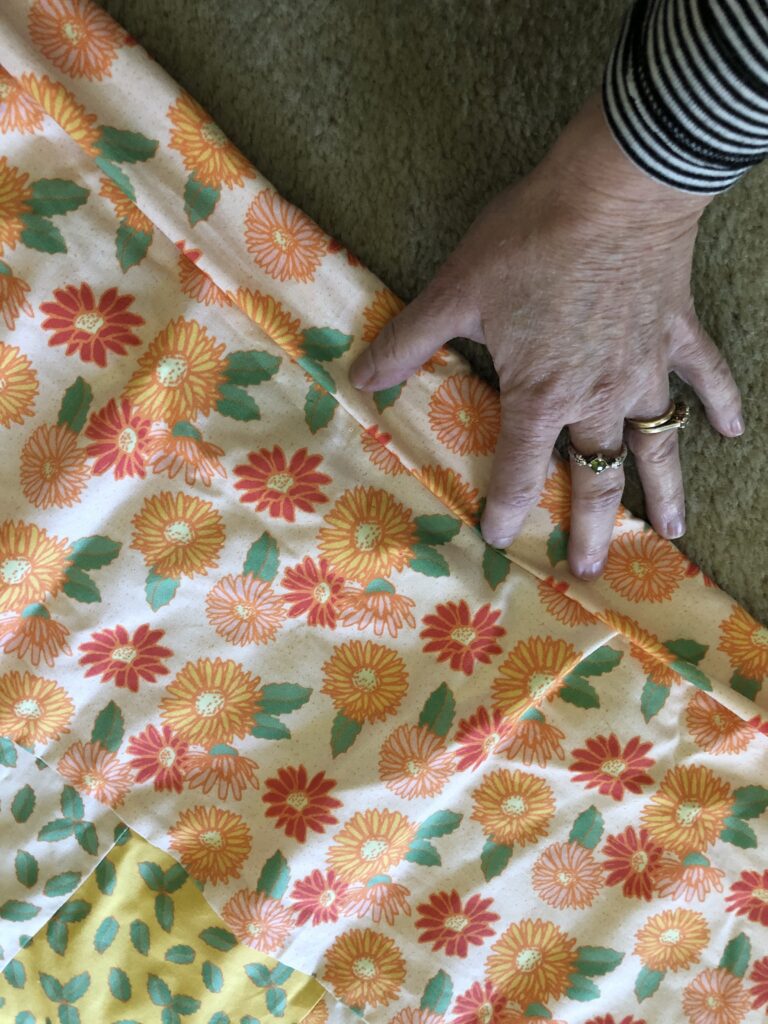
After I stitched it all together, I ironed the seams, then I laid it flat on the ground with the pattern facing down and put the batting on top of it.
The easiest way to do this is to start at the center of the fabric and unfold the batting so that the center of the batting matches up to the center of the fabric.
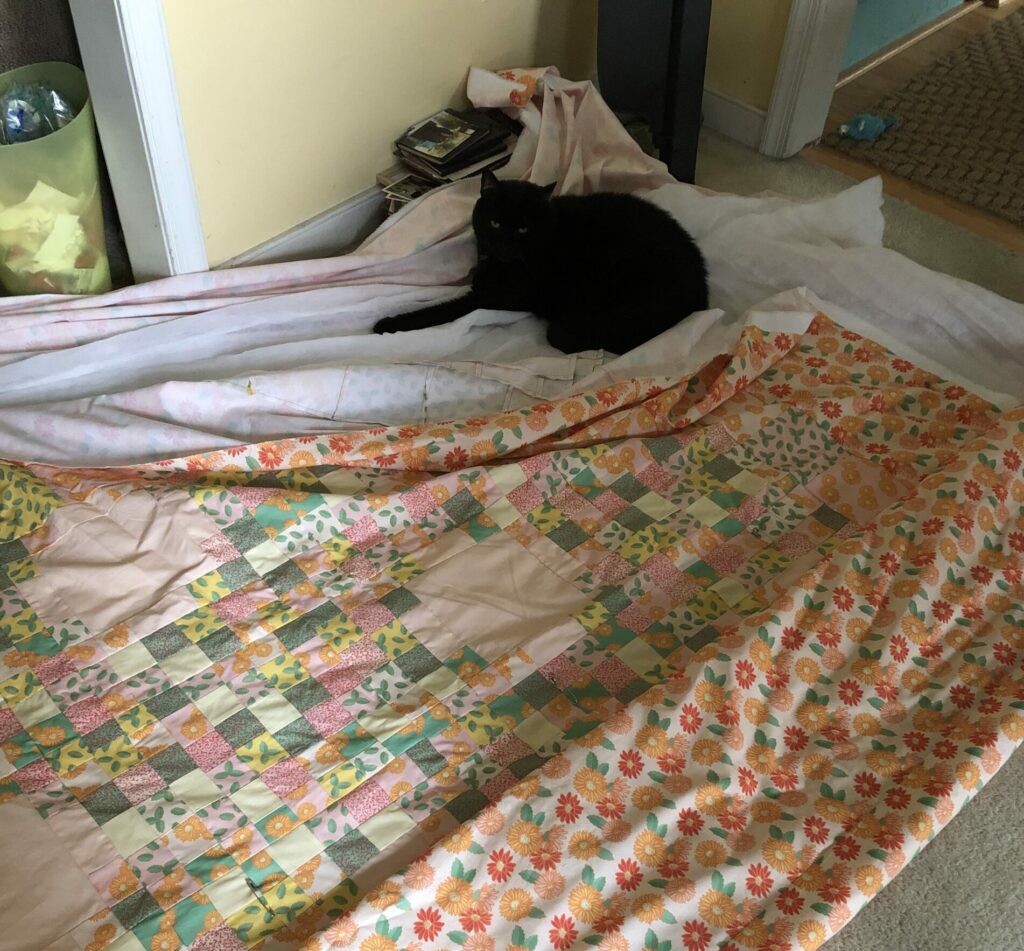
Naturally, my cat who is obsessed with sitting on anything that I’m working on came over to sit on the quilt, but that’s okay because I could work around him.
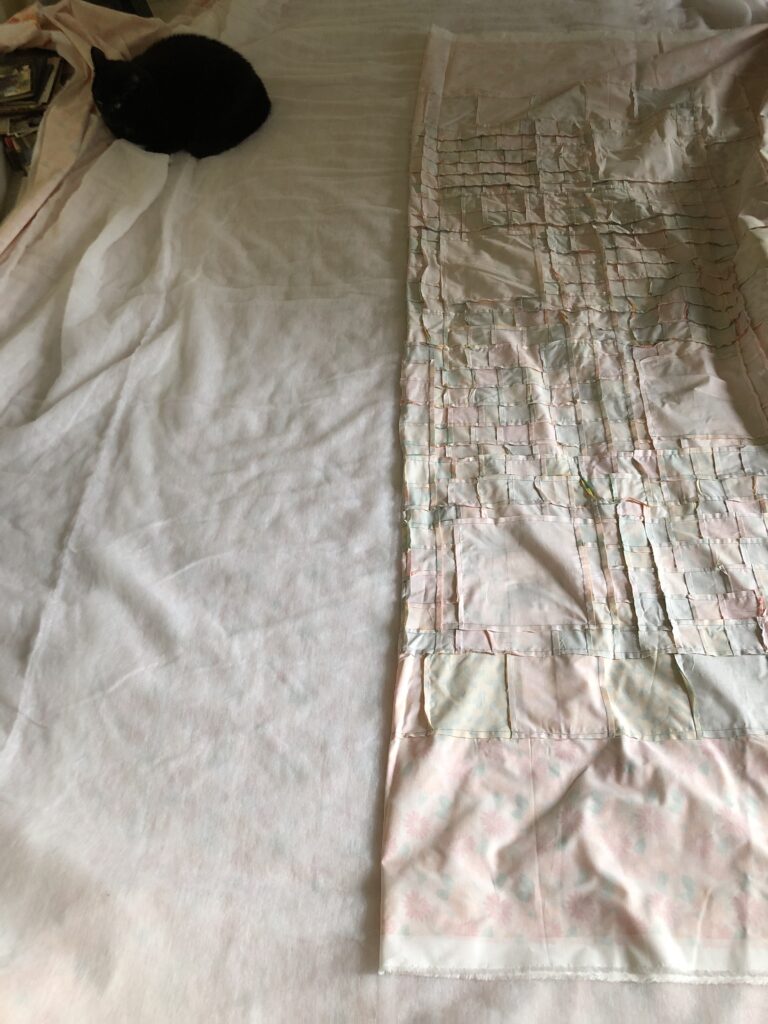
Once I had the backing and the batting laid out, I took the quilt top and I folded it in half, then I laid that center seam down on the center of the backing fabric so that everything would be square.
I then unfolded the quilt top so that it covered the batting completely, and it created a 3 layered quilt.
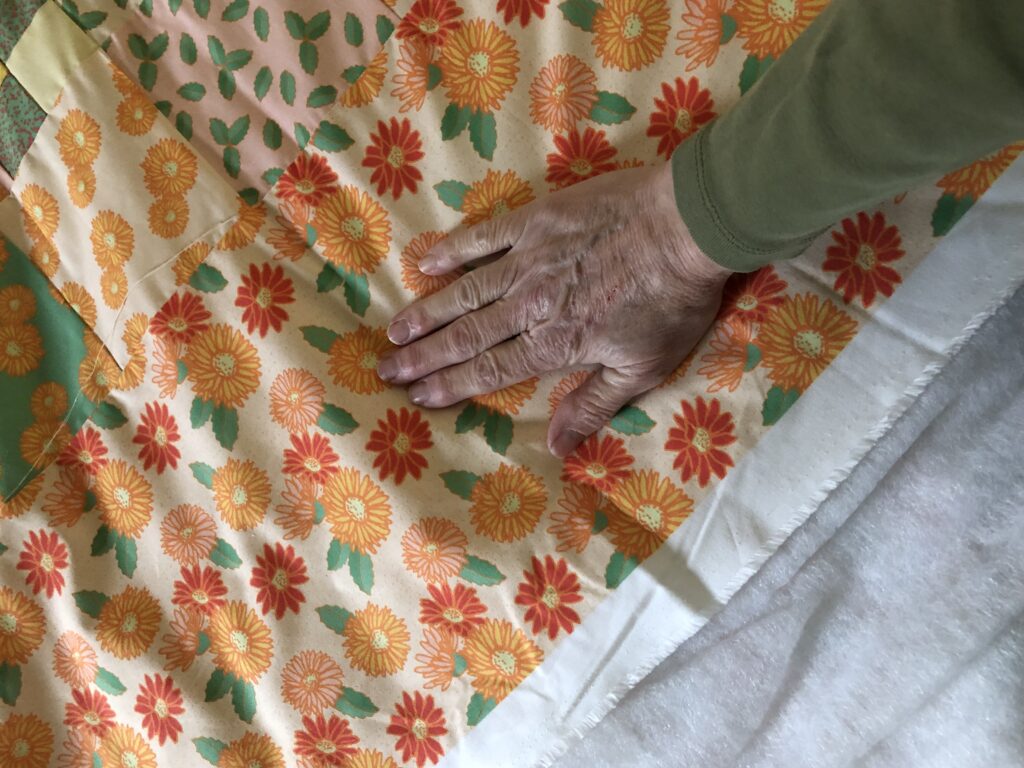
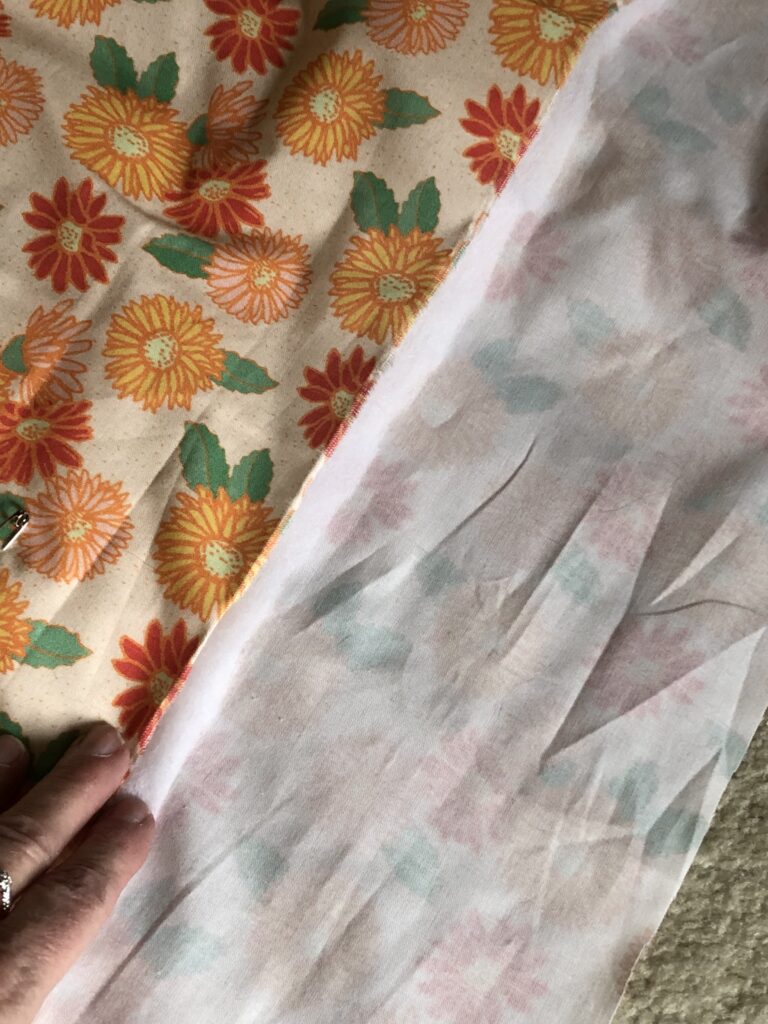
So here you can see the backing of the quilt (facing down because you’re going to want the pattern to be facing out,) the batting (which is the layer between the 2 pieces of fabric,) and the quilt top, which is the piece with the orange flowers on the right.
This makes your little quilt sandwich and when you have that already you can go ahead and pin the 3 layers together so that you can start the quilting process later.
Now this is a part that I do want to get even and unwrinkled.
You want to make sure that when you’re pinning the fabrics together, everything is smooth. If you don’t, you might end up with big wrinkles and bunched up fabric on the back of the quilt as you’re quilting it, and that’s going to be a problem if you want the back to be smooth.
If this is the first quilt that you ever made don’t worry, because you’re going to have mistakes. You’ll still be able to use the quilt on your bed, and you will still enjoy it, and it will still look nice.
It’s not a big deal if there are some bunchy places and it’s not perfect. There’s an old saying the quilters say that’s “Only God can make a perfect thing.”
A lot of quilters who are super, super precise and professional, still make one square incorrectly somewhere on the quilt in order to prevent it from being perfect. I personally think that’s kind of charming, and you know, as long as you have fun making the quilt and you can use it later it’s okay if it’s not 100% perfect.
But even knowing that, you do want to make it as smooth as you can when you’re layering the three pieces. So as you’re pinning the quilt pieces together, smooth it out starting at the center and work your way out to the edges so that you can kind of make sure there’s not a big fold on the back that you’re going to catch by accident.
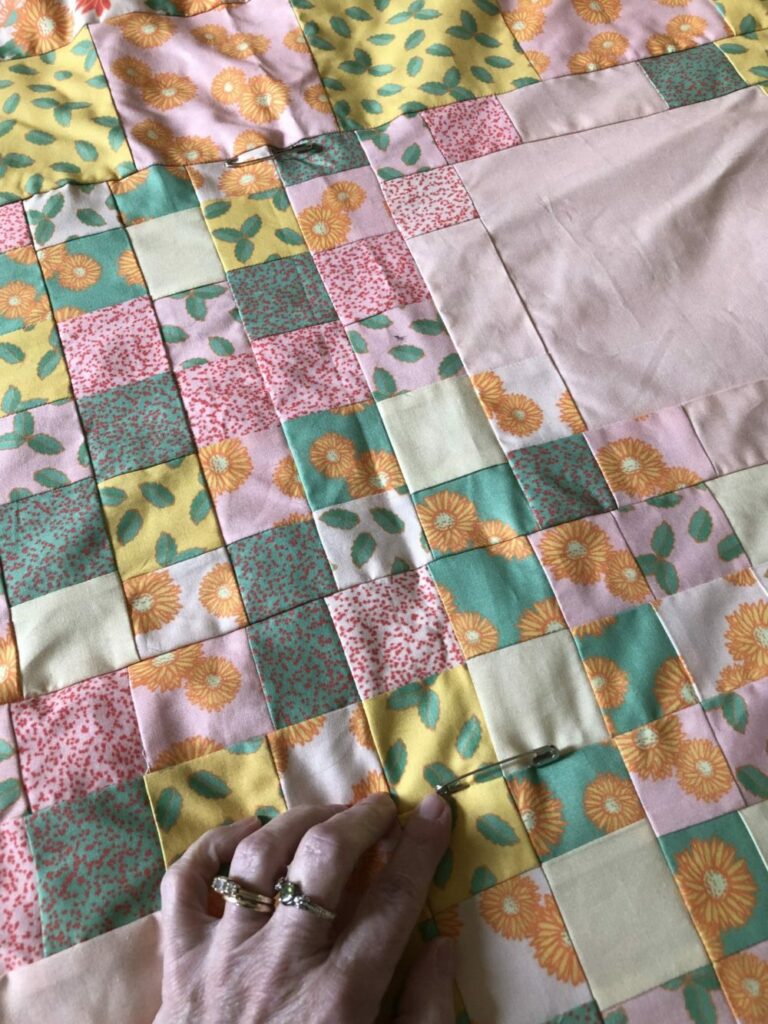
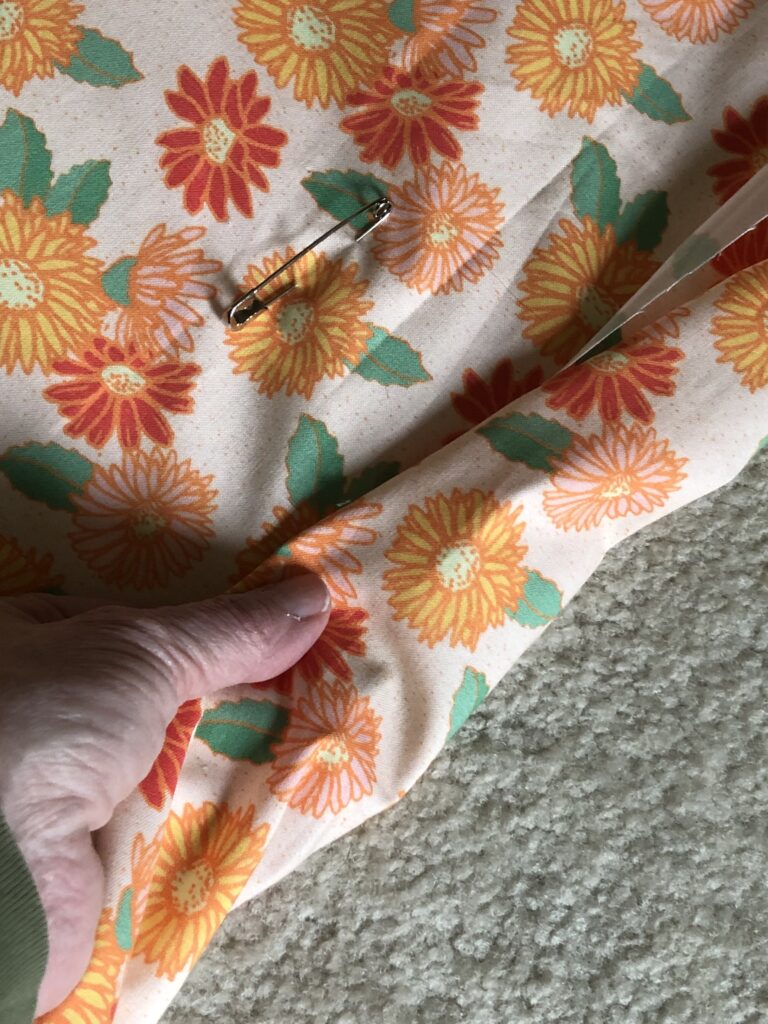
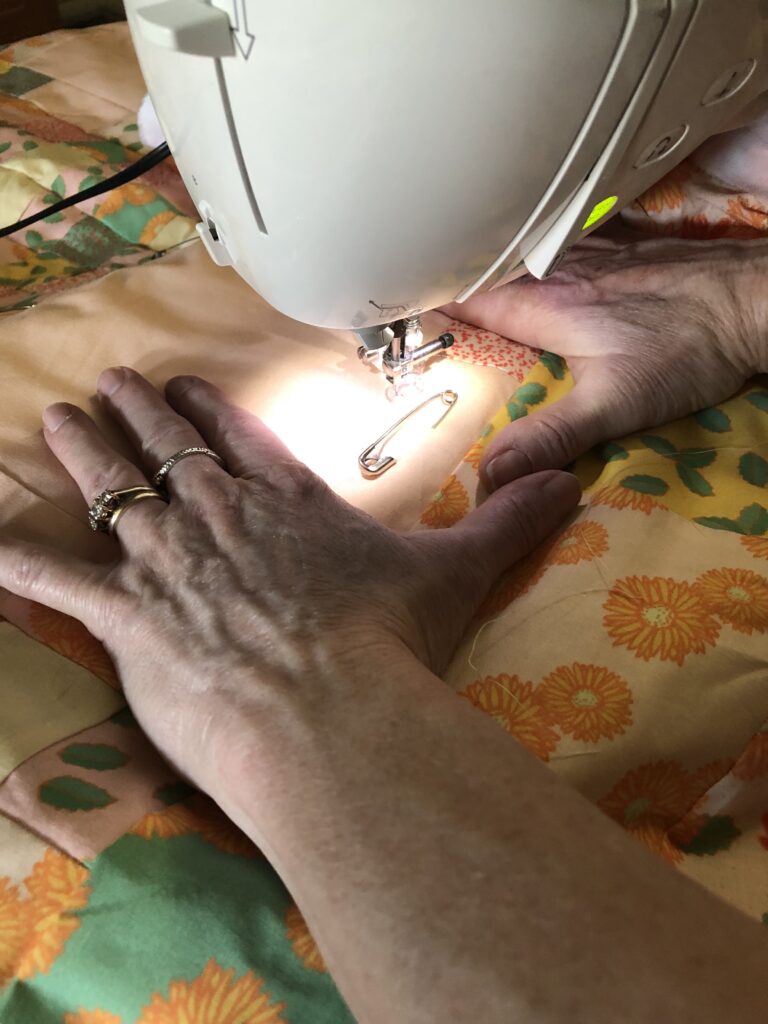
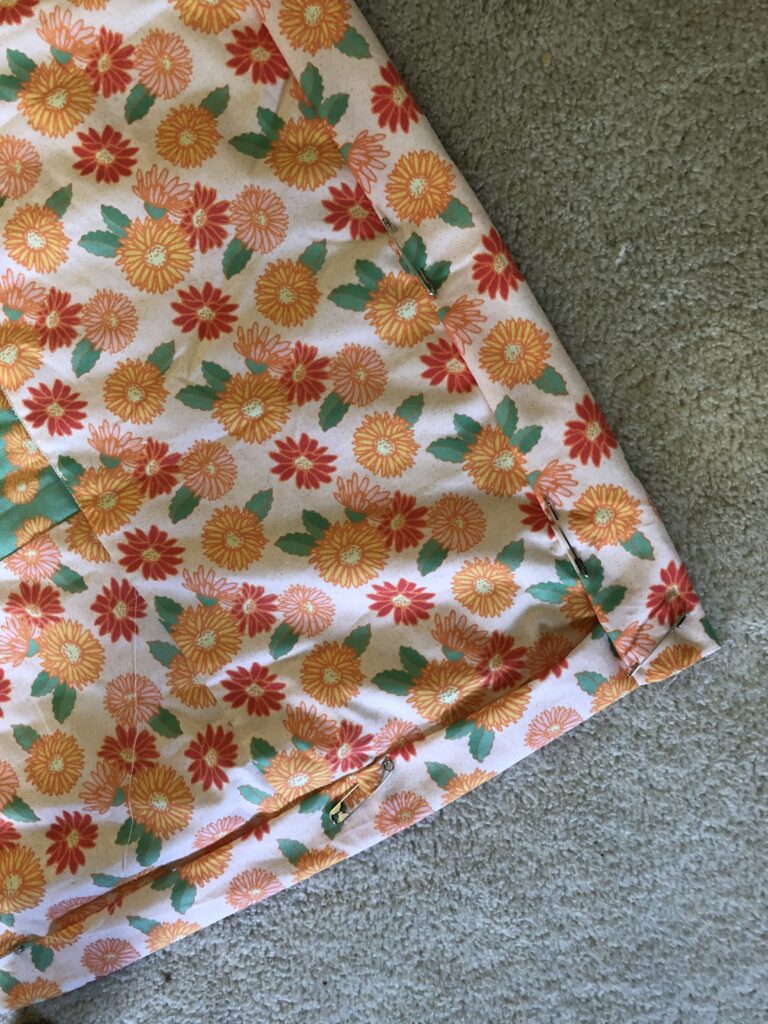
I started in the middle of the quilt and put a safety pin through the top batting and backing about once every 12 in.
If this is the first time you’re making a quilt, you might want to do it more frequently than that, but I’ll probably get my quilt frame out that is a larger piece that allows me to stretch the quilt and make sure everything is smooth as I’m going.
Because of that, I don’t need to worry about it being perfectly smooth right now, but I do want to get it pinned together so that I can move on to the next step without things sliding around.
Here’s a few of the safety pins going through all 3 layers on the back of the quilt.
You want to be sure that you do secure the whole thing and you don’t miss a place, because then you might have things shifting around.
Work your way from the center out to one edge, and then go back to the center and work your way out to the other side.
Smooth things down as you go so that you prevent wrinkles from forming on the backing.
The room I was working in wasn’t wide enough to have that full floor space to open the whole quilt up, so I folded the side that I had pinned and pulled the quilt to smooth out the second side when I was ready to do that.
This meant that I had to have the cat move and he was mad about that but too bad.
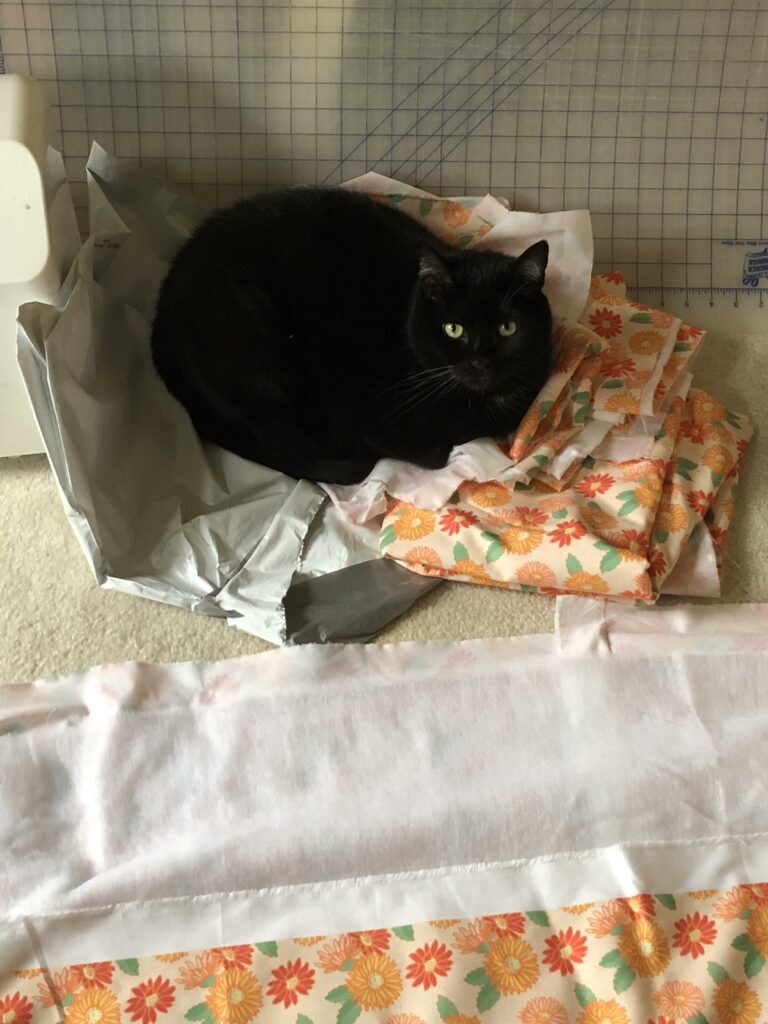
He walked over and sat down on the uncut fabric and gave me a dirty look for a while.
Trim off the edge of the quilt batting.
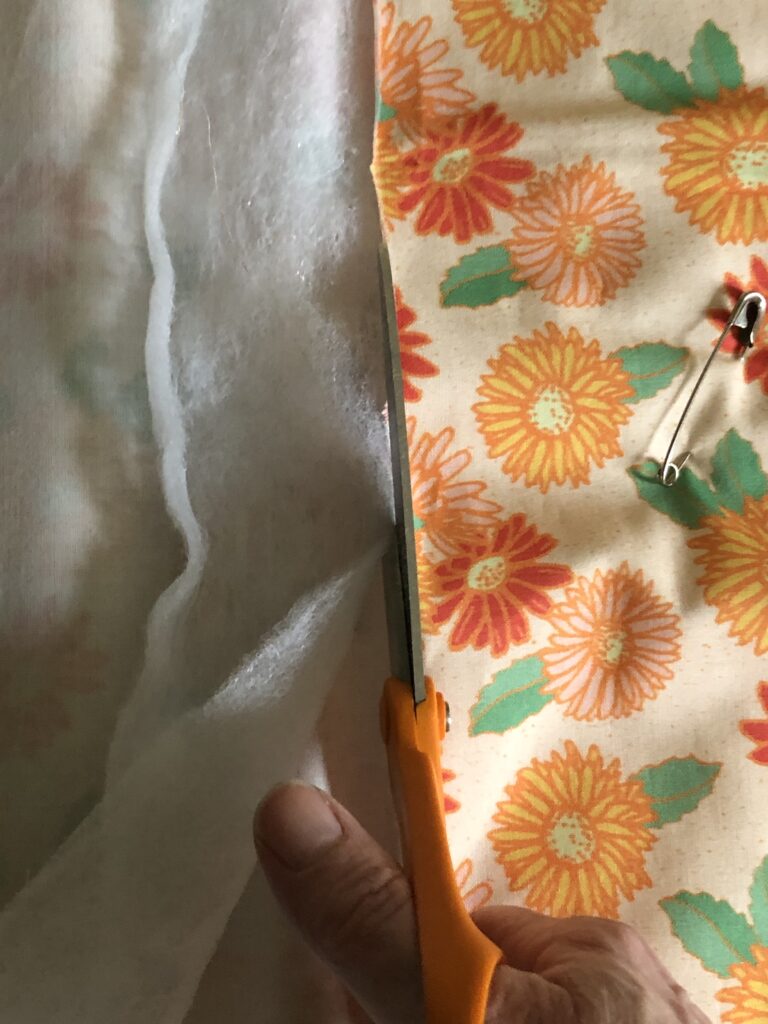
Once the whole quilt has been pinned, cut the extra batting to be even with the quilt top. Don’t cut the back of the quilt too, unless you’re going to do a separate binding.
The quilt binding is basically sewing the edges of all three layers of the quilt together and covering them with another piece of fabric.
You can make a separate binding that’s like a giant bias tape that wraps around the front and back of the quilt and holds the outside edges together and in place.
Or you can do what I do, which is basically a self-binding process, and it’s a lot easier because you’re not dealing with a separate piece that you have to pin and make sure it fits.
The downside of using a self-binding technique is that the back of the quilt is going to be the same as the binding, and if you don’t like that then you might want to do a regular binding technique.
In this case, the outer border of the quilt is the same as the quilt back so doing a self-binding is fine because it’ll match.
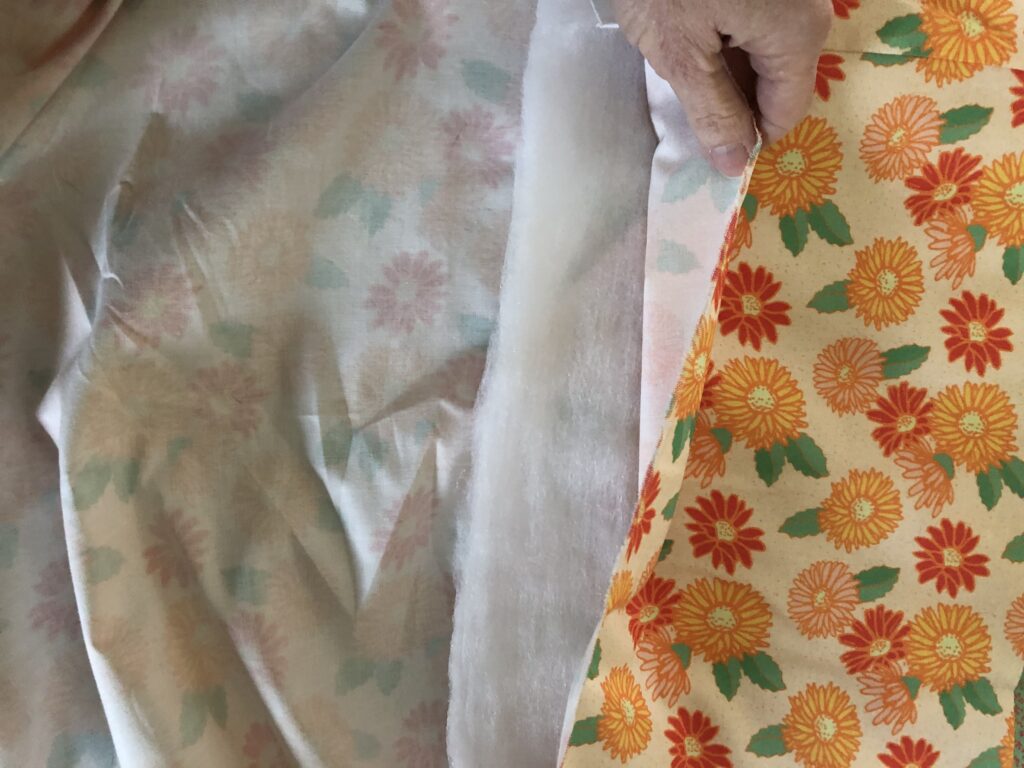
I left the backing of the quilt not cut off, so that I can then, later in the process after the quilt has been quilted, turn it over the top of the quilt and create the binding there.
Basically what I’ll do after the quilting has been done, is come back and turn the backing over like this so that it wraps up over the front of the quilt, and then I’ll stitch that in place to create the binding on the edge.
It’s one less thing to cut, it’s one less thing to pin in place, and I just find it a lot easier to do.
The quilt is ready to be quilted!
Now I can go ahead and do the actual quilting, which is sewing through all three layers to connect them and create a design on the plain sections.
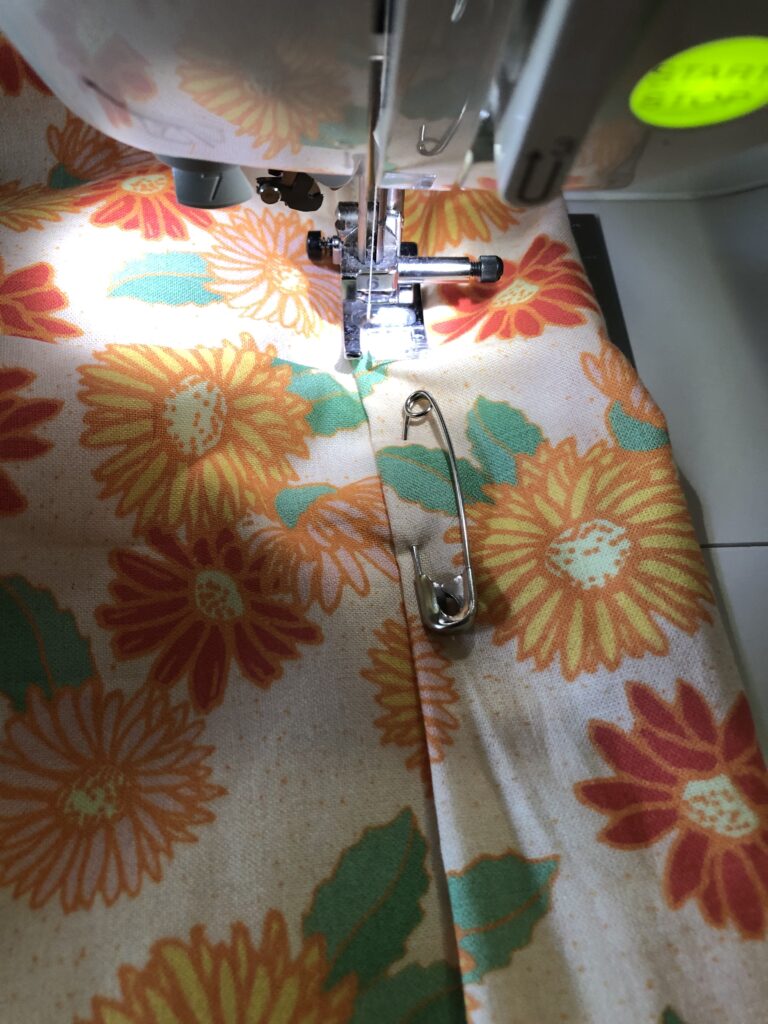
I’ll say, first of all, that you should baste your quilt sandwich (top, batting, and backing) to keep it in place and together while it’s being quilted. I’m very bad at following the rules, and I just pin everything instead of actually basting it, but that still works.
The important part at this point is to try to work out the wrinkles and folds that can show up when you start quilting the quilt.
You want to try to smooth out the whole thing as you work, and I find it’s easier to just pin everything together then start working on one side and go across. That way, you’ll kind of push the fabric across and you’ll be able to work any excess fabric out ahead of you so that you get rid of extra bulk that can form wrinkles in the fabric.
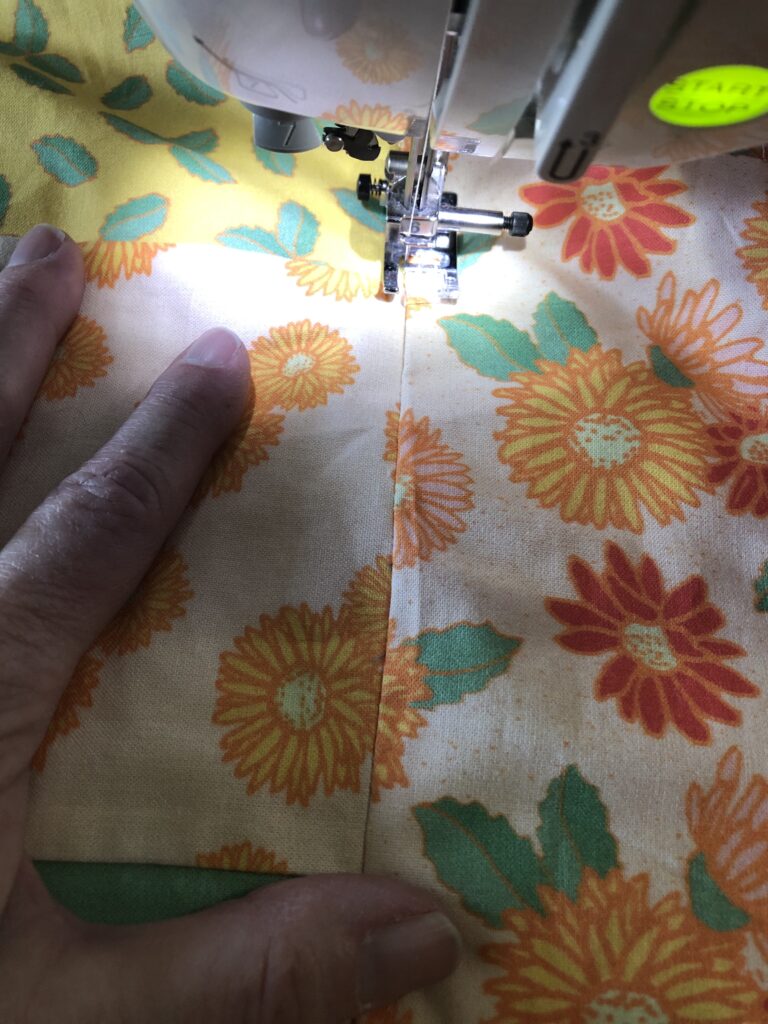
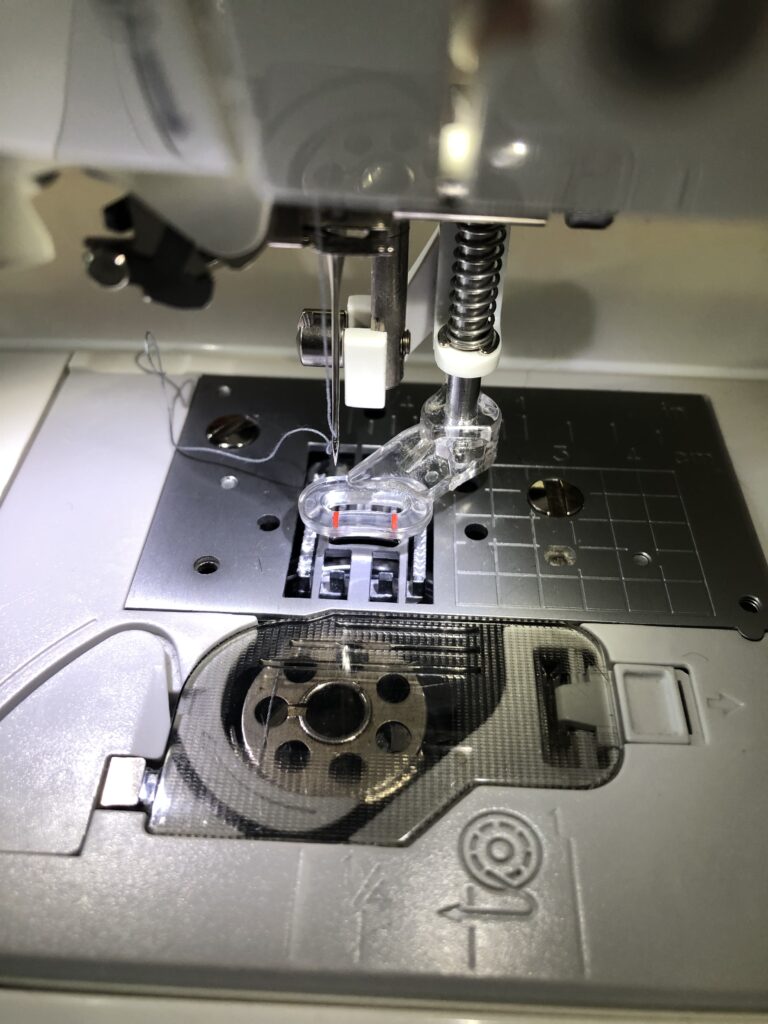
I started by sewing all the way across one of the outer border seams so that there was an entire straight seam to start from.
I used a regular presser foot for this, but a lot of people who I asked for advice afterwards said that using a walking foot would be better.
I wrote another article with tips for machine quilting using a home sewing machine, and you can read that by clicking here.
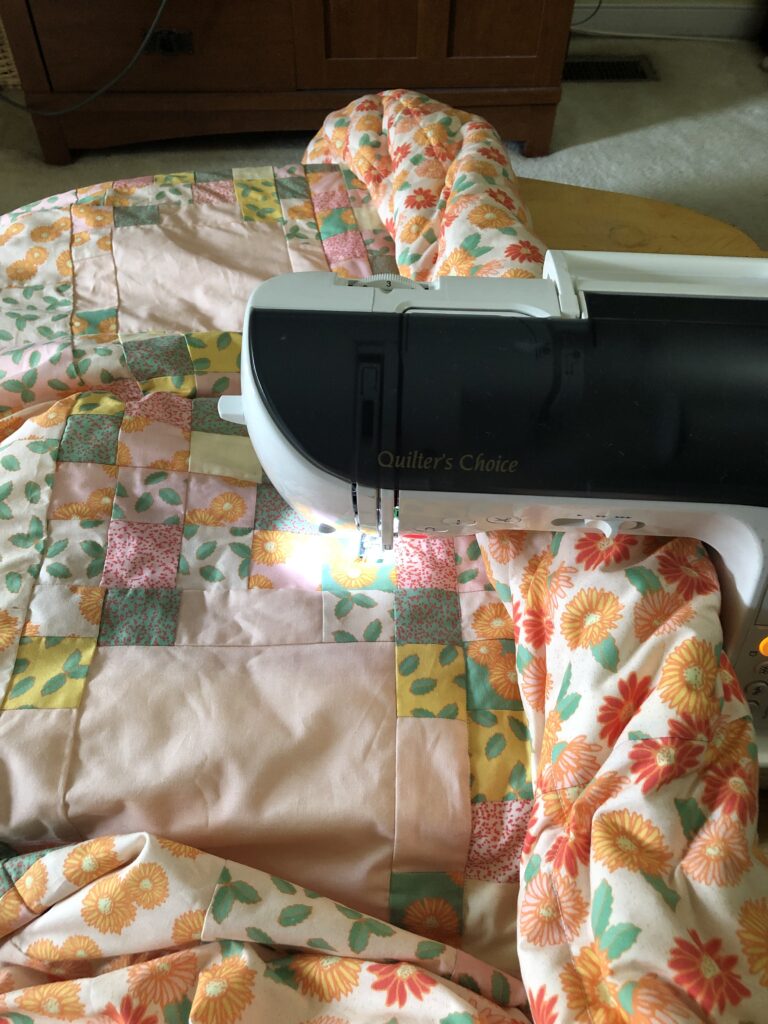
After sewing the first long seam, start on that seam and work your way across perpendicular to the other edge of the quilt.
Make sure that you’re not catching the backing of the quilt in any folds, and keep it flat so that when you finish, the whole thing will have minimal to no folds in the backing.
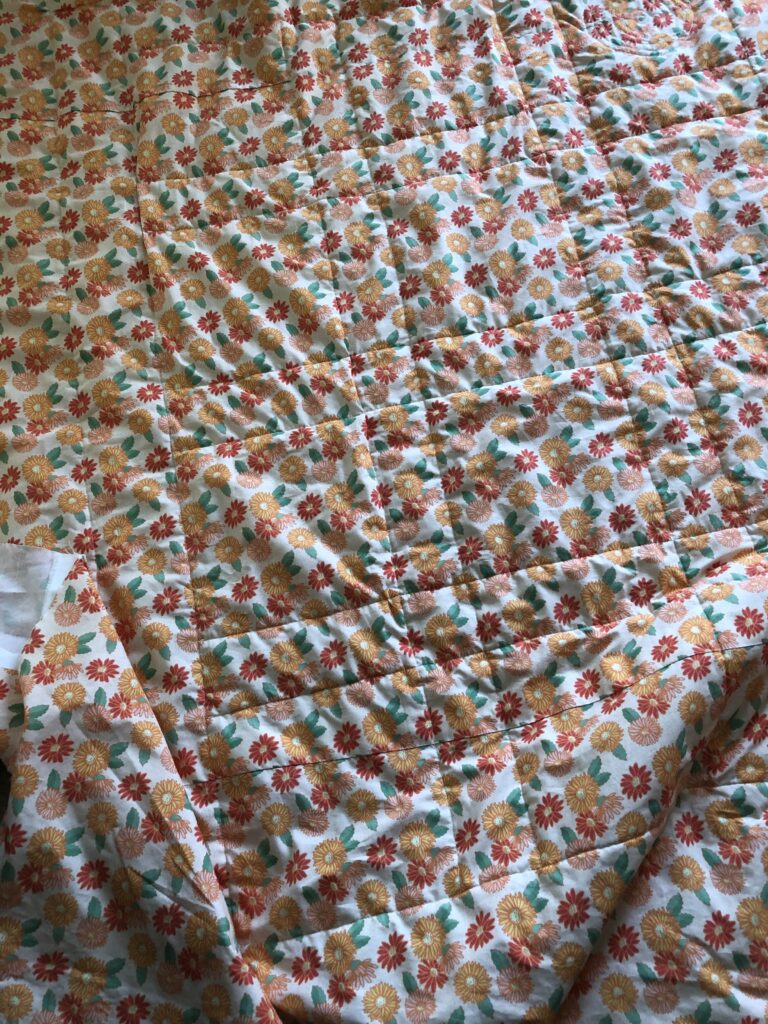
I outlined all of the long seams this way, and basically did a stitch in the ditch straight seam to create squares and rectangles on the back of the quilt.
After that you don’t really need to worry about the basting because the stitch in the ditch will keep it all in place.

I was going to do a machine quilted design in the middle of the plain squares, but since my machine quilting skills pretty much suck, I decided to hand quilt those sections on their own.
Everything else was going to be machine quilted, but I wanted those sections to be neater, and doing it by hand was the best option.
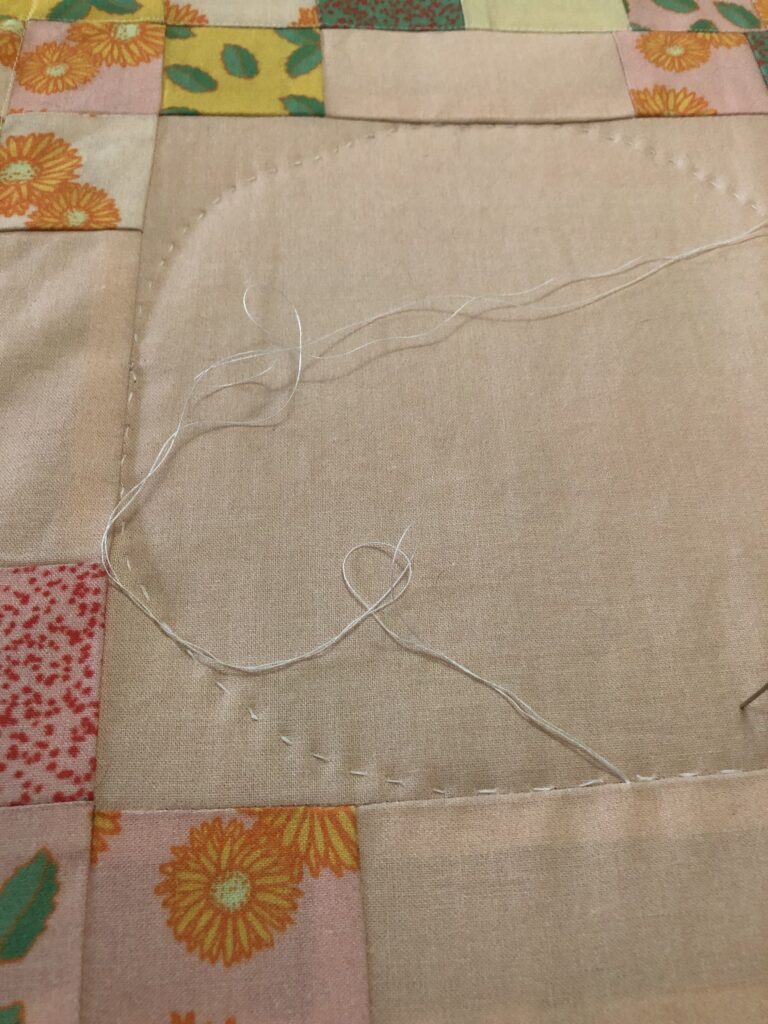
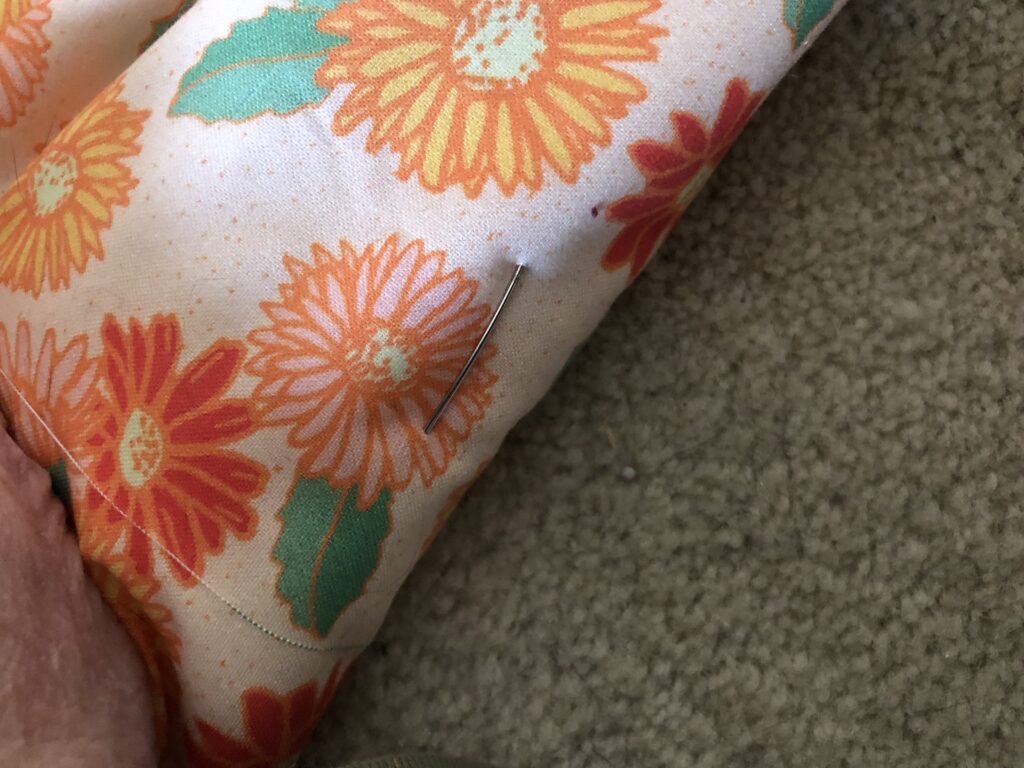
Something that I realized when I tried to thread the quilting needle, though, is that my eyesight is so bad I can’t thread a tiny needle anymore.
It’s been so long since I did any hand quilting, I haven’t had to worry about threading needles. Since quilting needles have such a tiny eye, I seriously could not thread it at all, and I ended up using an embroidery needle with a giant eye.
I only tell you this because I don’t want you to think that there’s only one way to get a job done, and even though my hand quilting is not as even and tiny and perfect as it used to be, the designs came out nicely and the overall effect was still pretty.
I’m obviously not someone who’s worried about everything being super perfect, I just want a nice overall effect when I’m done and doing it this way still gave me the result that I wanted.
Next was the machine quilting part, and boy am I terrible at machine quilting.
Like I said, I put another article together with some machine quilting tips for people who are using home sewing machines, but he really does just take a lot of practice, which I had not done.
Even so, it ended up looking pretty good as long as you don’t look at it really closely and don’t try to enter it in any kind of contest where people are going to really critique it.
And that’s the whole point of making this quilt and doing this article. I want to show people that you can have fun and make a nice thing without worrying about every single thing about it being perfect.
Even if your stitches are wonky and your squares aren’t even the way that mine are uneven, the overall effect when the quilt is done looks really nice.
So don’t get upset if you don’t make a perfect thing. That’s unrealistic and it’ll stress you out so much it won’t be fun to do the quilt, and what’s the point of making it if you’re not going to enjoy the process?
After I had done the stitch in the ditch and formed all the squares to keep everything in place, I went ahead and did the binding by flipping the extra part of the backing around and folding it in on itself.
I everything in place, and then sewed the binding in place using a straight stitch all the way around the edge of the quilt.
Here you can see that I was using a regular presser foot, even though I do have a walking foot. A walking foot does give you a little bit less chance of forming a wrinkle in the fabric as you’re sewing, but I did find with the regular presser foot and I didn’t feel like changing it so I didn’t.
Again, remember that there’s no one way that you have to do everything and if you find a way to do it that works for you go ahead and do it that way.
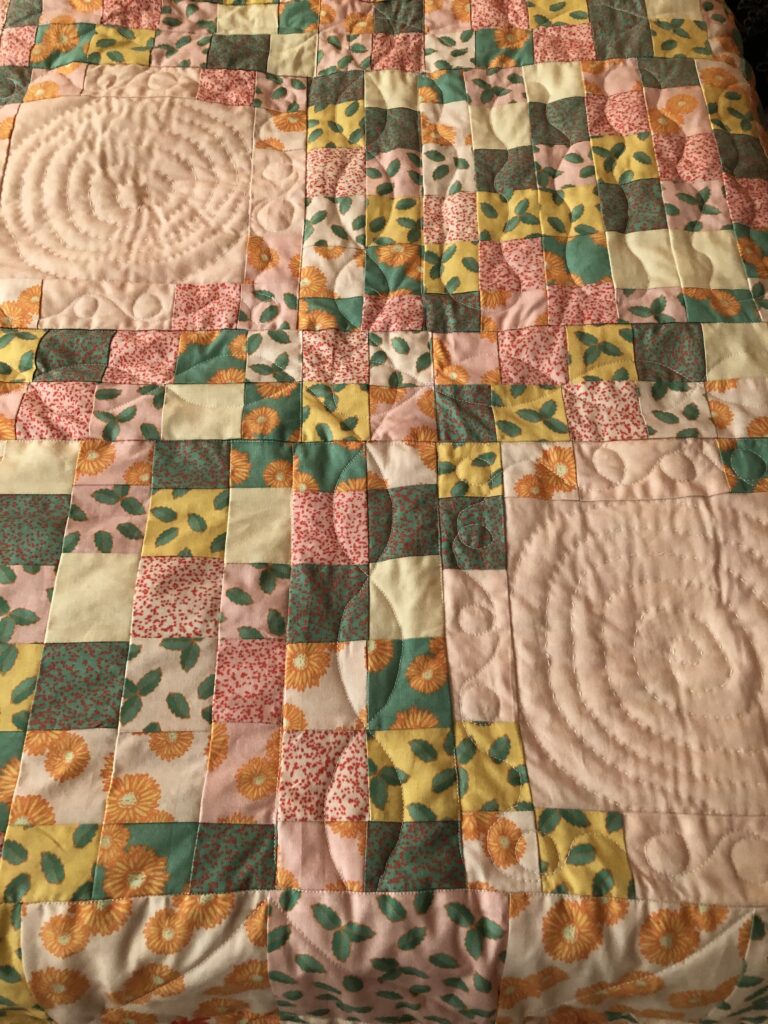
I alternated sewing the quilting patterns on the quilt using the regular presser foot and a straight stitch that I kind of curved to make some shapes, and by using the free motion quilting foot to make more loopy shapes.
I find it a lot easier to just sew straight lines then to try to do the free motion quilting, but I wanted to do some curvy lines because everything else on this quilt is so straight, and I wanted some contrast.
I did some wavy lines on the sashing part that made a pattern, then I did some random wavy lines on the square checkerboard sections to contrast with the straight lines of the pattern.
I think that the round and curved stitching compliments the straight lines of the piece quilt top nicely.
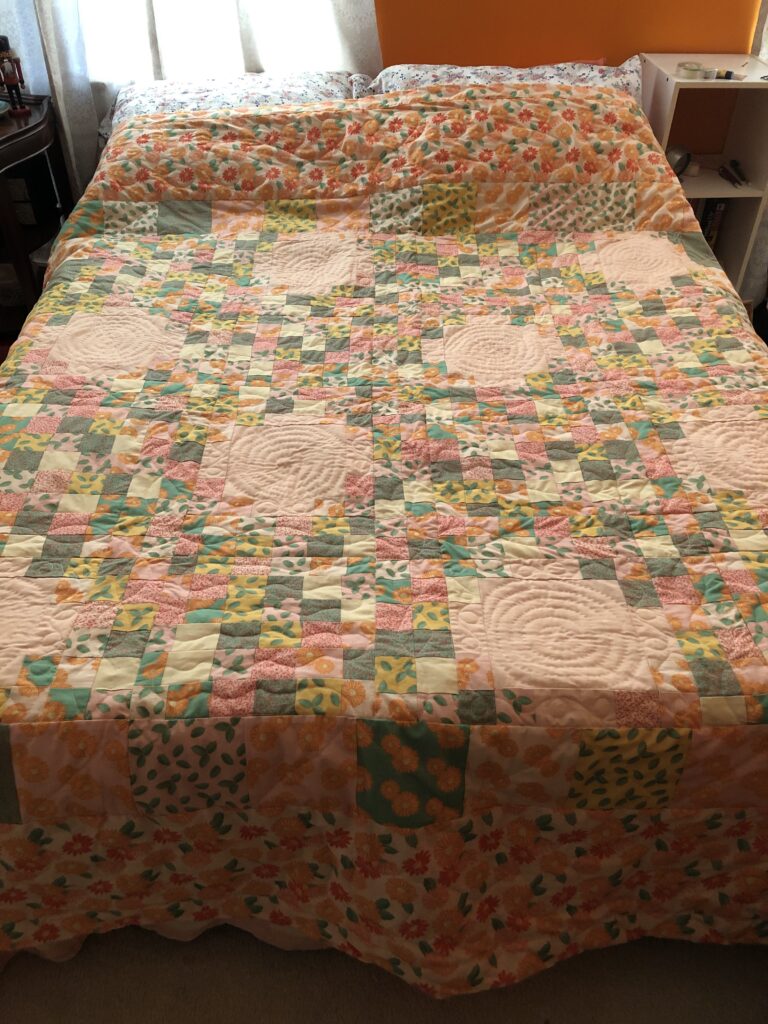
Here’s the final quilt on the bed in the orange room. I love how it turned out, and it actually ended up being a lot bigger than I thought it was going to be, so it will probably work on a queen size bed too.
This was a fun project, and the fact that I designed the fabric as well as did the assembly and all the quilting made it a little bit more fun.