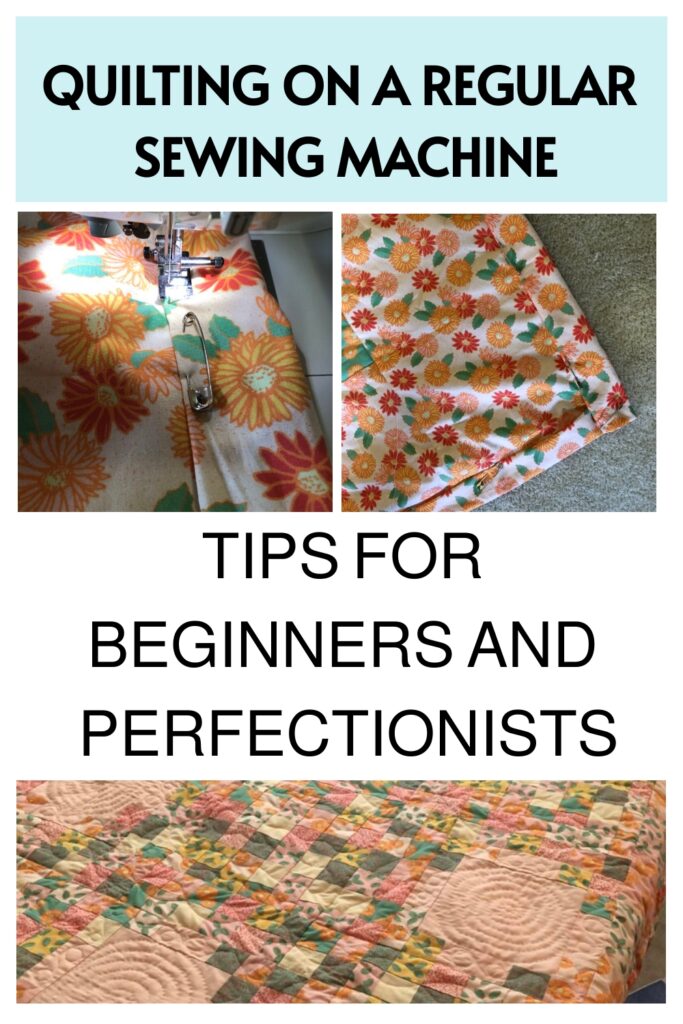
If you want to learn to quilt on a regular home sewing machine you’re going to need some tips to help you out.
I used to make quilts and quilt them by hand, but then my fingers gave out.
I had to give up hand quilting because of that, but then I came around to the idea of machine quilting instead of doing everything by hand. It’s not as easy as it looks, though, so I got some tips from the members of the Artisan Shopping Directory who do machine quilting.
Some of the links in this article are affiliate links that will pay a small commission if they’re used to purchase something. To see the entire affiliate policy click here.
Equipment tips for quilting with a home sewing machine.
Be willing to experiment.
The first thing is that you need to try things out to see what works best for you. I watched a bunch of YouTube videos before I started on my quilt (you can see the tutorial for that here,) and some of the tips in them seemed useful, but some didn’t work well for me.
Be willing to do things, try them out, but then if they don’t work adjust them to make them work better for you.
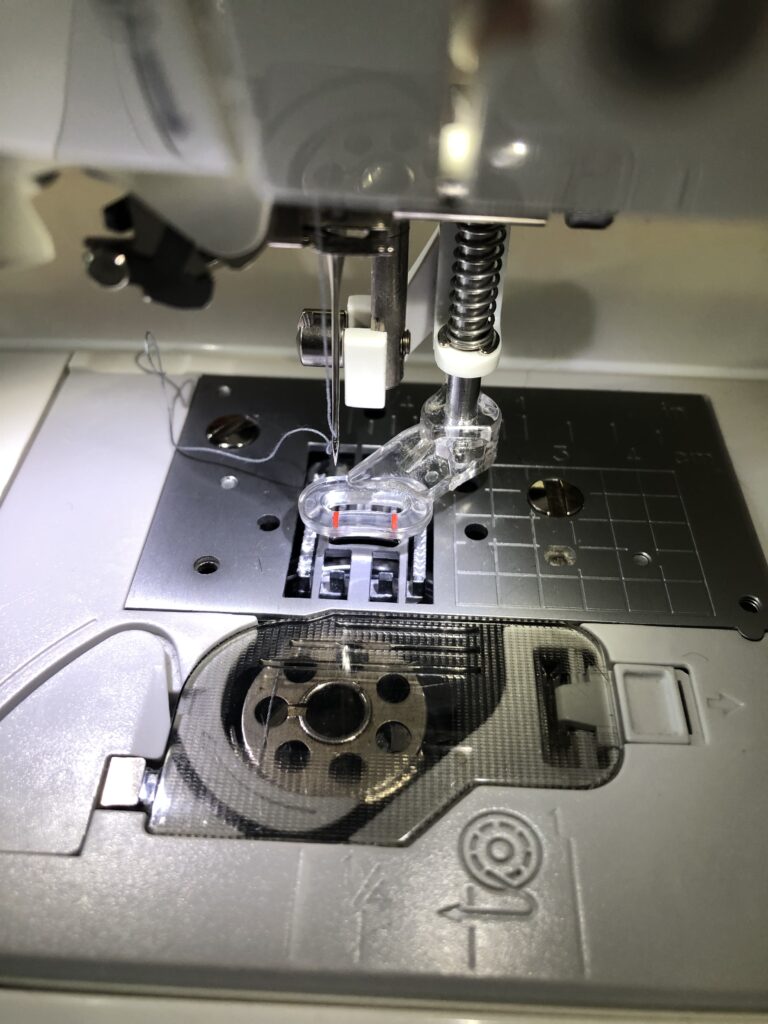
For example, the tension on my machine was doing something really weird every time I dropped the feed dogs when I was free motion quilting.
I was getting a lot of stitches on the back that really weren’t stitches, and the thread was going to come out pretty easily if I didn’t fix it.
The only way that I figured out that fixed it was to actually leave the feed dogs up while I was free motion quilting. For some reason that made my machine work with the correct tension, and I didn’t have that problem anymore.
Since the free motion foot doesn’t press down on the fabric I got away with it, but I know that’s 100% not the way the people tell you to free motion quilt, so I know I was doing it “wrong.” In this case, the wrong way worked better, so that’s what I did.
Learn the right way, and then go off the beaten path.
I know this kind of contradicts what I just said, but you really do need to learn the right way to do things so that you can then make adjustments for your own purposes.
Having said that, there are probably a ton of people who taught themselves how to machine quilt and who do just fine without knowing the “right” way to do anything.
But it’s probably good to learn the right way of doing things first, and then you can make decisions for yourself about whether some other method works better for you.
Have the right equipment ready to use.
Whether you decide to use it or not, it’s good to have the right kinds of presser feet and other tools on hand.
When I quilted the quilt top that I made in the Irish chain quilt article (you can see that here) I had a walking foot, but I used a regular presser foot to stitch the straight lines because I prefer that.
But I do have a walking foot, and when I asked some Artisan Shopping Directory members for machine quilting advice, a couple of them did say that you should use a walking foot.
Both Catherine, owner of Memory Thread Co, and Carrie, owner of More Love Mama, suggested using a walking foot when you’re sewing straight lines on a quilt. Catherine also suggested using masking tape to mark straight lines so that you can stitch the first few lines without worrying about being crooked.
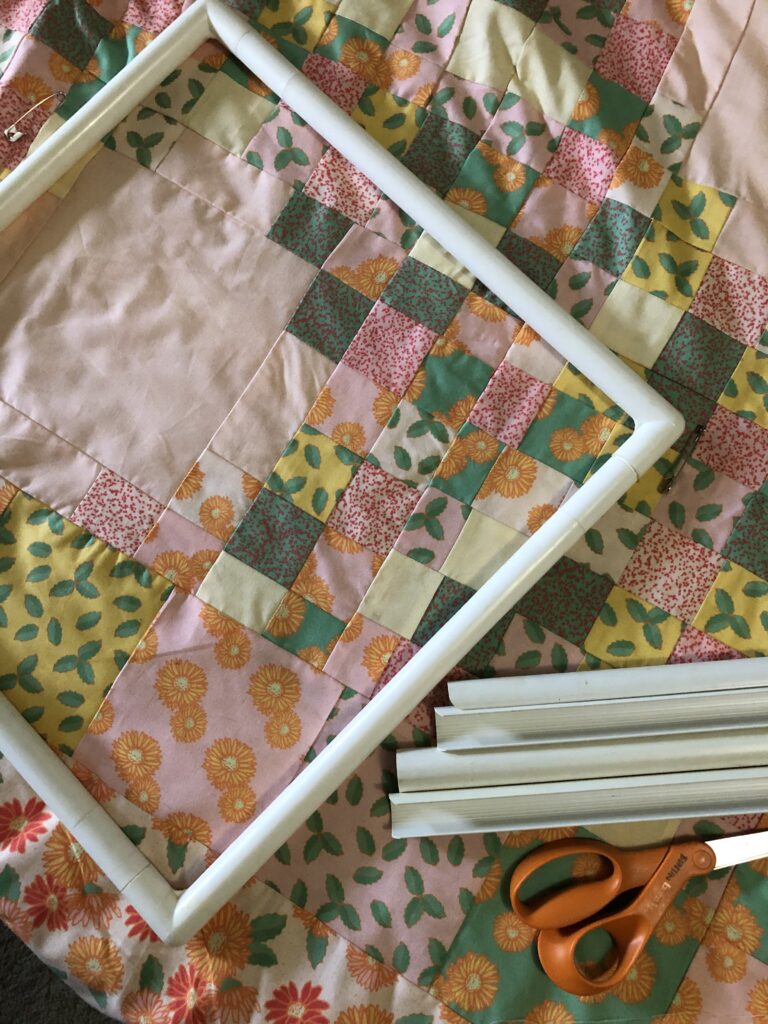
Another suggestion that Catherine had was to use bicycle clips to hold your quilt when you’re rolling it up and sewing it under the throat of the machine. She said that they actually do sell quilt clips, but they’re just a fancy and more expensive version of bicycle clips.
Lora, owner of Beez Hive, suggested using special quilting gloves that have little rubber dots to grip the fabric better as you’re moving it around under the quilting foot.
Karen, owner of Tahoe Quilts, agrees with using the rubber gripper gloves to get a better grasp on the fabric.
Maria, owner of Jari Jade Creations, suggest winding a whole bunch of bobbins before you get started sewing so that you don’t have to stop in the middle of sewing to do that.
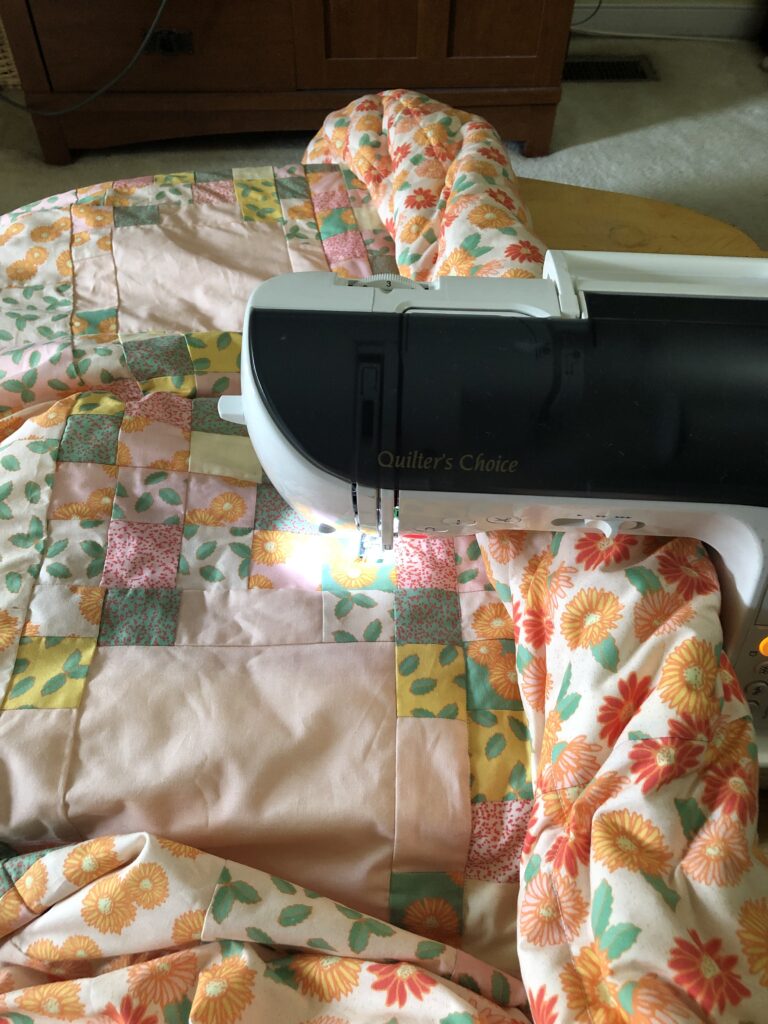
Shauna, owner of Shauna Smith Designs, says to make sure that your sewing machine has enough throat space that you’ll be able to put the rolled up quilt under the throat of the machine so that it’s not crowded.
If your machine has a really small throat, it might not work very well for machine quilting at home. (The throat of the machine is the part that hangs over the needle section where you slide the fabric under to sew it.) some machines have longer throats than others, so you can fit more fabric and a rolled-up quilt under it easier than a machine with a shorter throat.
Don’t skimp on the practice when you’re free motion quilting.
The hardest thing about learning how to free motion quilt is figuring out the speed to move your hands while pressing the pedal in order to get the best stitches.
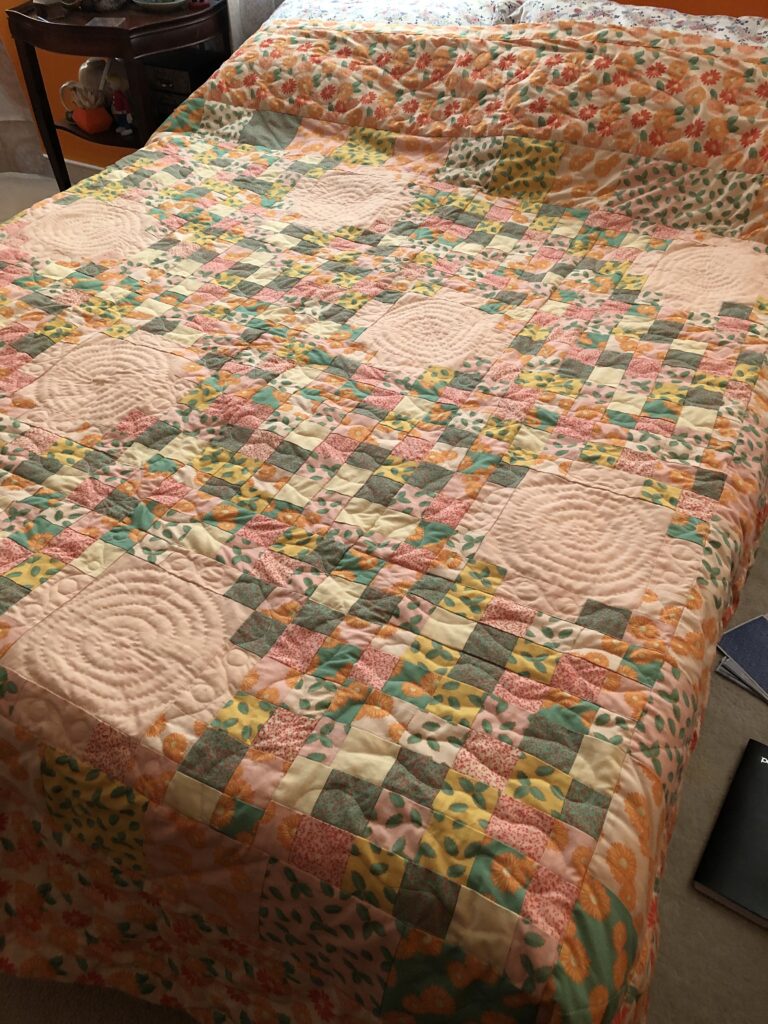
My stitching was terrible. I’m the first to admit it, but I am also not someone who really cares that everything is perfectly stitched as long as it looks good when it’s done.
My final quilt is shown above, and I think it looks pretty good considering that if you look at it closely it’s very similar to the type of work that a baby monkey would do.
I definitely need to take the time to do some more practice, because that’s really the only way that you’re going to get good at getting even stitches that actually look very nice when you’re looking at the quote closely.
Kelly, owner of Timeless Kreations Dezigns, had a bunch of tips for getting clean stitches when I asked the group for those.
She says to “Bring the threads up from the bobbin before starting, to make a nicer cleaner finish. Test any marking tools on your project scraps before starting to mark over your freshly designed quilt top. I had a friend do an anniversary quilt, and destroyed the quilt, because the pen never removed.
“Test on swatches before doing free motion quilting, be sure to clean your machine and oil it before starting a new project. I do mini lovies the 12 x 12 small quilt testers before starting. And most important, be sure to have a fresh needle to start out with, testing it as well that it will go through your quilt sandwich.”
Karen agrees with this adding “Take time to get in your free motion ‘groove’ when using the darning foot attachment. It is a balance between pressing the foot pedal the right speed and moving your hands around the quilt. Too fast and you will have bunched up stitches. Too slow and you will have long stitches.”
One tip that I heard on YouTube about that is to set your machine speed at about 30% of the highest speed, and then press the pedal all the way to the ground every time. That way you’re going to have a consistent speed no matter what you do, and you won’t have to worry about pressing the pedal a certain amount and not more or less. You can adjust the speed depending on whether you want it to go faster or slower but starting at a lower speed is better at first until you get the hang of it.
Michelle, owner of May Designers, says to make sure that your quilt is pinned together well when you do the basting. You can base a quilt together or pin it together, but you need to do something to make sure that it’s secure and that the batting and backing won’t slide around before you actually start quilting it.
A few people suggested to use an extension table to the left of your sewing machine so that it will support the weight of the quilt as you’re moving it around under the free motion quilting foot.
If there’s too much drag on the quilt and it can’t move freely under the foot you’re not going to be able to get smooth stitches and it’s going to make the whole thing more difficult.
And the last tip came from Sonya, owner of Sonya Algosaibi, who said to quilt when you’re feeling stressed out, because concentrating on the quilt will make your worries leave your mind, and will help you focus on something else for a while.
I think that’s absolutely true, because machine quilting can be very relaxing once you get into that groove. It’s getting there that’s the problem, so give yourself time to practice before you start on the main quilt that you’re working on, get into that groove, and then move to work on the actual quilt.
And just remember that even if your stitches are not perfectly even, or your squares aren’t perfectly lined up, the final effect of the whole thing being put together is going to be nice at the end. And you’re going to have a quilt that you made yourself and that you can display and use as a useful item in your home.