Pam, owner of Lyon Handwovens , offered to give us a tutorial on a project that she’s been making recently to use up scrap fabric.
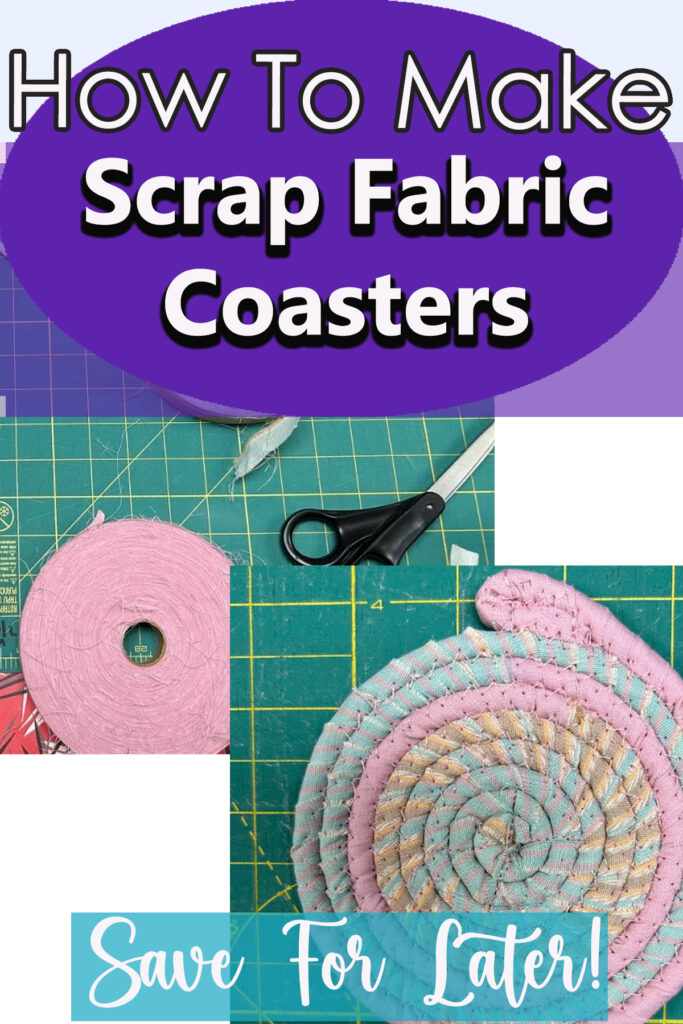
Here’s a photo and video tutorial on how to make scrap fabric coasters using cotton clothesline.
Some of the links in this article are affiliate links that will pay a small commission if they’re used to purchase something. To see the entire affiliate policy click here.
How to use scrap fabric to make a clothesline coaster, By Pam Lyon
I’ve been intrigued with clothesline baskets for a while now, but just wasn’t ready to jump in.
After doing some research on what other kinds of crafts could be used for the narrow width fabrics I have for rug weaving, and after watching several YouTube videos, I found that the same technique for baskets are used for beginner projects like coasters and placemats.
The difference is that you don’t add curves to build up the sides of a basket. Kind of like beginning sewing – no curves, just straight lines. This was just the push I needed to give this popular craft a try.
For an article about making machine en=mbroidered coasters, click here.
Things you’ll need for this project:
Narrow, about ¾-inch wide scraps of fabric (lighter weight fabrics like cotton used for quilting)
Cotton clothesline (yes, it is still available at hardware stores and on-line). With or without a poly core, although I would recommend without the core for beginner projects.
Scissors
A sewing machine with a zig-zag function and a sharp needle
Thread that coordinates with your scraps
A ruler

Step 1
To get started, lay the end of your clothesline at an angle (about 45 degrees) across the end of your fabric. You may need to adjust it as you’re working to have enough fabric to be able to tuck in the ends. Continue wrapping at an angle covering the bottom edge of the previous row with each new wrap. Apply clips as needed to hold everything in place.
Lessons learned – As you may have noticed I started with a full roll of fabric, I don’t recommend this, about two feet is the maximum length to keep things tangle-free and moving along smoothly. This is why this craft is ideal for using your small scraps.
Step 2
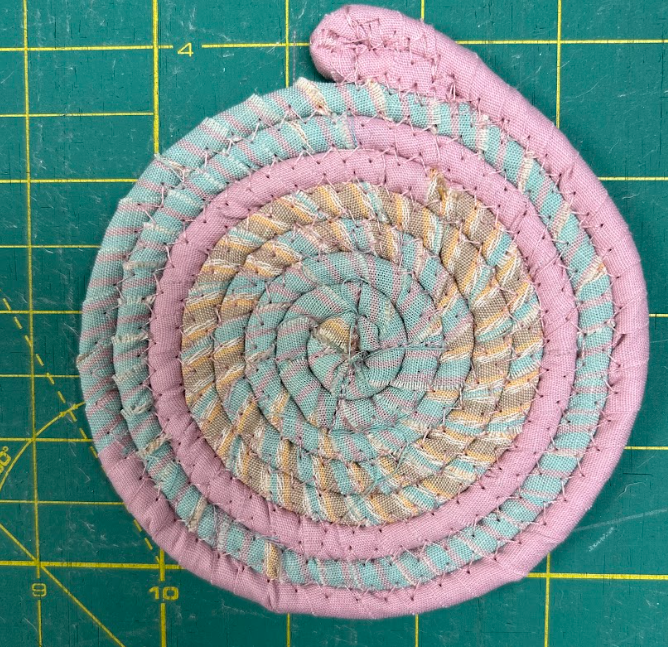
When you have several inches it’s time to move to the sewing machine, although some people prefer to wrap the entire length of their project before sewing. I may try this later now that I have a better idea of how much length I need for this project. Refer back to the photo of the finished coaster to see what this step looks like when completed.
Remove the clip that is holding your neatly folded end and begin forming a tight (no daylight showing through) circle until your circle is about the size of a half-dollar. Apply clips as necessary to keep everything together. Now slide this circle under the presser foot of your sewing machine and with a straight stitch sew across the diameter of the circle.
Either turn or backstitch along this same line to the center and then pivot 45 degrees and sew to the outside and then backstitch or turn and stitch to the other end and then back to center where you can now make the second stitch line over the first single line of stitching. If your circle is larger or your fabric is thicker and you feel this base needs more structure or stability simply add more “slices” to your pie.
Lessons learned – I neglected to measure the length of my foundation cord before starting as I was using cording left over from a decorative pillow project. My guess would be I had about one yard more or less. For fabric I used about two yards total of two different fabrics, each ¾-inch wide. Please don’t tell my fellow weavers as this goes completely against our credo of meticulous note taking.
Step 3
Change the stitch function on your sewing machine to zig-zag at a width wide enough to ensure that you are joining the two adjacent coils as you rotate your coaster. Hold the piece of wrapped coil you are adding close to the previous wrap – again no gaps or sunlight. Stop to measure the diameter of your coaster in several places periodically to make sure that when you end you have a balanced circle.
Step 4
Adding fabric strips is fairly simple – lay approximately ½ to ¾ of an inch of the new fabric on top of the current fabric. Align the two so no corners of either fabric will poke out and continue wrapping. As you can see in the video I simply tucked in a corner that wouldn’t cooperate.
Step 5
When your coaster is the desired size (at least four inches in diameter) wrap an additional couple of inches and cut off the clothesline just inside the last wrap. Again wrap and fold the end of the fabric to hide the cut end of the clothesline. Now fold about ¾-inch of this end piece back and to the inside of the round you are working on. Hold this area snuggly between the previous stitch and the length of the final round. Continue stitching first in the area of the coil end and then pivot and come back along the opposite side of the turned back loop and the outer round. Clip your cut threads close and admire your new coaster.
If you’d like another fabric strip project, check otu this crocheted basket tutorial that Pam did for us: Easy Beginner Fabric Project Fabric Basket